Custom Payment Gateway
A payment gateway is a network system that facilitates the transfer of funds from one person to another. It streamlines the online payment process and facilitates faster and more secure payment transactions.In TrainerCentral, we provide integration with the following payment gateways: Razorpay, Stripe, Paytm, Forte, Authorize.net, Paypal. If you wish to integrate with a payment gateway not listed here, you have the option to utilize the Custom Payment Gateway feature to achieve the integration.
Things to consider before opting for custom payment gateway
-
After receiving payment through custom payment options, the enrollment process for learners who have chosen this method needs to be carried out manually, while the enrollment process is automated for integrated payment gateways.
-
Coupons and taxes configured in tickets will not be applicable on the custom payment page.
Custom payment gateway in TrainerCentral
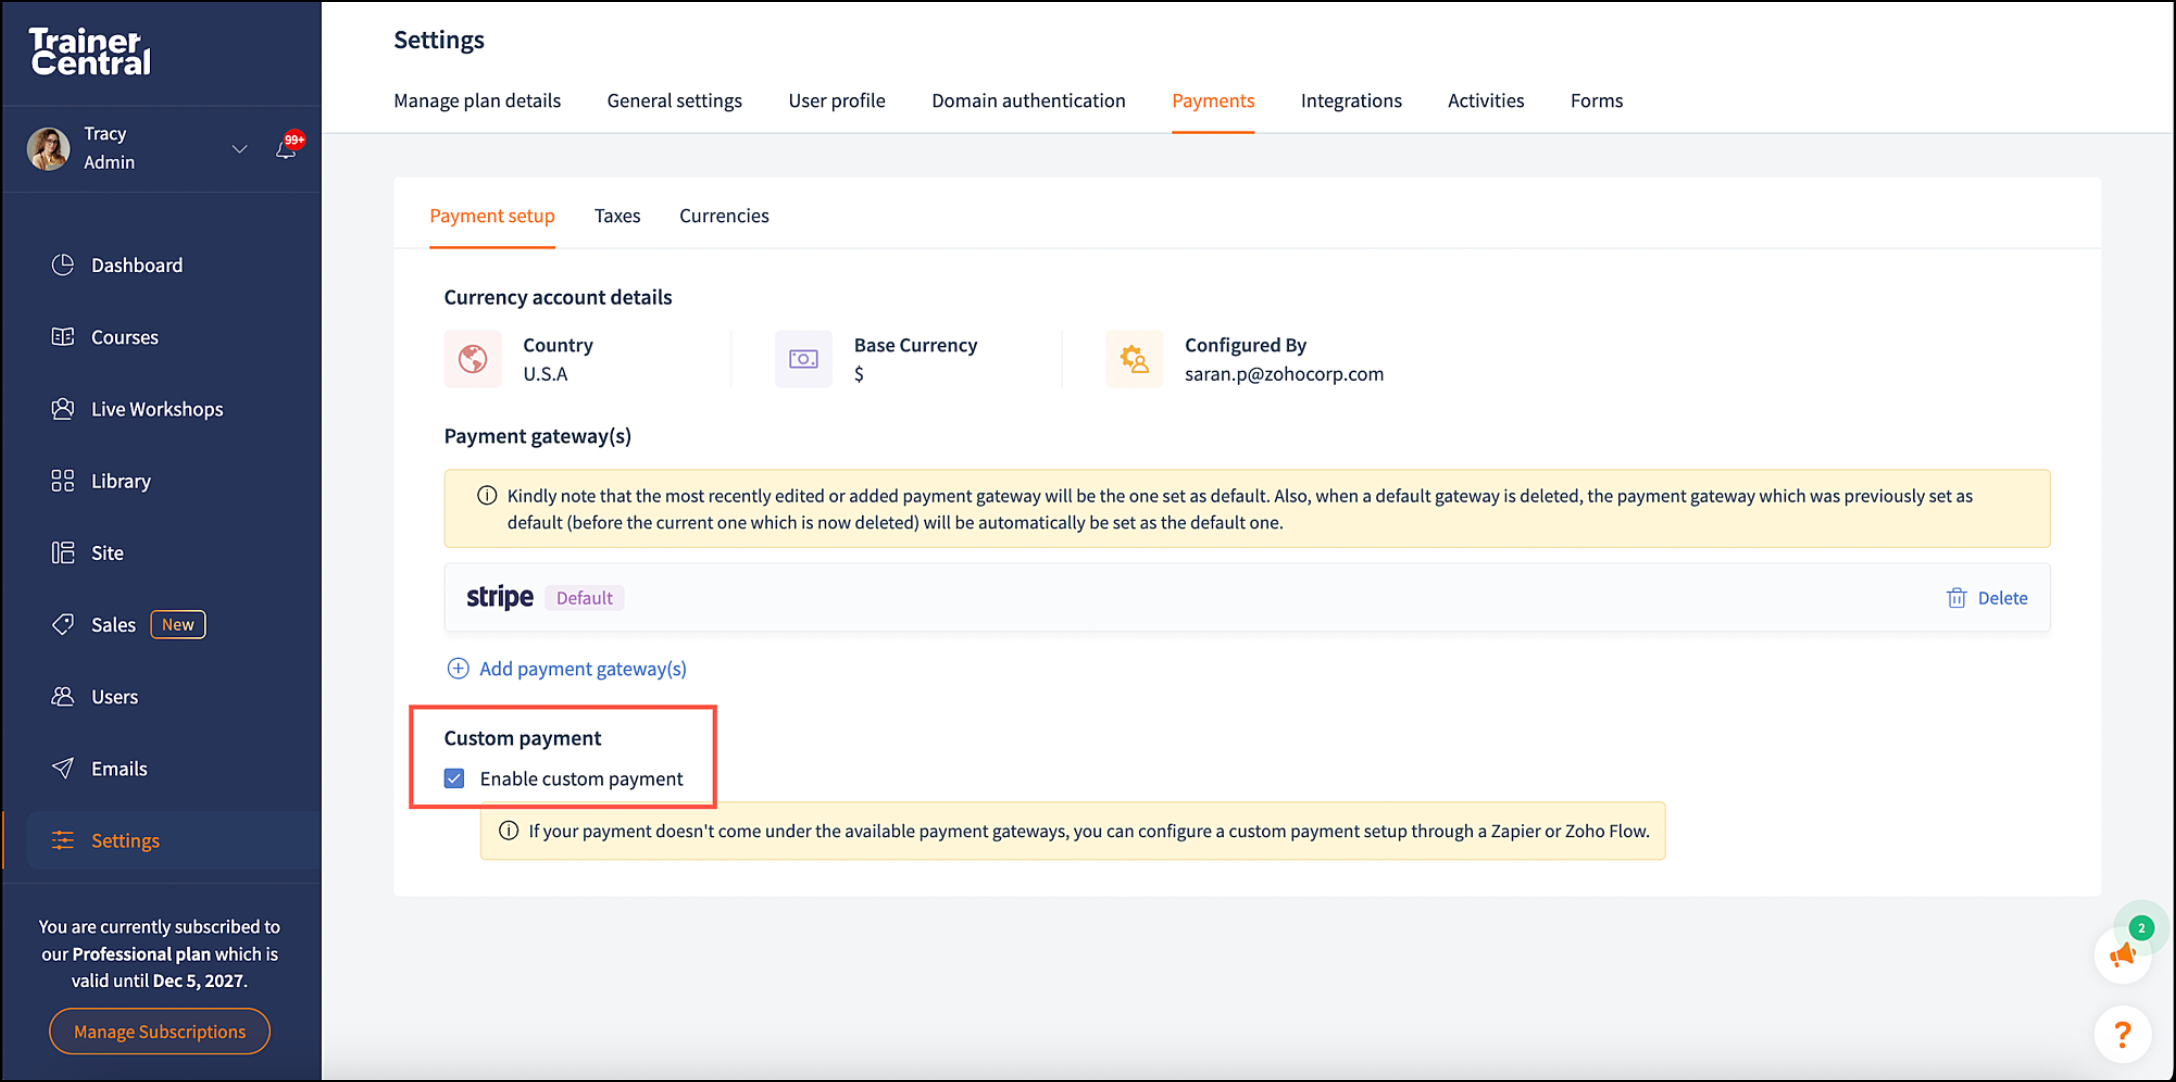
- Sign in to your TrainerCentral account as an admin.
- Navigate to the Settings tab in the left pane. The Settings window will open.
- Go to the Payments tab and click Payment setup.
- Click the Enable custom payment option under the Custom payment.
Associate your custom payment gateway with your ticket
Now that custom payment is enabled, the trainer will need to associate this into their Pricing feature.
For Courses
- Navigate to the Courses tab in the left pane. The list of all your created courses will appear.
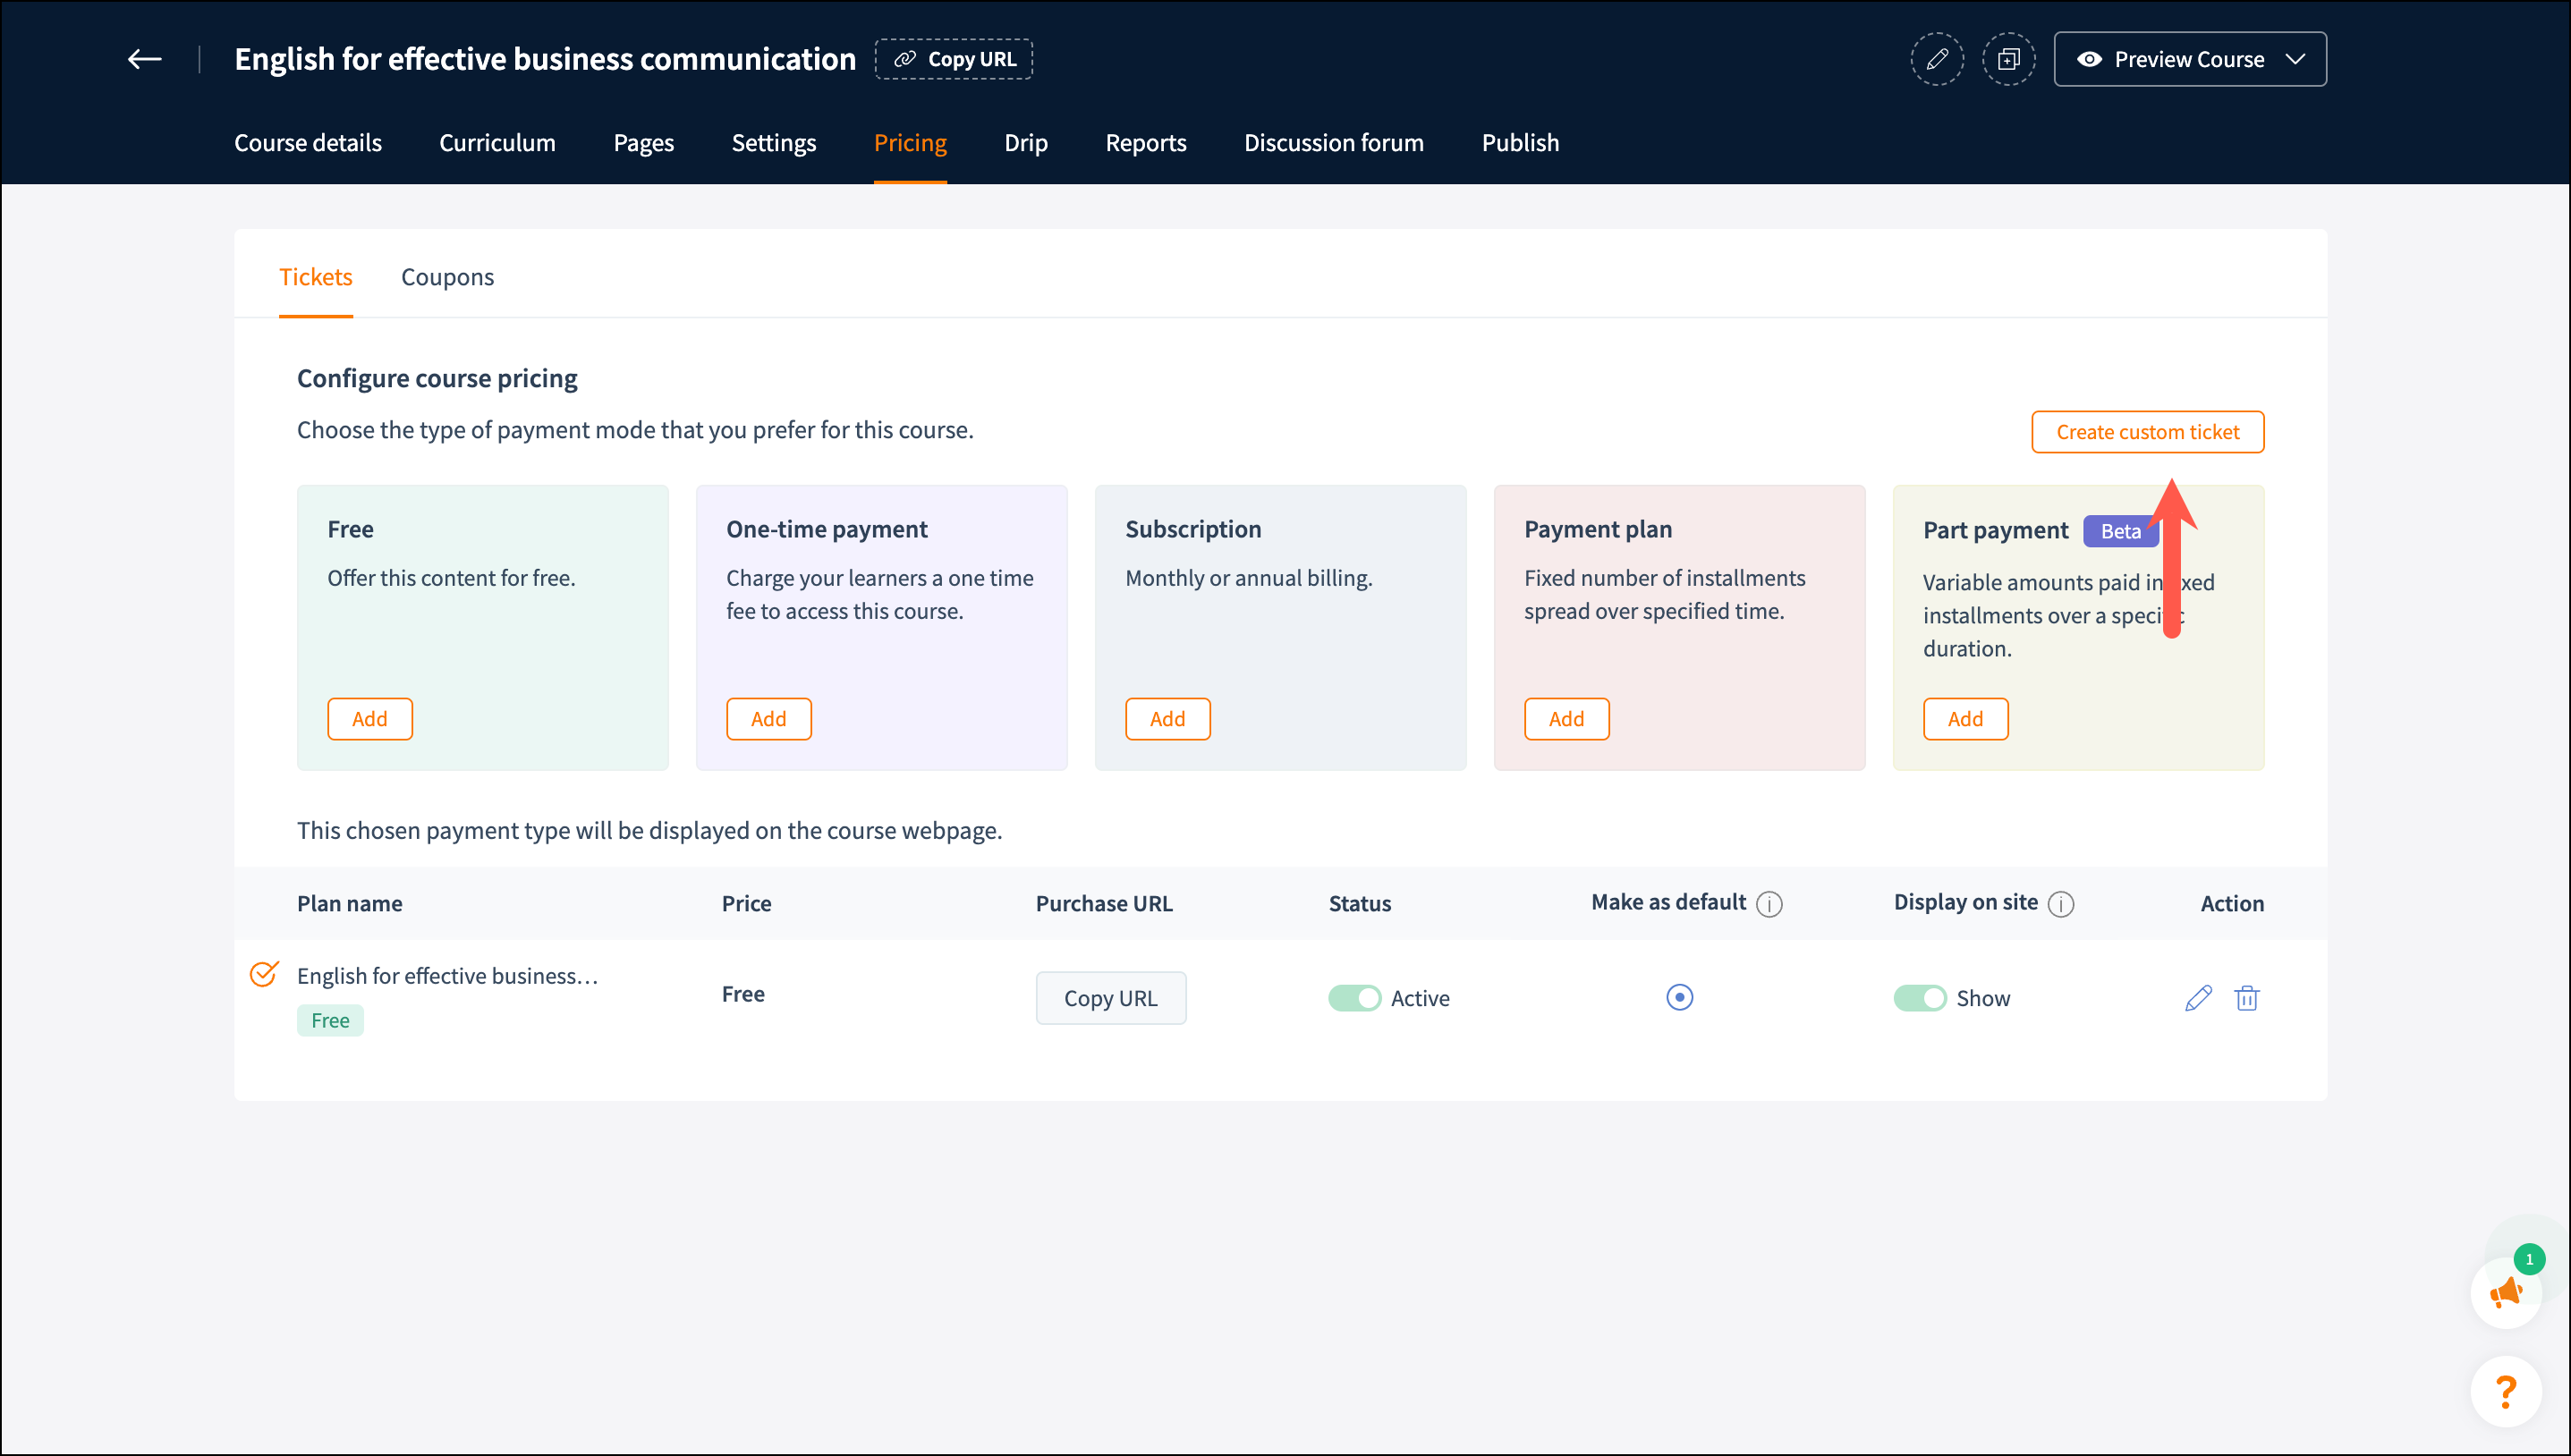
- Select the course you want to set pricing for by clicking the course thumbnail icon. A new window with the set of course manage options will appear. From here, access the Pricing tab.
For Live Workshop
- Navigate to the Live Workshop tab in the left pane.
- Create a live session and navigate to the Pricing tab.
Create custom ticket
- In Pricing tab, Click Create custom ticket at the right of the page. The Custom Payment window will open.
-
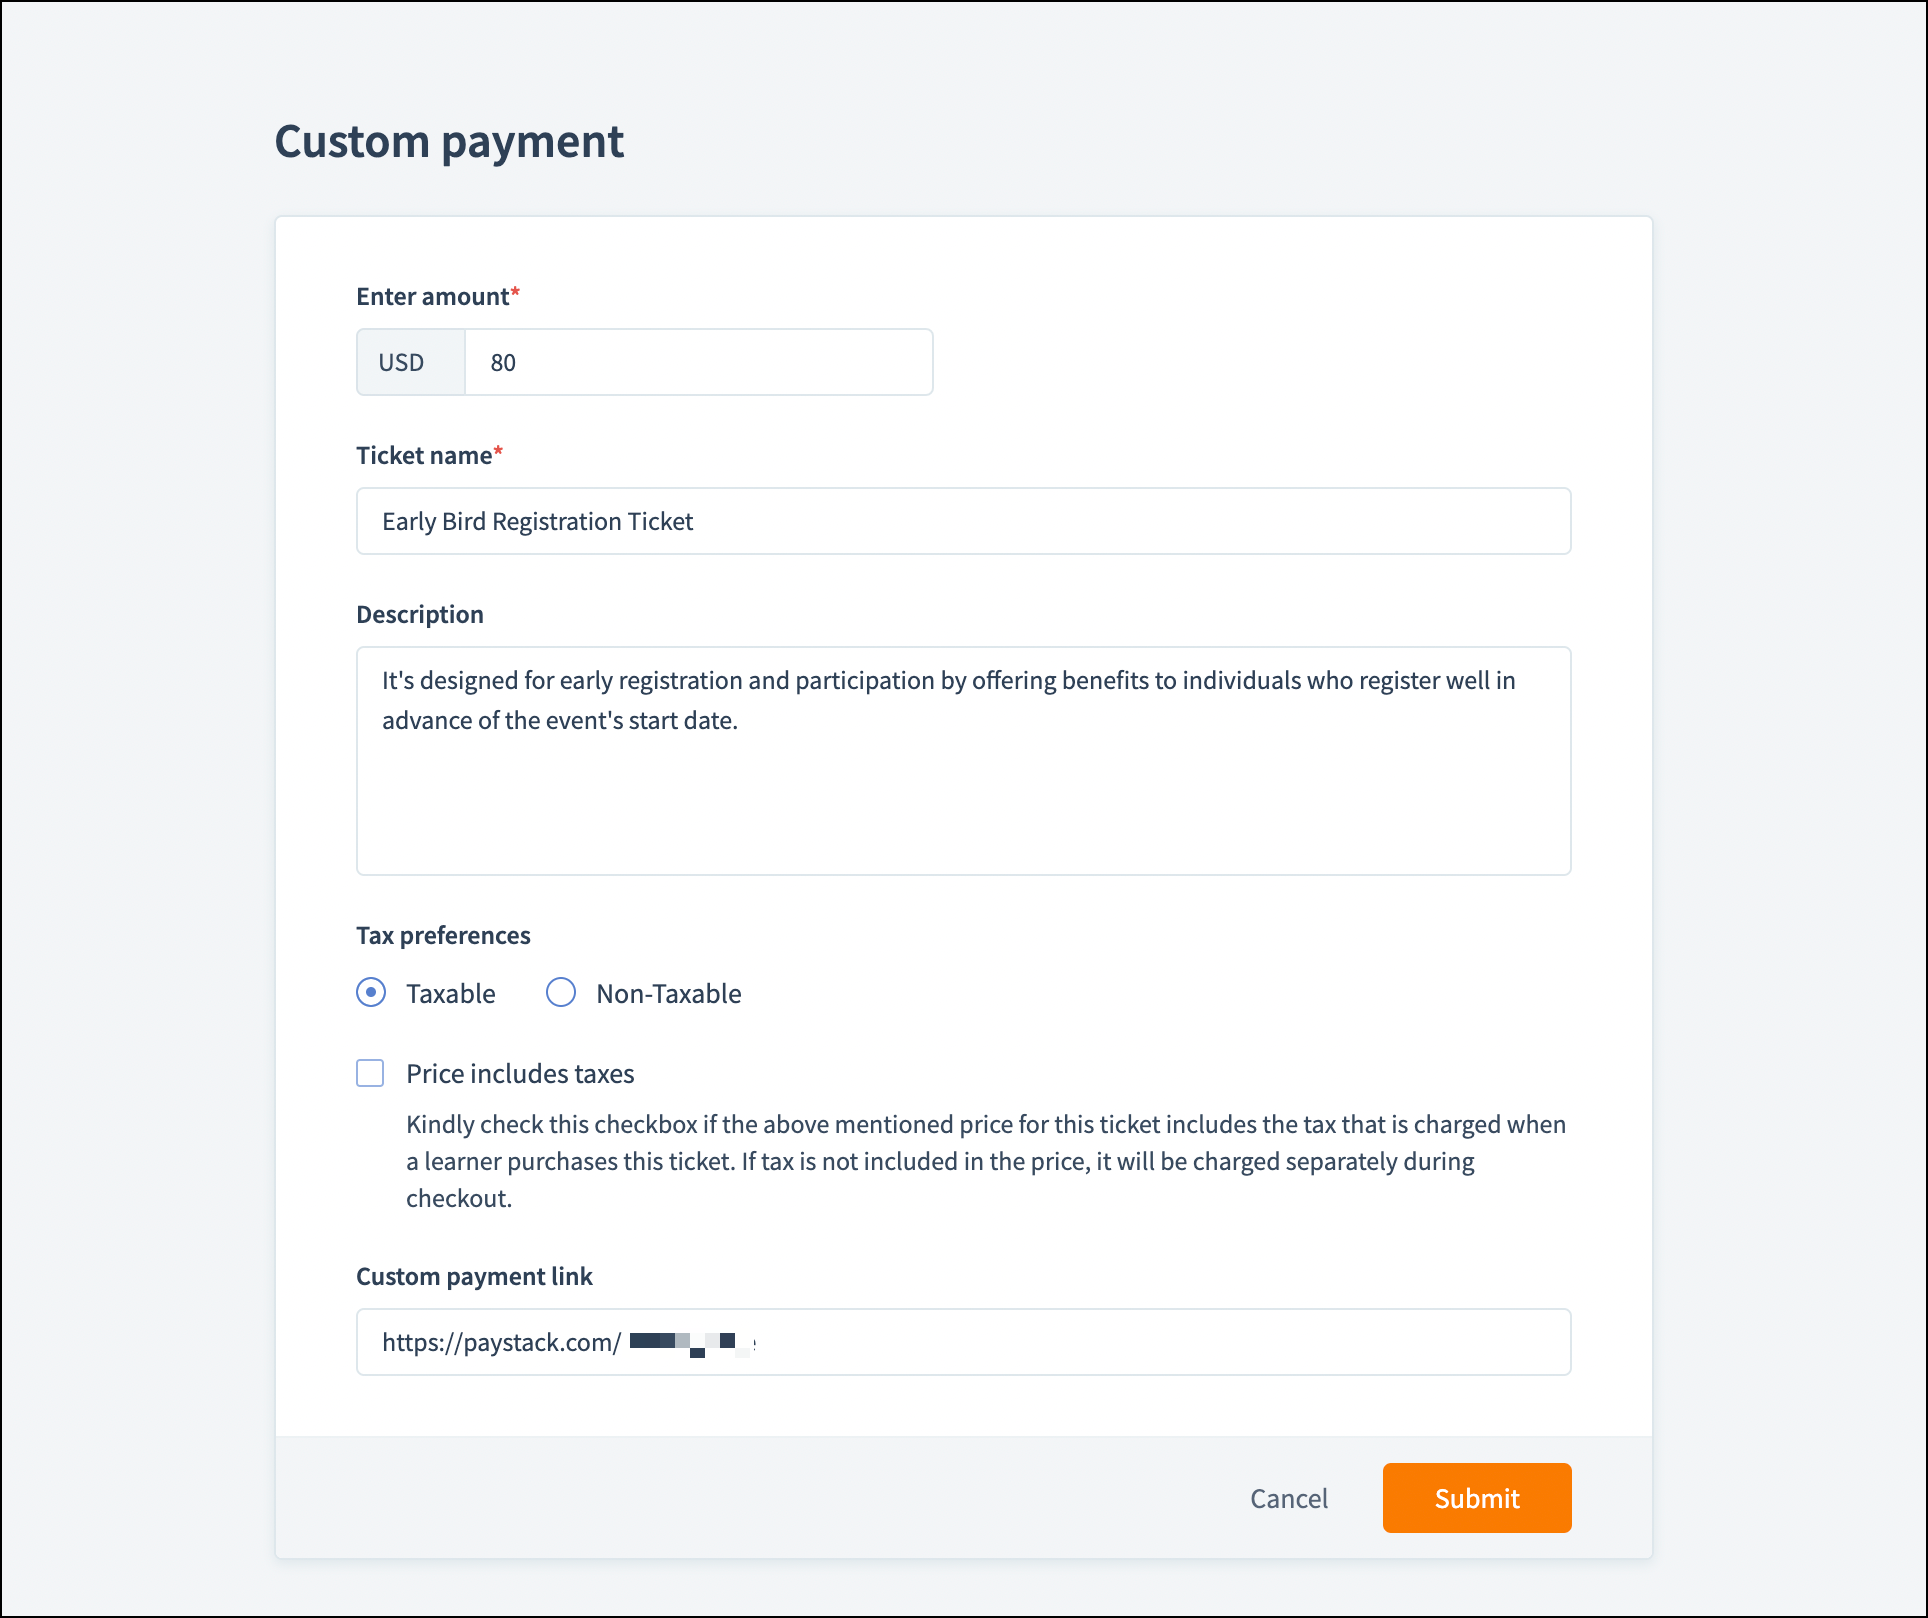
Fill out the specified fields:
Enter amount: Enter the ticket amount.
Ticket name: Provide a specific name for your ticket.
Description: A small description about the ticket.
Tax preference: Select the preferred tax preferences.
Custom payment link: The payment page link from external payment gateway. This link will be served as the landing page for the learners. - Click Submit to save the changes.
Integrate with the Custom Payment gateway page
-
Go to your payment gateway's website.
- Create a payment plan/ticket that matches the TrainerCentral ticket. The plan should have the same amount as the course/Live Session ticket.
- Map the corresponding payment page to your Custom payment link field in TrainerCentral custom ticket .

Each payment plan/ticket must be unique and it must matches with the course or Live session ticket.
Enroll the learner in the course or live workshop
Once the learner's payment is received, you need to enroll them in the course/live workshop manually while in the integrated payment method, this process is automated.
There are three options for this:
- Add learners manually
- Import the list of learners through the academy
- Automate the process through Zapier/Zoho Flow.
Add learners
- Navigate to the Users tab on the left.
- Click Add Learners on the right of the page. The Add Learners window will open. By default, the Manually tab will be selected.
- Enter the First name, Last name, and Email address.
- Select Invite learners to a course for a course or Invite learners to a workshop for a live session.
- Check Allow direct access without ticket purchase.
- Enter Direct access expires on as Specified day or Specified date.
- Click Invite to invite the learner to the course.
Learners will now be notified by email to join the course and the learner name will be enrolled in the course.
Import learners
- Navigate to the Users tab on the left.
- Click Add Learners on the right. The Add learners window will open.
- Select Import tab.
- Upload the Excel/CSV sheet that contains the list of learners' first names, last names, and email addresses.
- Select Invite above learners to a course for a course or Invite above learners to a live workshop for a live workshop.
- Check Allow direct access without ticket purchase.
- Enter Direct access expires on as Specified day or Specified date.
- Click Import.
Here, you can import the list of learners to join the course. Learners will now be notified by email to join the course and the learners name will be enrolled in the course.
Automate the process through Zapier/Zoho Flow
Please contact our support to learn more about integrating with Zapier and Zoho Flow for automation.
Related Articles
Configure Payment Gateway
In TrainerCentral, you can monetize your training expertise by adding tickets to your courses. As an Admin, before you add tickets, you will be asked to set a specific currency value for your account. This specified currency will be the base currency ...Configure ticket in multiple currencies
For any ticket configured, you can choose to display the ticket in a particular currency to all users across the globe or display the course price in different currencies when accessed from different countries. This way any prospect accessing the ...Payment Plan
TrainerCentral allows you to collect the course fees in installments. For instance, consider a course called 'Business English' that is offered for $50. The admin has the option to charge $10 for 5 cycles. The main difference between a subscription ...Part Payment
TrainerCentral allows you to charge your course fees in terms. You can also configure the percentage of the fee that has to be paid in each term. For example, consider a course called Communication Skills, which is offered for $100. You can configure ...Custom Domain
As a course trainer, after creating and publishing your courses, the next step is to make them available to your intended learners through a website. However, to achieve this, you need to have a domain where the course content will be hosted and ...