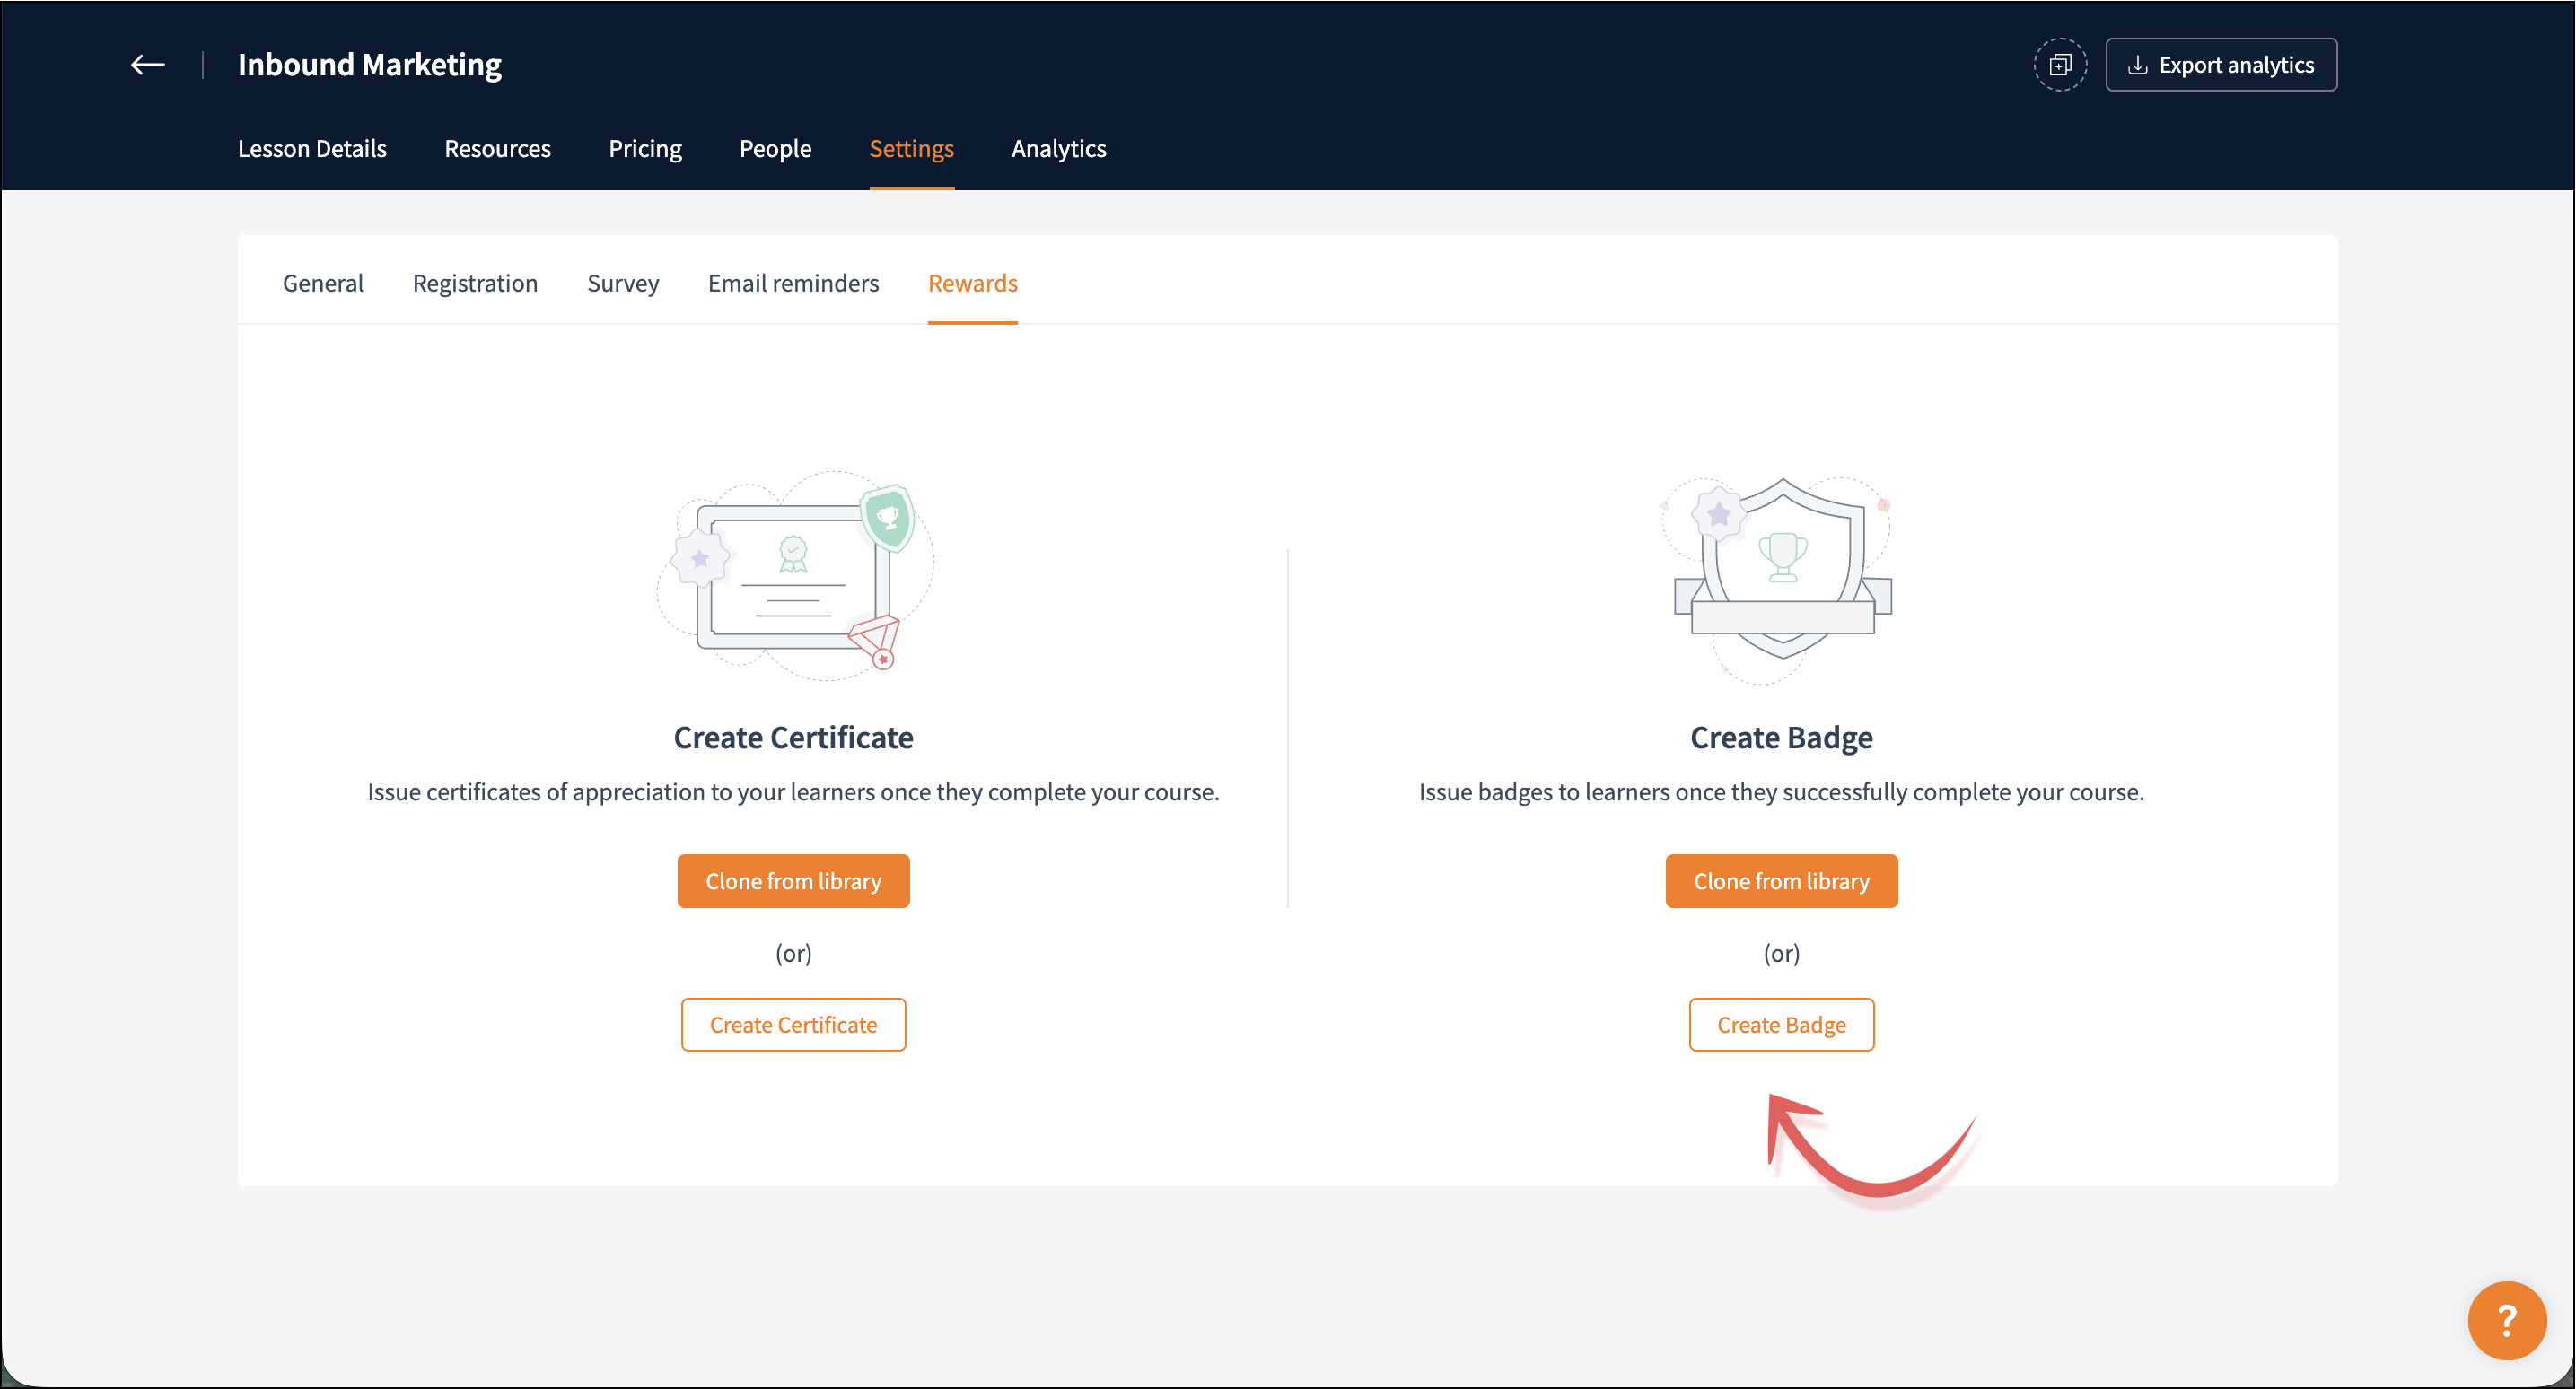
Customize Badges for Your Sessions
Issuing badges to session attendees encourages continued learning and gives them a sense of accomplishment. Our robust badge editor lets you design, customize, and issue professional, visually appealing badges in just a few minutes.

Available on all paid plans (Starter and Professional).
- Conduct a session and navigate to the Settings tab.
- In the Create Badge, click Clone from library to choose the edited certificate template from the library.
- In the Create Badge, click Create Badge to choose a new badge template from the list of options.
- Hover over the badge templates to customize or preview them.
Select: To customize the badge template.
Preview: To preview the badge template.
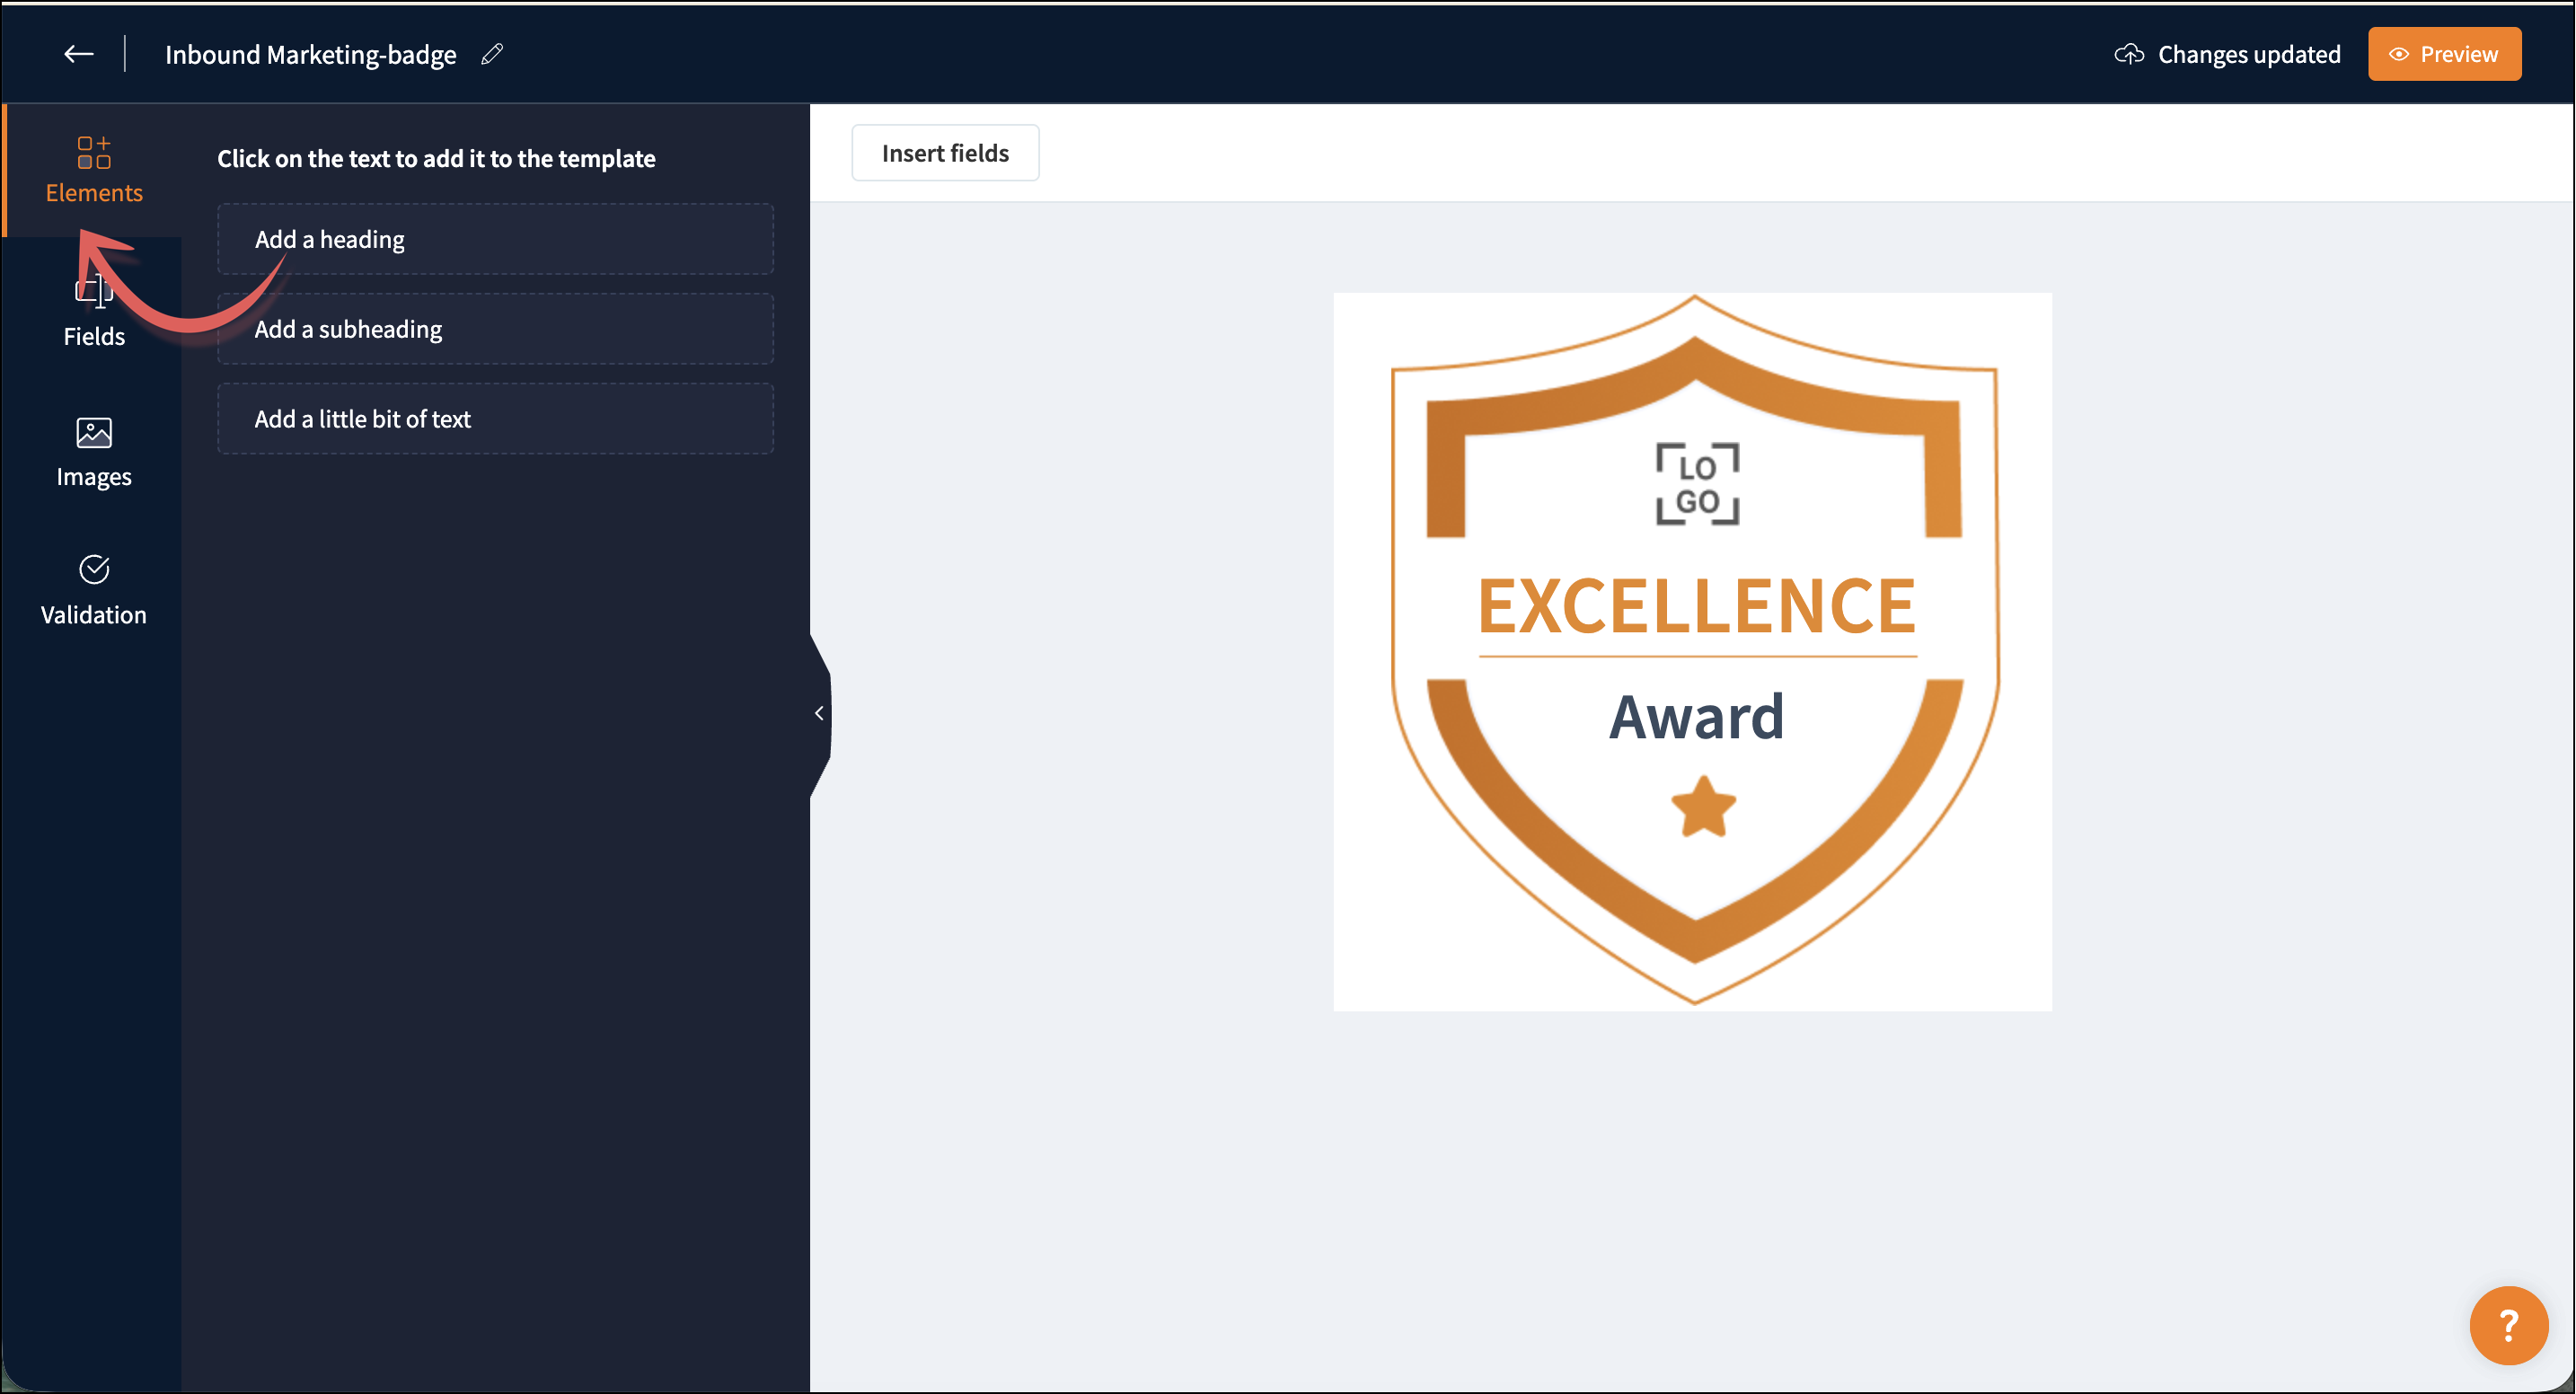
Customizing badges
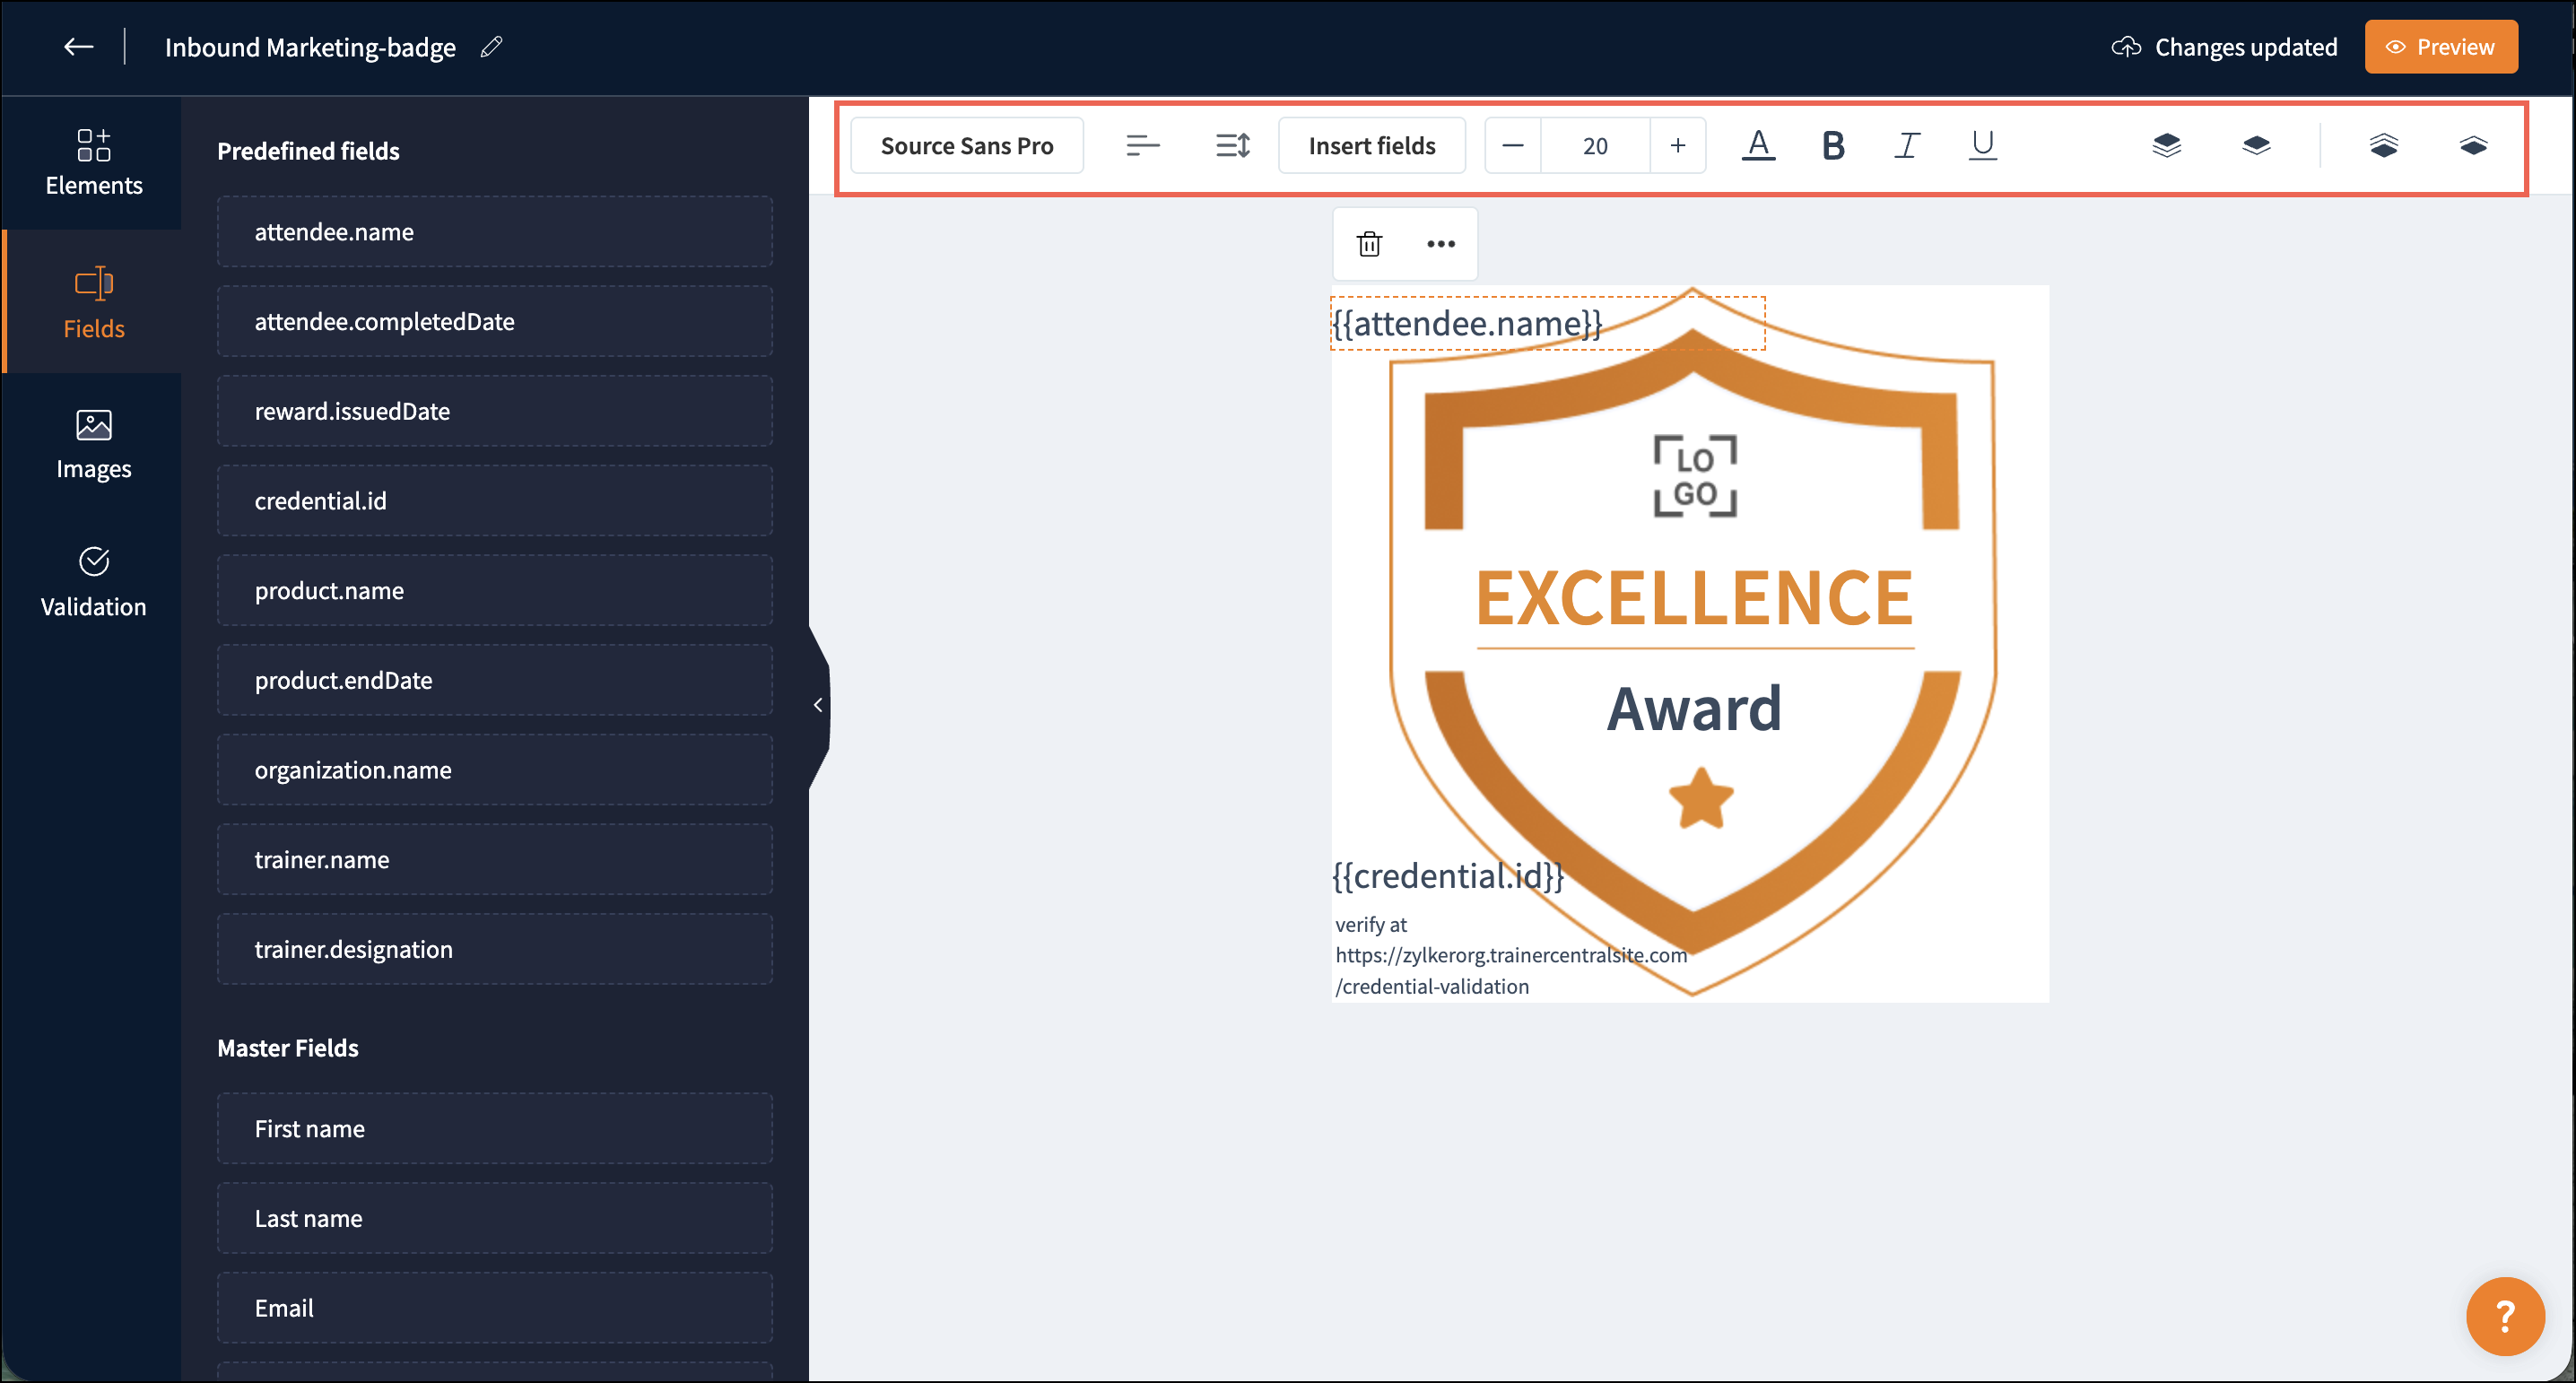
You can customize the badge template according to your requirements. The badge template consists of four components: Elements, Fields, Images, and Validation.
Let's explore them in detail.
Elements
Customize the badge with predefined elements such as a heading, subheading, and body text. You can give your own title to the badge, add an academy tagline as the subheading, and also alter the existing body content.
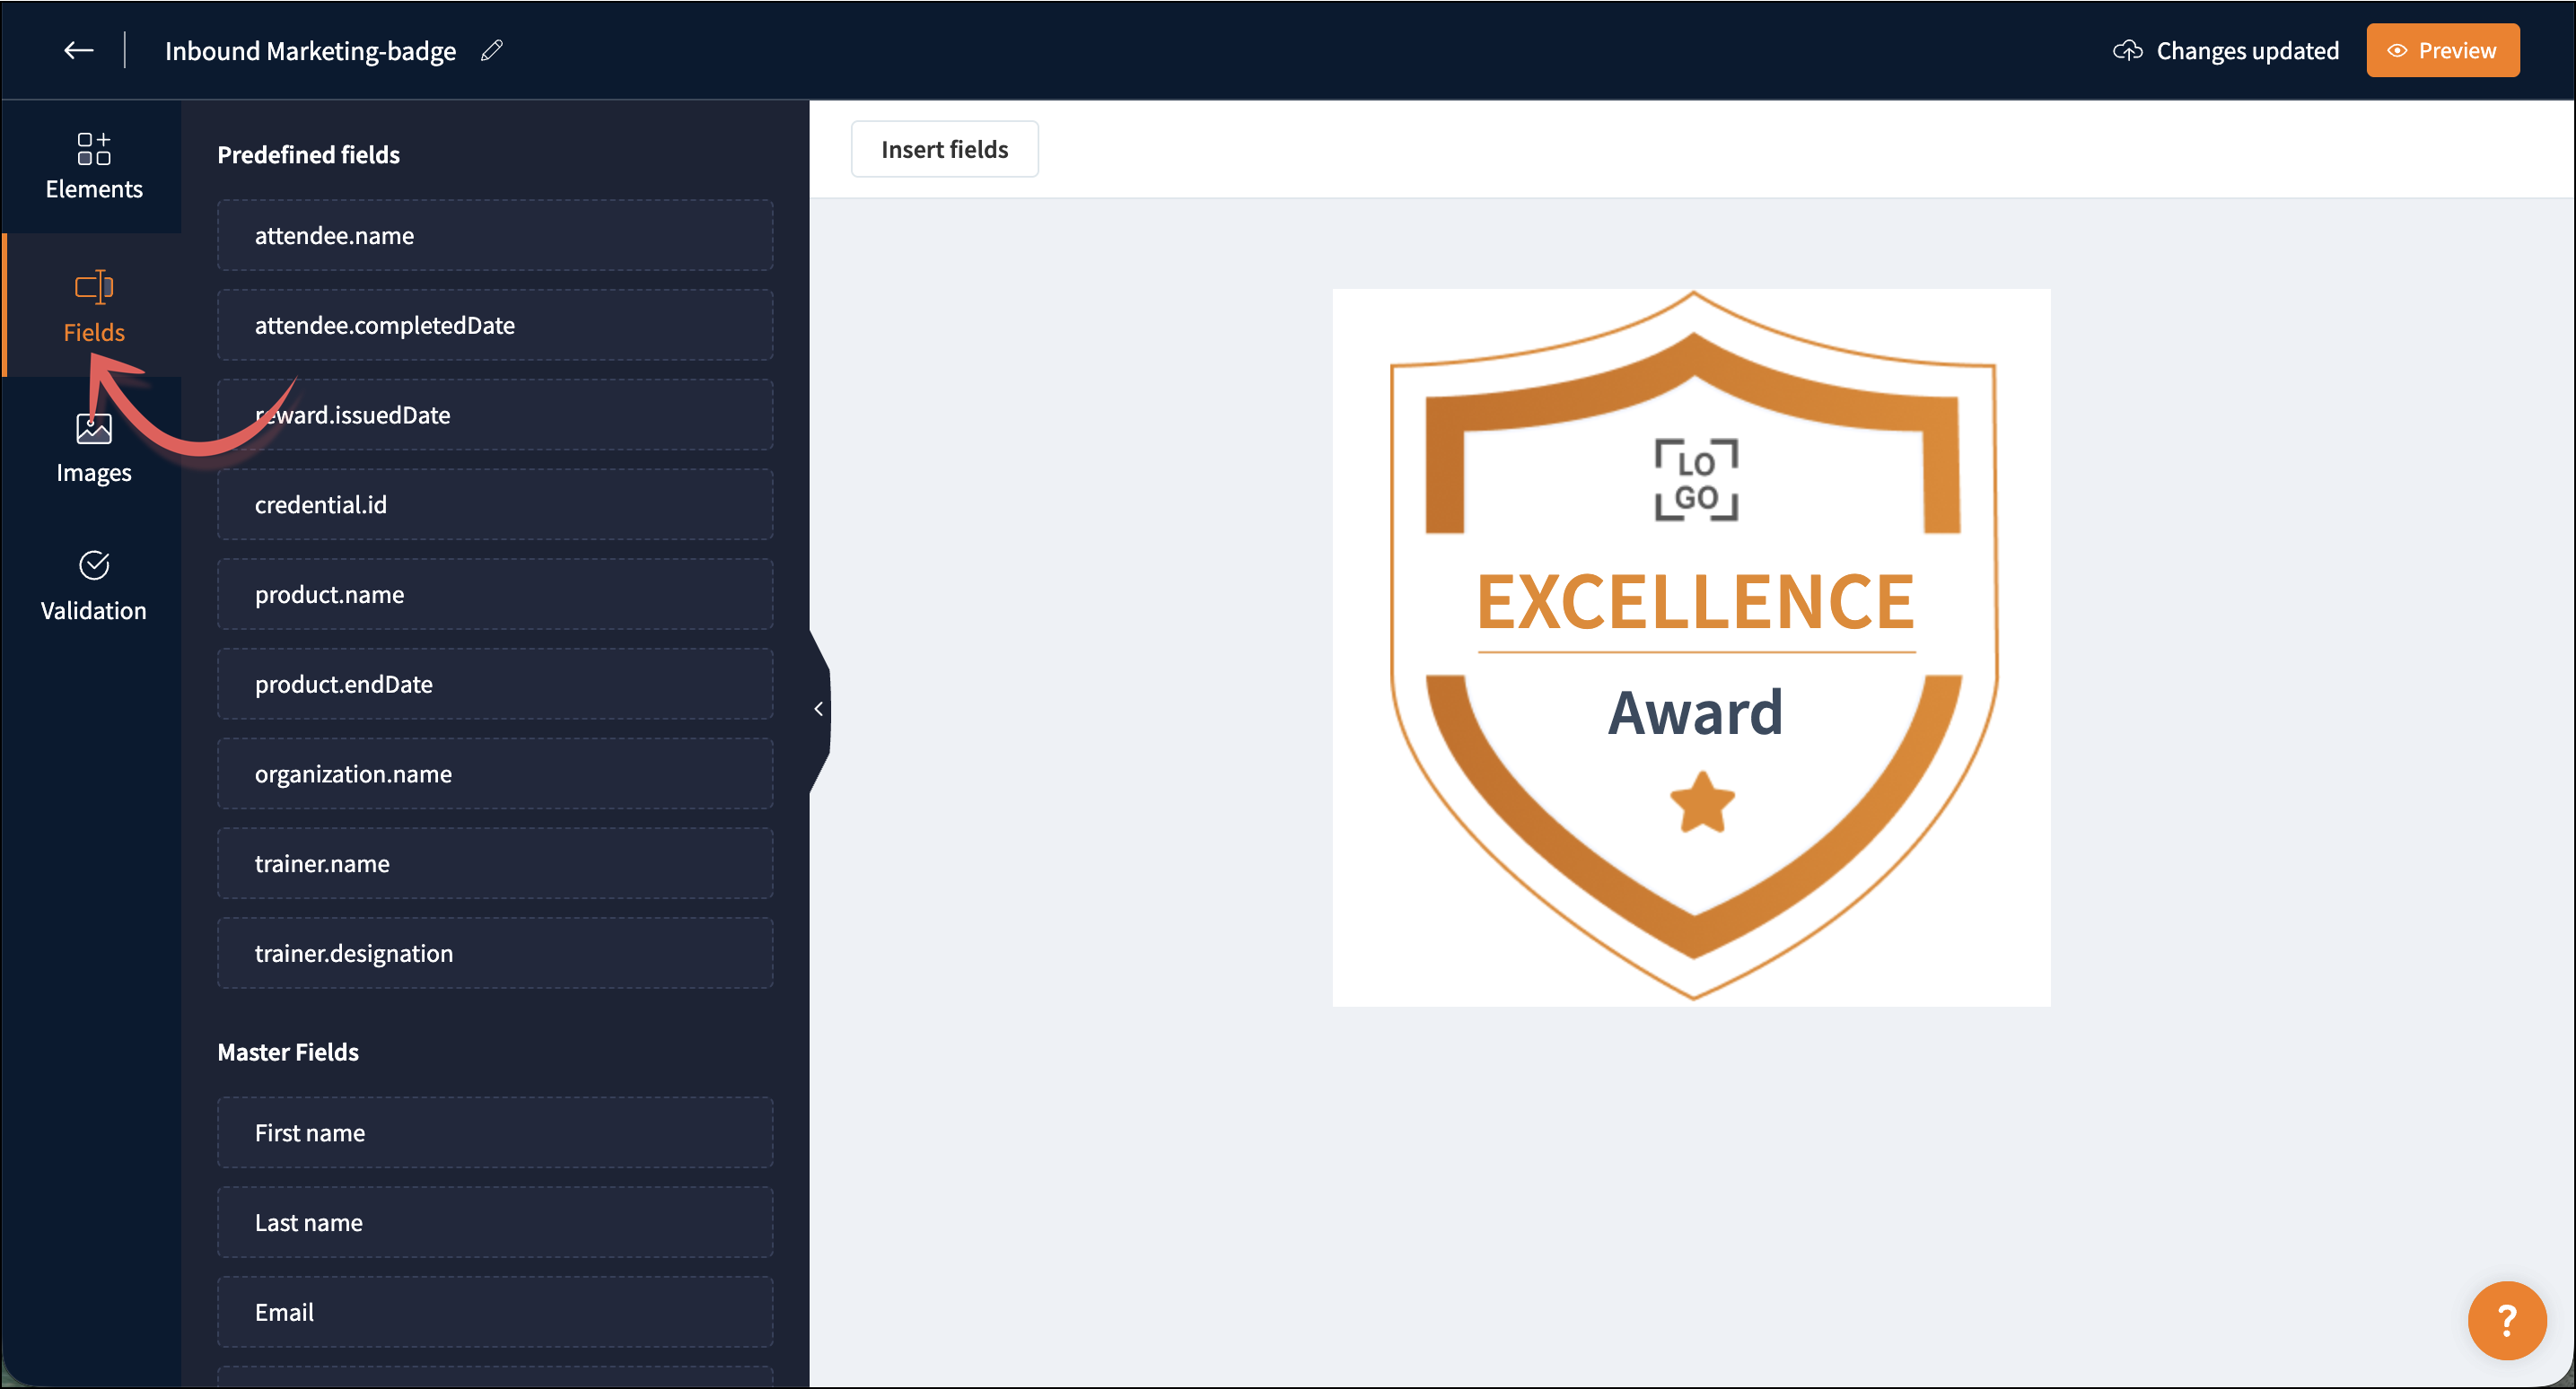
Fields
Include dynamic values in your badge template. Dynamic values refer to details that are automatically generated based on your course information. By inserting these fields in your badge template, the values will be auto-populated. For instance, attendee name, course name, and trainer name will be automatically generated.

You can also select Insert fields at the top-left corner to access the Fields tab.
There are four types of fields available, and they are listed below:
Predefined fields:
- Attendee name
- Attendee completed date
- Reward issued date
- Credential ID
- Product name
- Organization name
- Trainer name
- Trainer designation
Master fields:
The fields you set in the academy's Master fields will be displayed here.
Signup fields:
The fields you set in the academy's signup form will be displayed here.
The fields you set in the academy's Master fields will be displayed here.
Signup fields:
The fields you set in the academy's signup form will be displayed here.
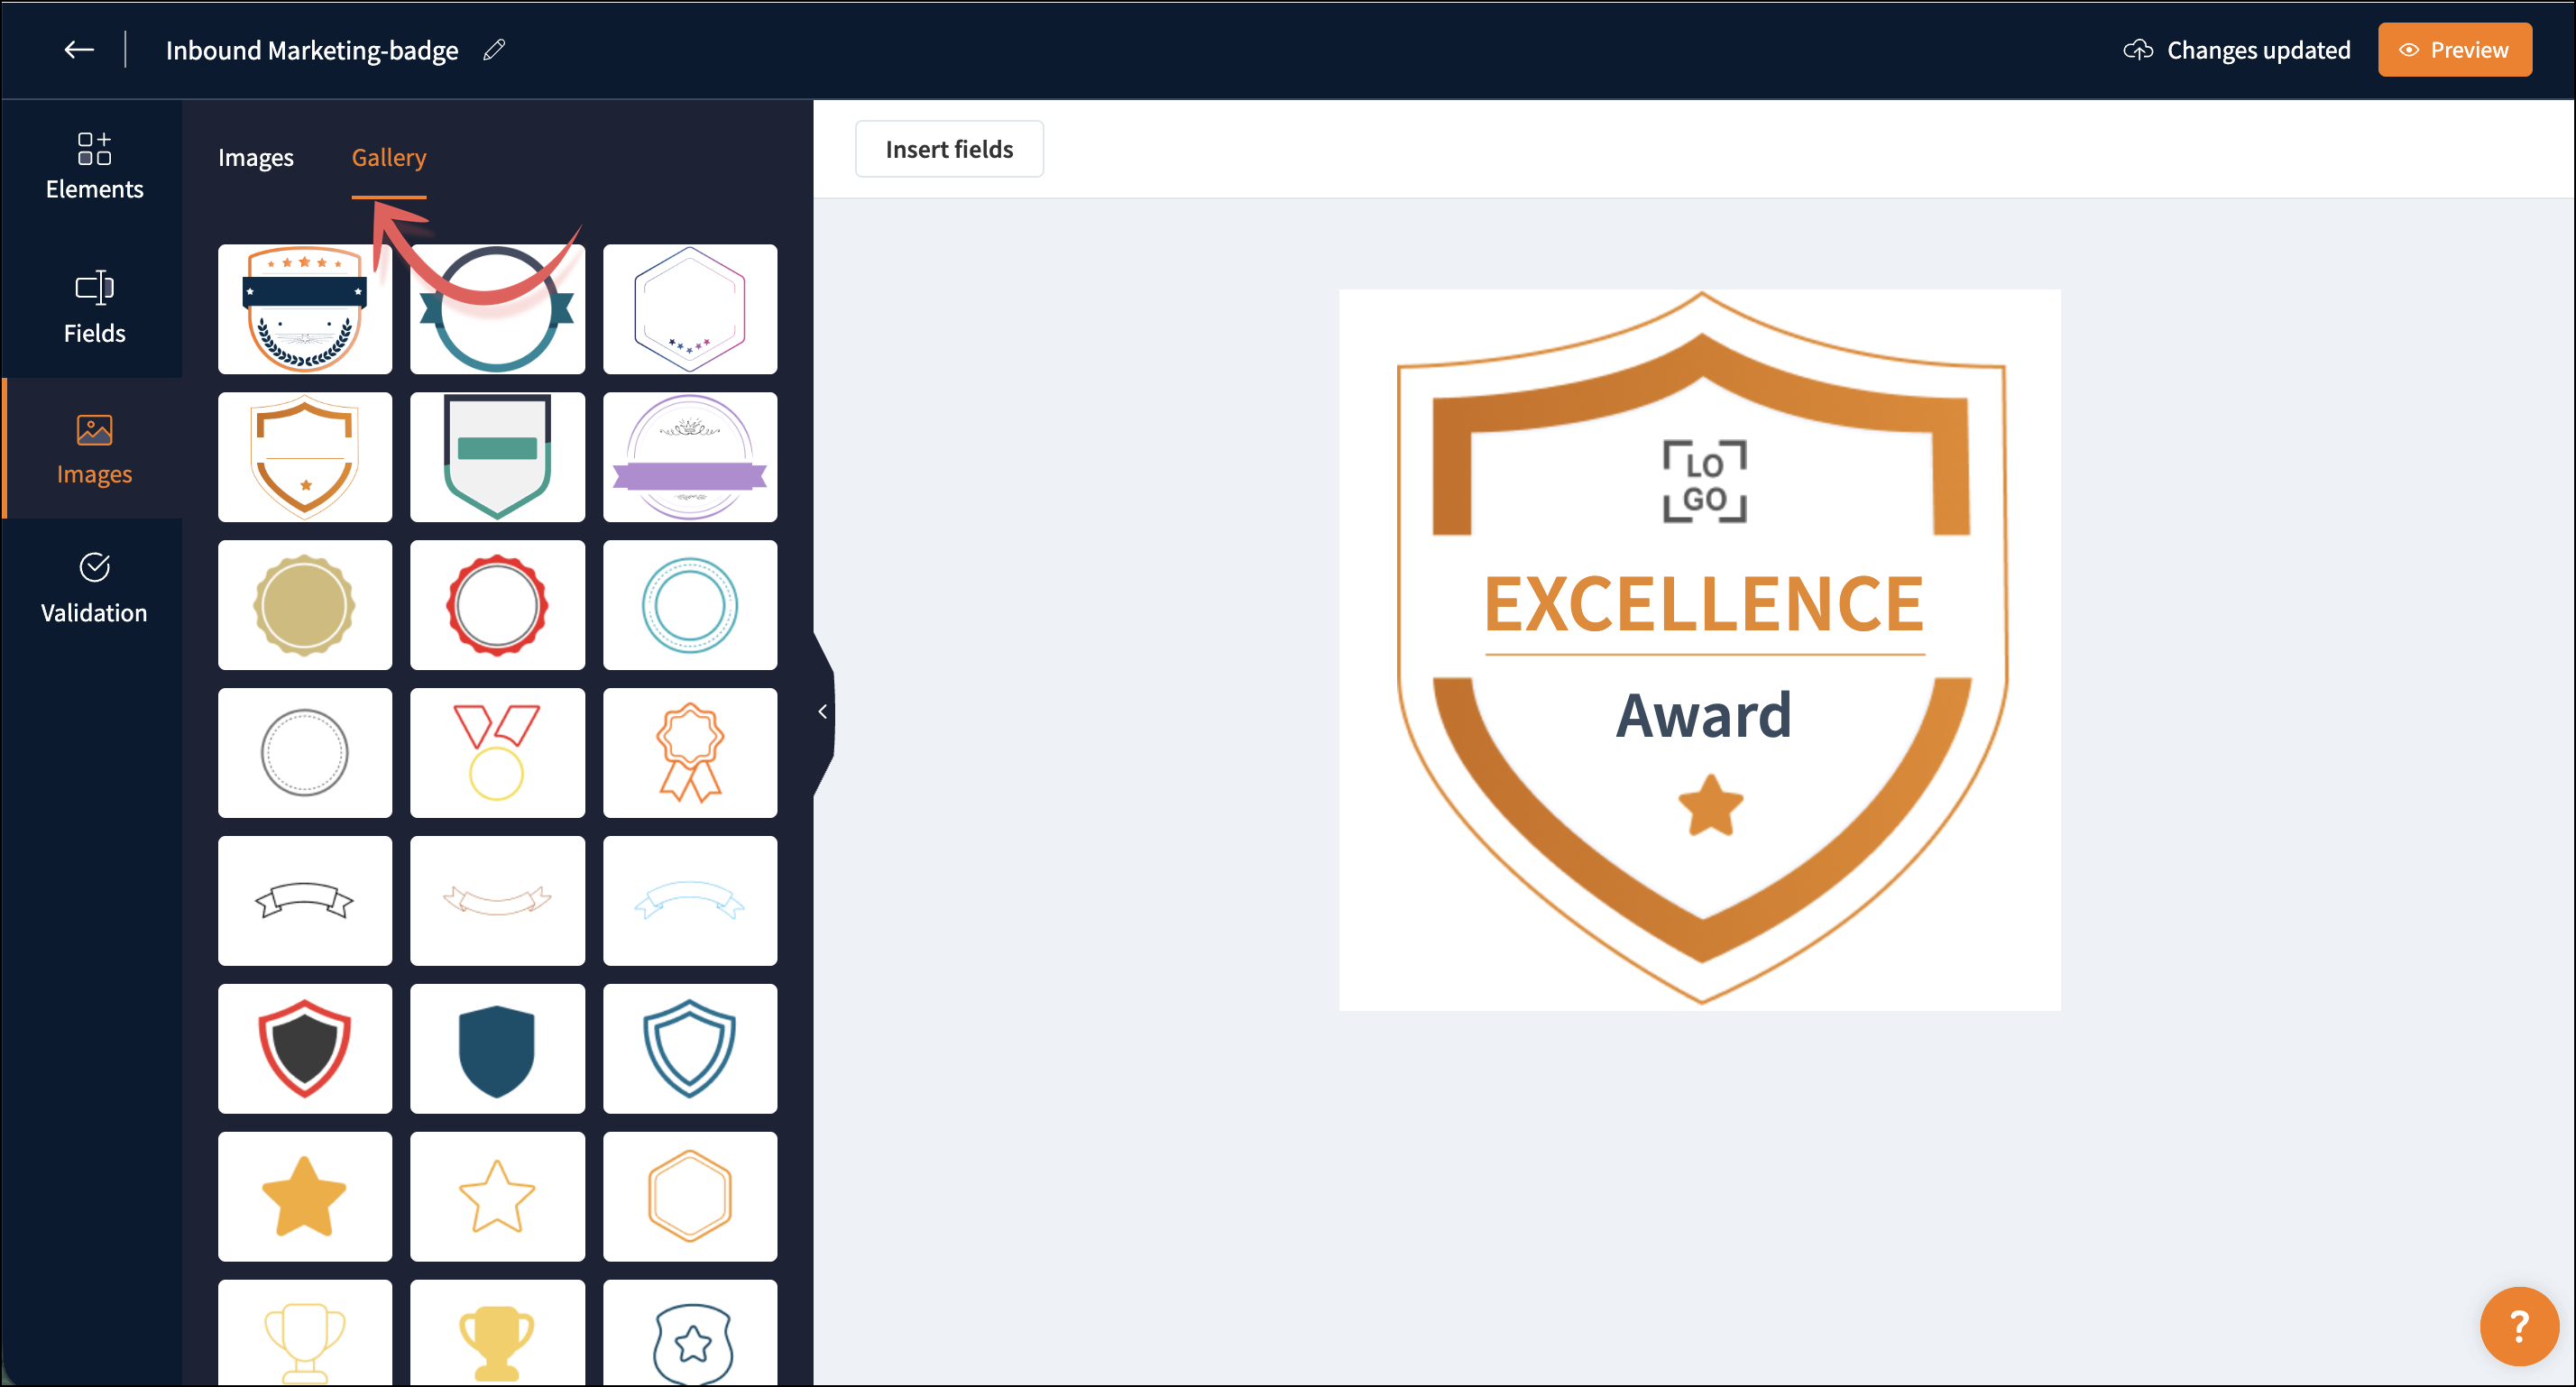
Images
Design images to suit your academy's brand.
The three different options for inserting images are:
Images: To insert images from your academy's library.
Upload image: To upload images from your device.
Gallery: To insert the default stock images that are available in TrainerCentral.
The three different options for inserting images are:
Images: To insert images from your academy's library.
Upload image: To upload images from your device.
Gallery: To insert the default stock images that are available in TrainerCentral.
Validation
Add validation to badges to help others validate learners’ rewards. This validator redirects people to the reward verification page, where learners' credentials can be verified.
The reward verification page is a dedicated webpage for academies created through TrainerCentral, designed to authenticate their learners' rewards. Refer to this help article to learn more.
Credential ID
Generate a Credential ID to uniquely identify a learner’s badge. The system automatically generates this ID in TrainerCentral.
Add Credential ID: Display a link to the reward verification page at the bottom of the badge. Enable anyone to verify the badge’s authenticity when learners share their badges on LinkedIn or other social media platforms.
QR Code
Enable QR codes for learner badges to allow quick verification using a mobile device.
Add QR Code: Redirect users to the reward verification page when they scan the code, where the learner’s badge and all associated credentials are displayed.
Enable QR codes for learner badges to allow quick verification using a mobile device.
Add QR Code: Redirect users to the reward verification page when they scan the code, where the learner’s badge and all associated credentials are displayed.
Copy URL
Copy the URL to view the learner’s reward on the verification page.

Format text in badge templates
Format text options let you modify the text elements and fields based on your preferences. With this option, you can set the tone and style of the badges.
Here's how you can format a badge.
To format text options:
Select the required text.
Choose Font, and the font navigation drawer will open.
Customize the required font by using the options below:
Alignment—Align the text left, center, and right of the field.
Size indent—Indent the space between letters and words.
Text size—Increase or decrease font size.
Text color—Apply font color.
Text style—
These are the options available:
Emboldens the selected text
Italicizes the selected text
Underlines the selected text
Up arrow icon—To move the selected field one position in front of all other fields.
Down arrow icon—to move the selected field one position behind all other fields.
Down arrow icon—to move the selected field one position behind all other fields.
Delete and duplicate text or image
Select the text or image in the badge template.
A delete icon and the More Options -> Duplicate will be displayed.
Delete: To delete the text or image.
Duplicate: To duplicate text or an image.
A delete icon and the More Options -> Duplicate will be displayed.
Delete: To delete the text or image.
Duplicate: To duplicate text or an image.
After customization, the following options are available on the reward page.
Edit: Edit the created badge template.
Preview: Preview the selected badge.
Delete: Delete the created badge.
Send me a sample: Email the selected badge to yourself to see how learners receive it.
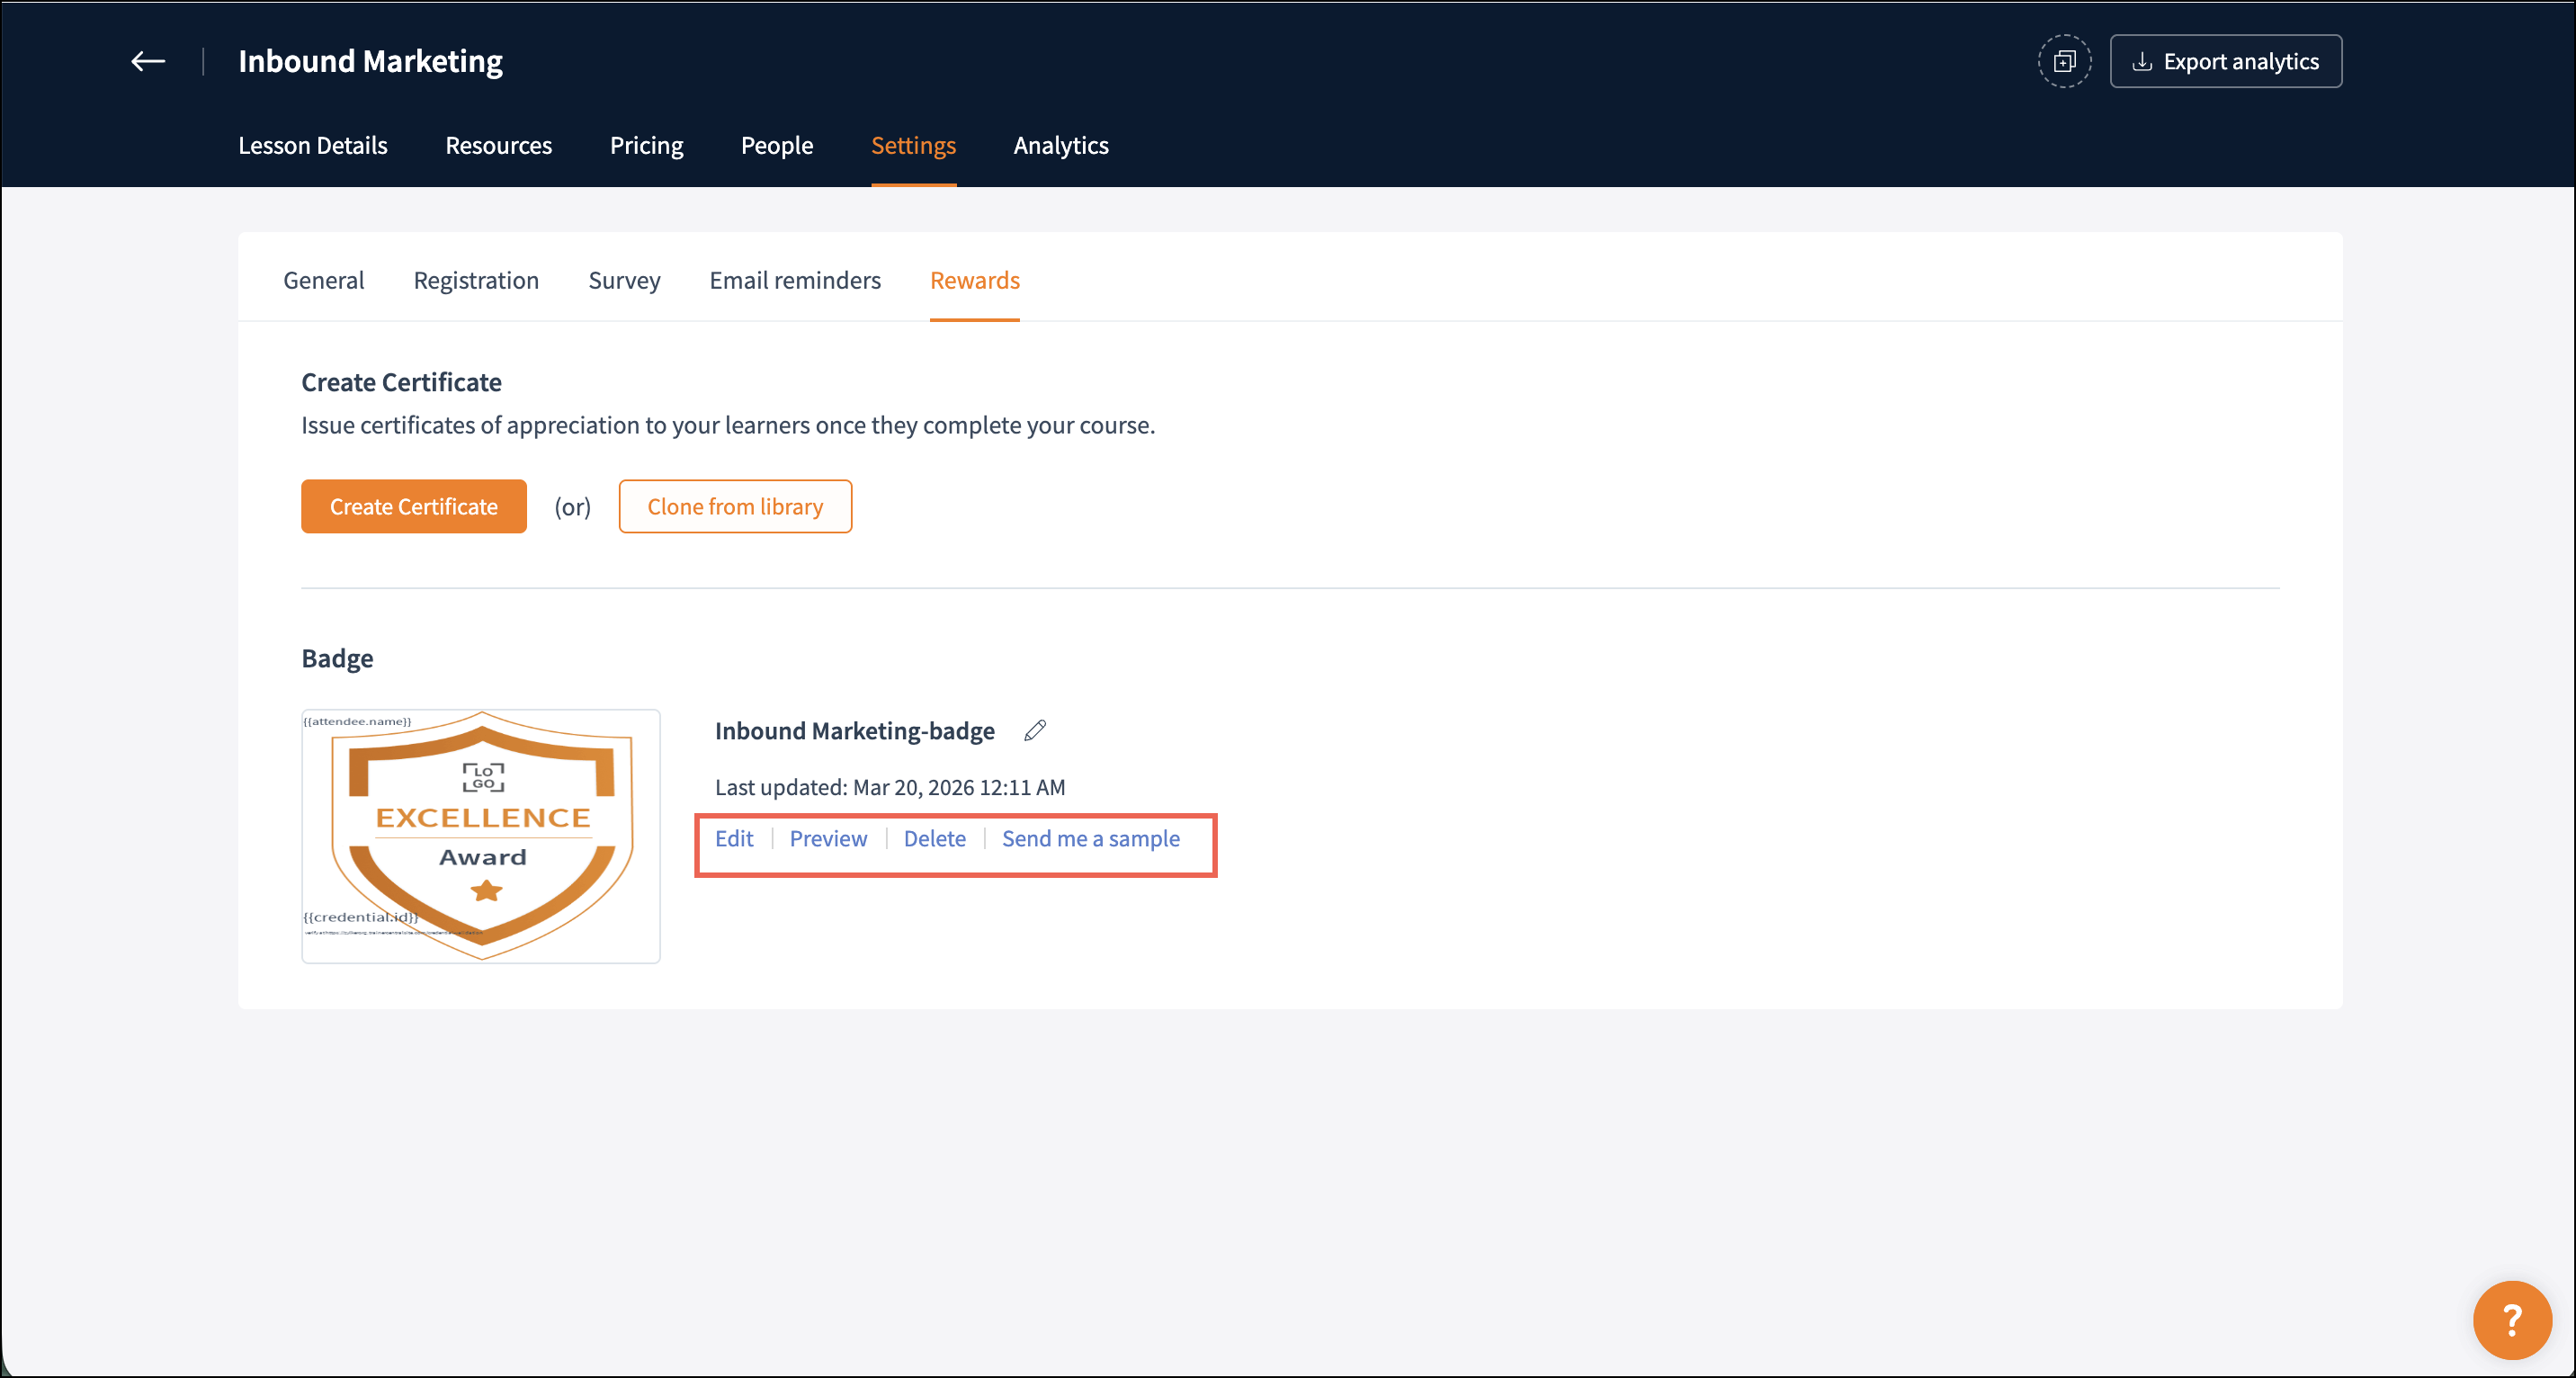
Edit: Edit the created badge template.
Preview: Preview the selected badge.
Delete: Delete the created badge.
Send me a sample: Email the selected badge to yourself to see how learners receive it.
Issue Badge
In a live workshop, you need to manually select the attendees to issue the badges.
- Navigate to the People tab and select the Attended tab.
- Select the attendee's name.
- Click the Issue Badge button.
Update Badge
If you’ve already issued badges to attendees and need to replace them with the latest version, you can do so.
- Select the attendee's name.
- Click Update Badge from the more options to update the badge with the latest one. The latest version of the badge will be updated for both you and the learner, and both of you will be notified via email.
Related Articles
Customize Course Badges in TrainerCentral
In TrainerCentral, we offer a badge editor that lets you create digital badges to recognize your learners' effort and commitment. These visually appealing badges motivate learner progress and can be tailored to reflect their competence and skills. ...Customize certificates for your sessions
Issuing certificates for a live workshop in your academy creates a sense of achievement for learners and adds credibility to the training program. In TrainerCentral, we offer a certificate editor tool to create a digital certificate. This certificate ...Customize Registration
Once you have created your session, the next step is managing your registrations. Registration allows attendees to tell you ahead of time that they will be participating. Enable registration Registration helps you plan your session by letting you ...Share certificates and badges on your LinkedIn profile
As a learner, you have the option to share your course or session certificates and badges on your LinkedIn profile. This will help you unlock opportunities and showcase your achievements and skills. Web Navigate to the Rewards tab in the left pane. ...Set up recurring sessions
TrainerCentral allows you to set up Recurring sessions with your attendees at regular intervals such as daily, weekly, or monthly for a specific period. This helps you save time and effort of manually creating the same session multiple times. Set up ...