Customize Course Certificates in TrainerCentral
Providing a certificate to your learners upon completion not only serves as a source of motivation for them, but also adds credibility to your course. In TrainerCentral, we offer a certificate editor tool to create a digital certificate. You can customize the certificate according to your learners' competence and skill.

If you want to create a new certificate for the course, the new certificate editor will be available. However, if you want to edit an existing certificate, the old editor will be used. You have the option to delete the current certificate and use the new certificate editor to create a fresh certificate.
Create course certificate
- Sign in to your Trainer Central account as an admin/trainer and access the Courses tab in the left pane. The list of all your created courses will appear on the screen.
- Select the course you want to provide a certification for by clicking the course thumbnail icon.
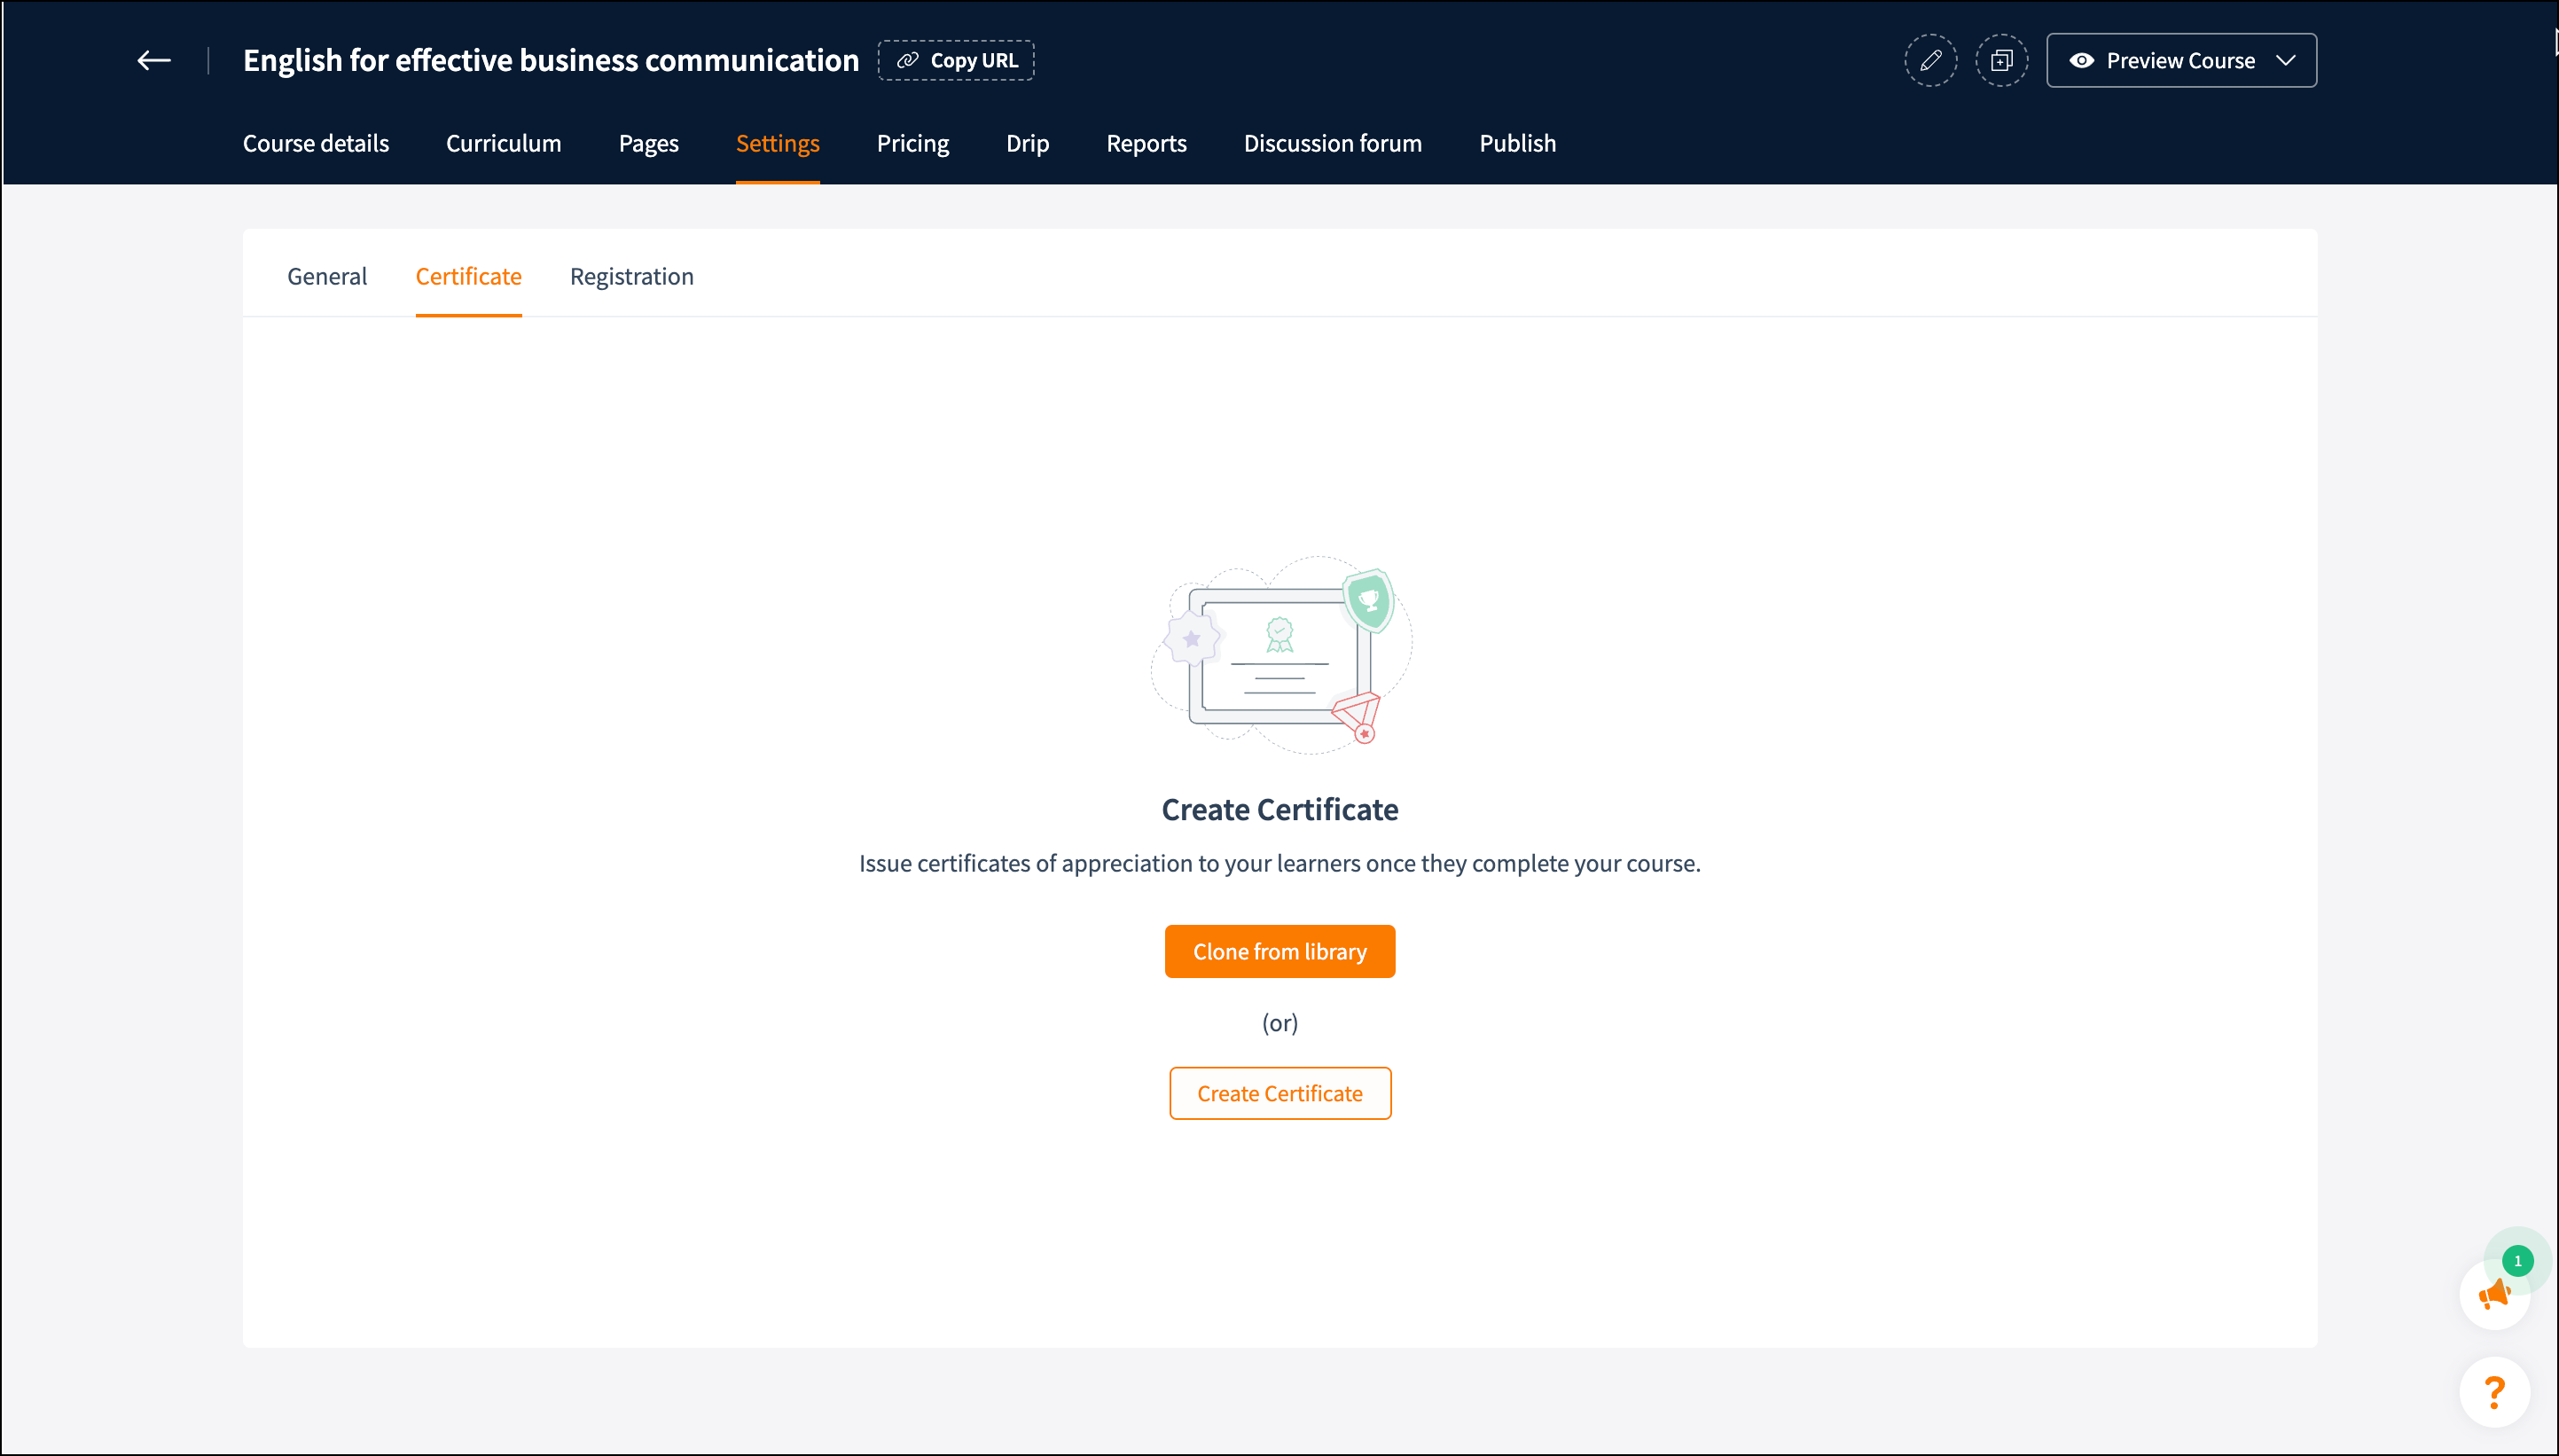
- A new window with the set of Course manage options will appear on the screen. From here, access the Settings tab and select the Certificate option.
- Click Clone Certificate to choose the edited certificate template from the library.
- Click Create Certificate to choose a certificate template from the list of options.
- Hover over the certificate templates thumbnail to customize or preview them.
Click Select: To customize the certificate template.
Click Preview: To enlarge and view the certificate template. When you're done with the required customizations, click the Back icon to exit the certificate editor window.
Any changes you make to the template will be saved in real time.
Customize course certificate
Elements
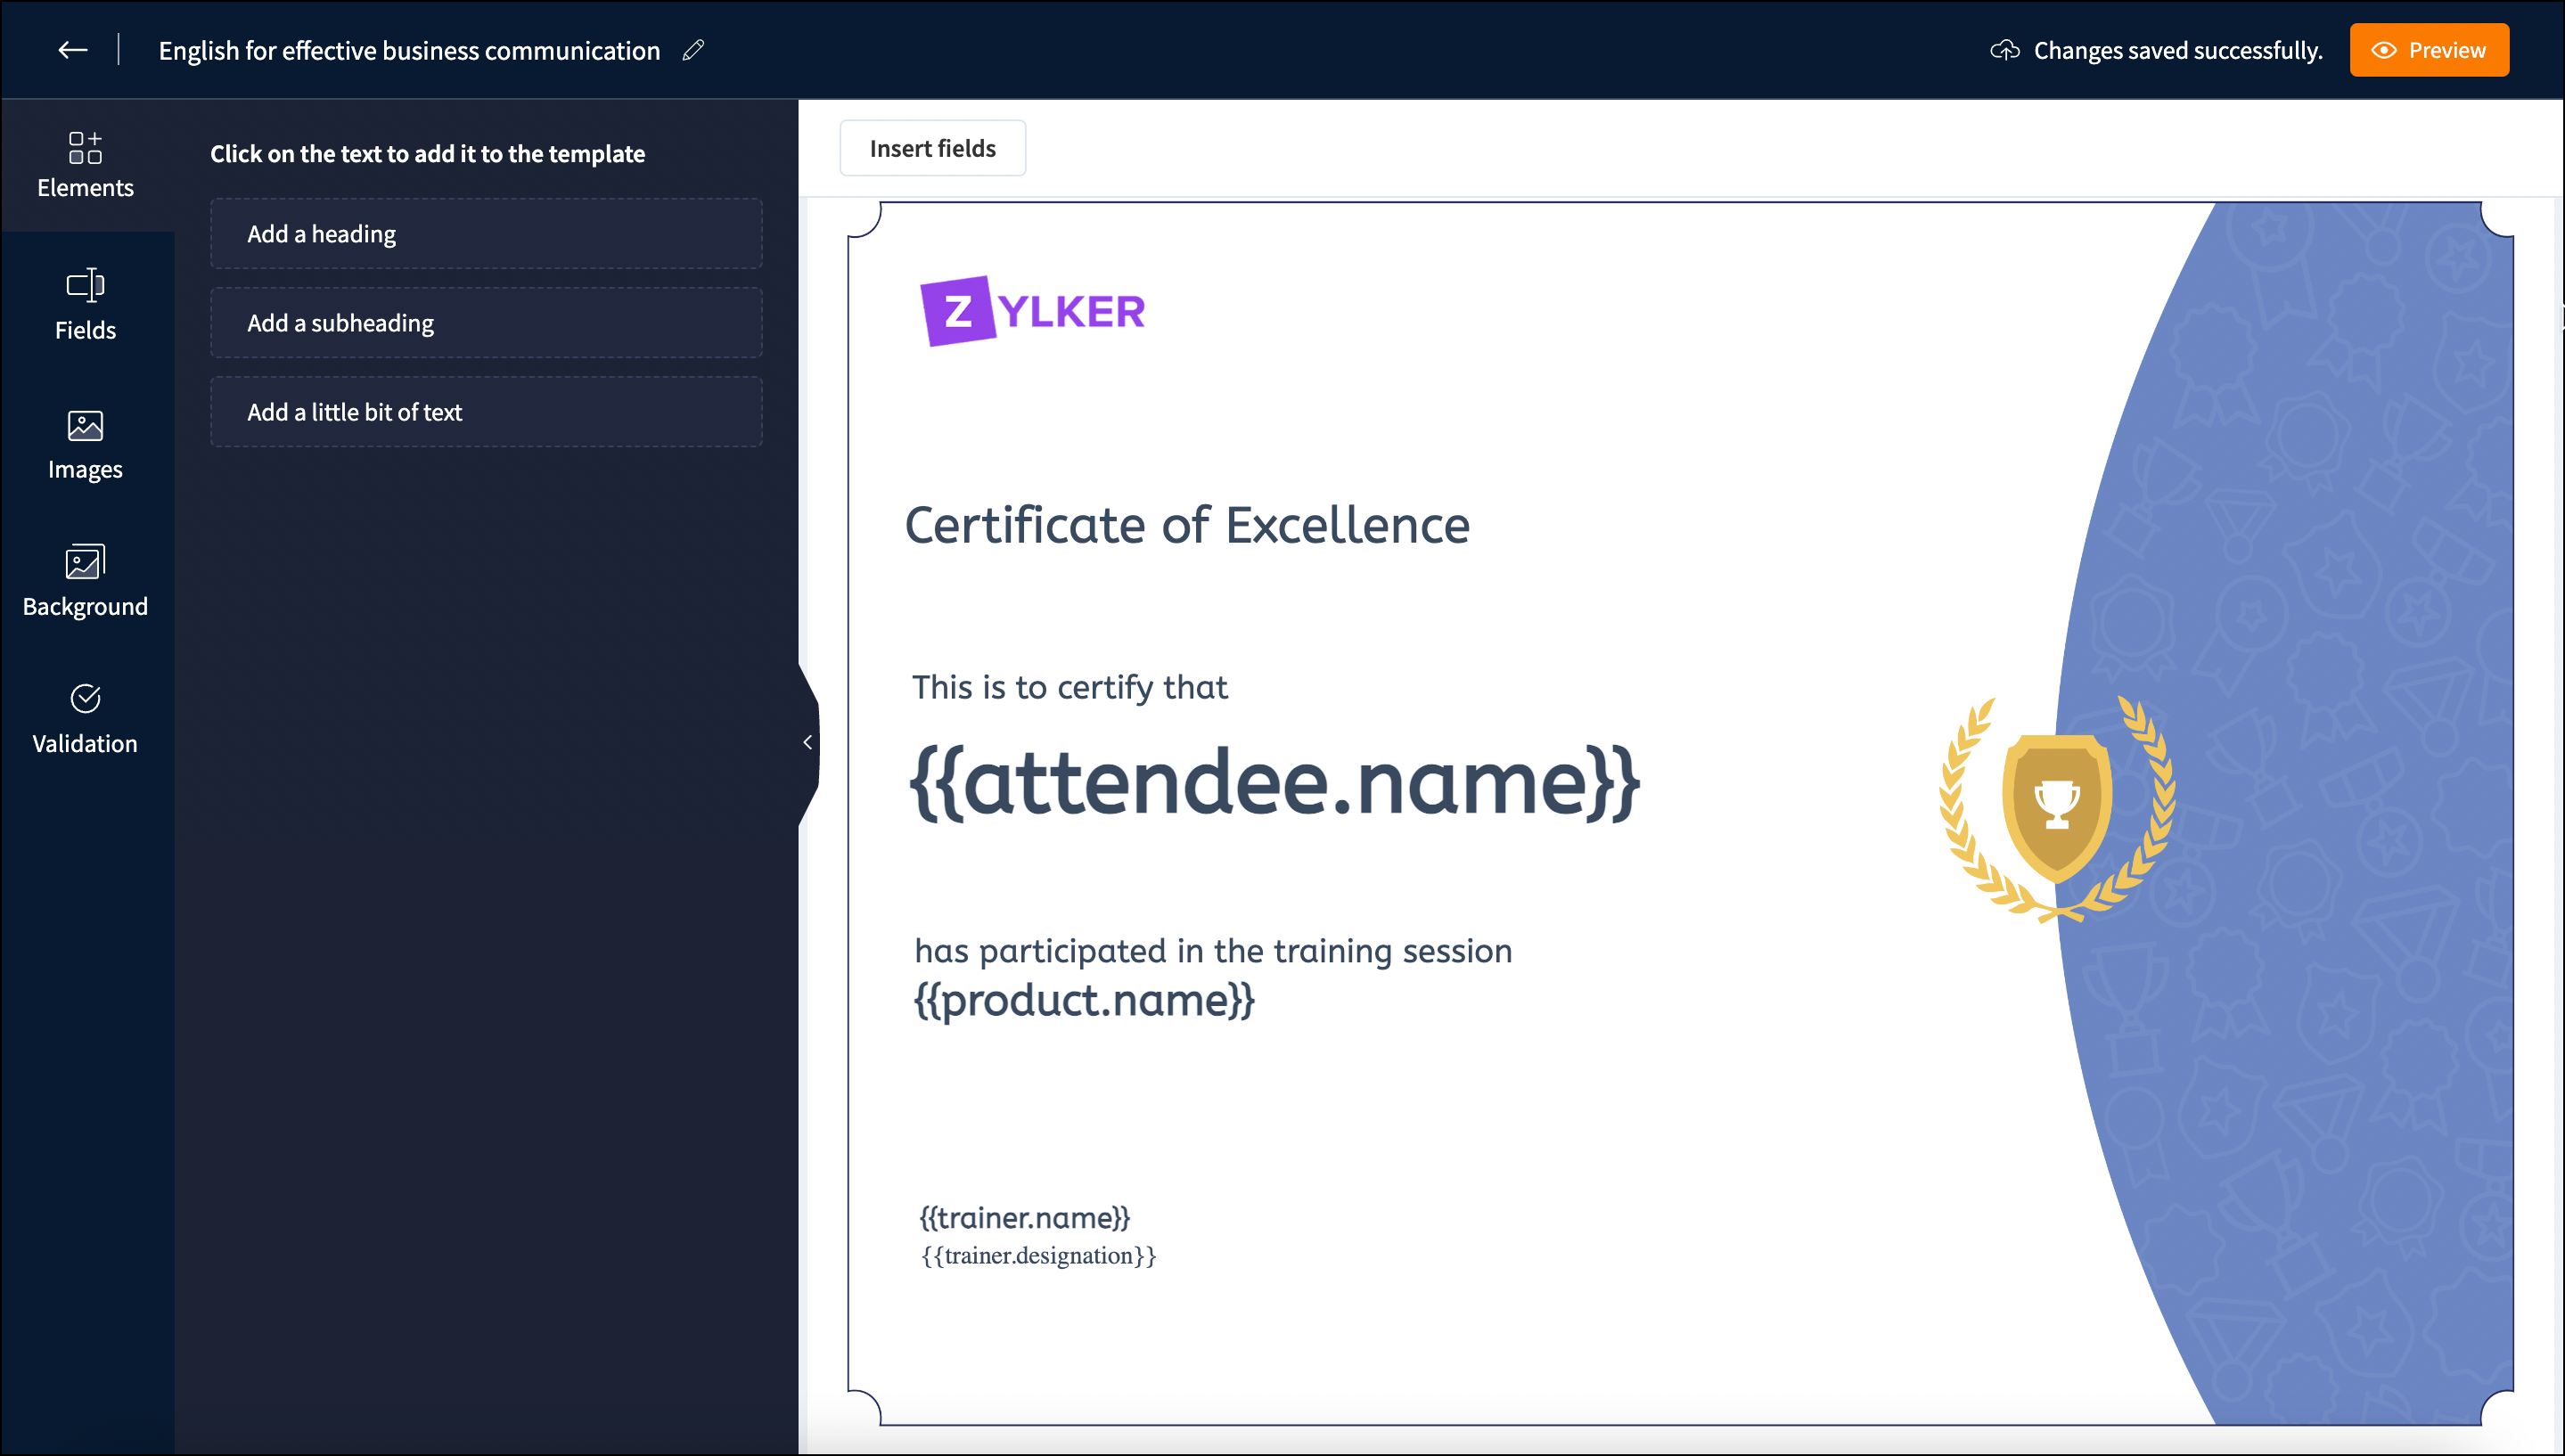
You can customize the certificate with predefined elements such as a heading, subheading, and body text. You can give your own title to the certification, add an academy tagline as the subheading, and also alter the existing body content. You can add elements to the template by clicking the required elements in the elements pane.
Fields
You can include dynamic values in your course certificate template by using Fields. Dynamic values refer to details that are automatically generated based on your course information. By inserting these fields in your course, the values will be auto-populated. For instance, attendee name, course name, and trainer name will be automatically generated.
You can also select Insert fields at the top left of the screen to access the Fields tab.
There are four types of fields available, and they are listed below:
Predefined fields: Course name,Attendee name, course completed date, organization name, trainer name, trainer designation, unique key. Master fields: The fields you set in the academy's Master fields will be displayed here.
Signup fields: The fields you set in the academy's signup form will be displayed here.
Course registration fields: The fields you set in the academy's course registration form will be displayed here.
Images
Images can be added to certificates. These images can be your academy logo, favicon, or any other image that suits your academy's brand. The three different options for inserting images are:
Images: To insert images from your academy's library.
Upload image: To upload images from your device.
Gallery: To insert the default stock images that are available in TrainerCentral.
Background
The Background option lets you add or edit the visually appealing background for your chosen template.
Select the Background and choose the preferred background template.
Alternatively, select the image that is added to your current template and click the More icon on the added image. Select the Set as Background option to change the image as the background for the certificate.
Detach Background: Click the More icon in the background. Select the Detach Background option to change the background to an image.
Validation
Certificate validator plays a pivotal role in validating the authenticity of learner certificates. The validator provides certificate details such as course name, issued by, date, and more.
Credential ID
A Credential ID is a unique identifier assigned to a learner's certificate. It is auto-generated In TrainerCentral.
Add Credential ID: Click this button to add the auto-generated credential ID to the certificate.
When the credential ID is generated, the link to the certificate verification page will be displayed at the bottom of the certificate. When any learner showcases the certificate in PDF or any other document format, anyone can verify the authenticity of the certificate by navigating to the website.
QR Code
We have implemented a QR code that you can add to your learner's certificate. This helps people verify the certificate's authenticity through their mobile device. By scanning this code, they will be redirected to the Certificate Verification page, where the learner's certificate will be displayed with all credentials.
Add QR Code: Click this button to add the QR code to the certificate.
Certificate Verification Page
The certificate verification page is a webpage designed to verify learner's certificates by entering their credential id.
Copy URL: This is the same as the URL that is generated at the bottom of learners' certificates. Copy this link to view the certificate verification page.
To learn more about the certificate verification page, please refer this help article.
Format text in certificate templates

Format text options let you modify the text elements and fields based on your preferences. With this option, you can set the tone and style of the certificates that are issued. Here's how you can format certificate templates:
-
Font type
- Alignment Size
- indent
- Font size
- Font color
- Font style
- Font movement
To format text options: - Select the required text.
- Choose Font and the font navigation drawer will open.
- Select the required font.
- Alignment—Align the text left, center, and right of the field.
- Size indent—Indent the space between letters and words.
- Text size—Increase or decrease font size.
- Text color—Apply font color.
- Text style—These are the options available: Emboldens the selected text, italicizes the selected text, and
underlines the selected text - To front-Select this icon at the top-right corner of your screen to move the selected field in front of all other fields.
- Move forward -Select this icon at the top-right corner of your screen to move the selected field one position in front of all other fields.
- To back -Select this icon at the top-right corner of your screen to move the selected field behind all other fields.
- Move backward—Select this icon at the top-right corner of your screen to move the selected field one position behind all others.
Delete and duplicate text or image
Select the text or image in the certificate template. A delete icon and a duplicate option from more options will be displayed.
Delete: To delete the text or image.
Duplicate: To duplicate text or an image.
Select the text or image in the certificate template. A delete icon and a duplicate option from more options will be displayed.
Delete: To delete the text or image.
Duplicate: To duplicate text or an image.
Issue course certificate
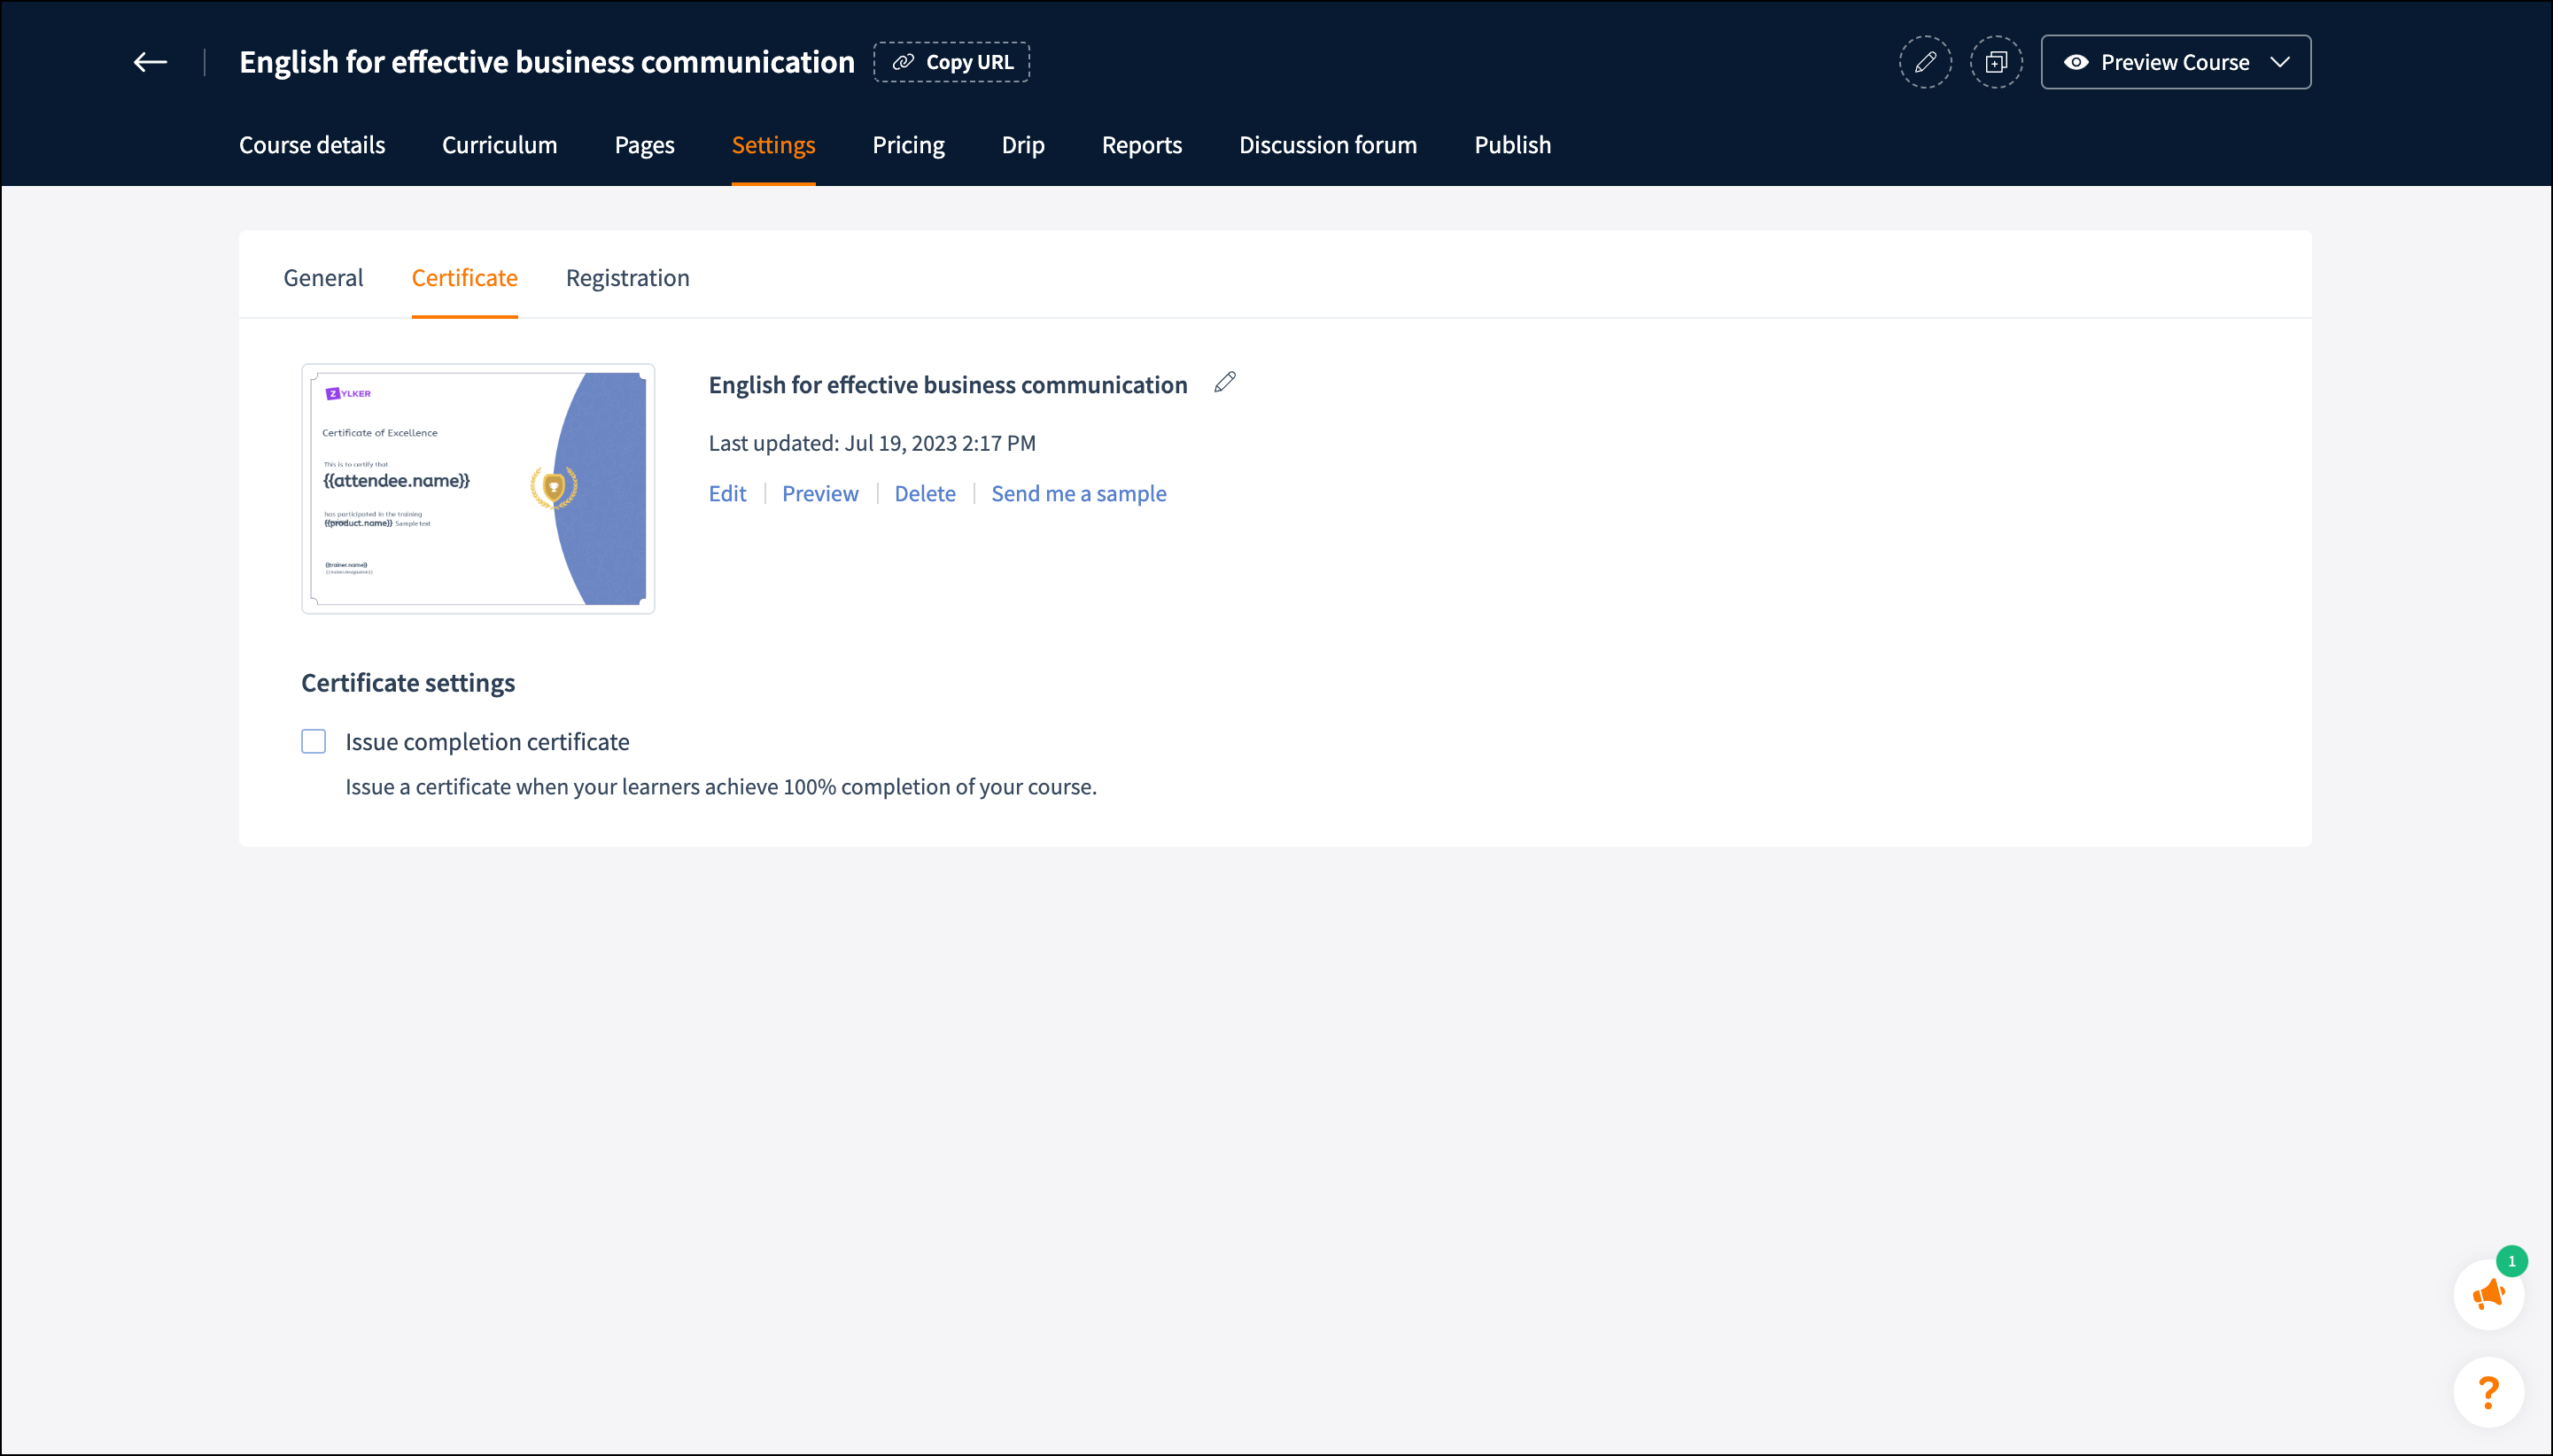
After customization, these are the options available on the Certificate page.
Edit: Open the certificate editor window.
Preview: Preview the selected certificate.
Edit: Open the certificate editor window.
Preview: Preview the selected certificate.
You can also click Preview in the top-right corner of the Certificate editor screen.
Delete: Delete the created certificate.
Send me a sample: Send the selected certificate to the trainer's email.
Issue course certificate: Check the Issue completion certificate checkbox under Certificate settings to issue the selected certificate to your learners after their course completion.
Send me a sample: Send the selected certificate to the trainer's email.
Issue course certificate: Check the Issue completion certificate checkbox under Certificate settings to issue the selected certificate to your learners after their course completion.
Related Articles
Customize certificates for your sessions
Issuing certificates for a live workshop in your academy creates a sense of achievement for learners and adds credibility to the training program. In TrainerCentral, we offer a certificate editor tool to create a digital certificate. This certificate ...Course Report
TrainerCentral gives you a detailed, consolidated report on how your learners performed all through your course, their status of completion, pending access requests, and more. Learner details The Learner details tab gives you complete details about ...Course Bundle
Create a course bundle If you wish to sell multiple courses together or combine related courses under one common landing page and pricing to offer it as one to your learners, you can easily bundle related courses together and sell them as one. When a ...Customize Course Badges in TrainerCentral
In TrainerCentral, we offer a badge editor that lets you create digital badges to recognize your learners' effort and commitment. These visually appealing badges motivate learner progress and can be tailored to reflect their competence and skills. ...Customize Course Page
TrainerCentral gives the option to customize your course page by adding sections, altering navigation, incorporating branding elements and much more. To edit the course page 1. Click on the course and navigate to the Pages tab. 2. Click on Edit ...