How to customize the Signup form
- Navigate to Settings in the left pane.
- Select the Forms tab.
- Click the All forms tab. The default forms, such as Signup, Contact us, and other customized forms, will be displayed.
- Click the edit icon at the right side of the sign up form.
Default Signup Fields
- First Name: The learner's first name.
- Last Name: The learner's last name.
- Email: The learner's email address. This email address will act as a signed in email address.
- Password: The password for this account.

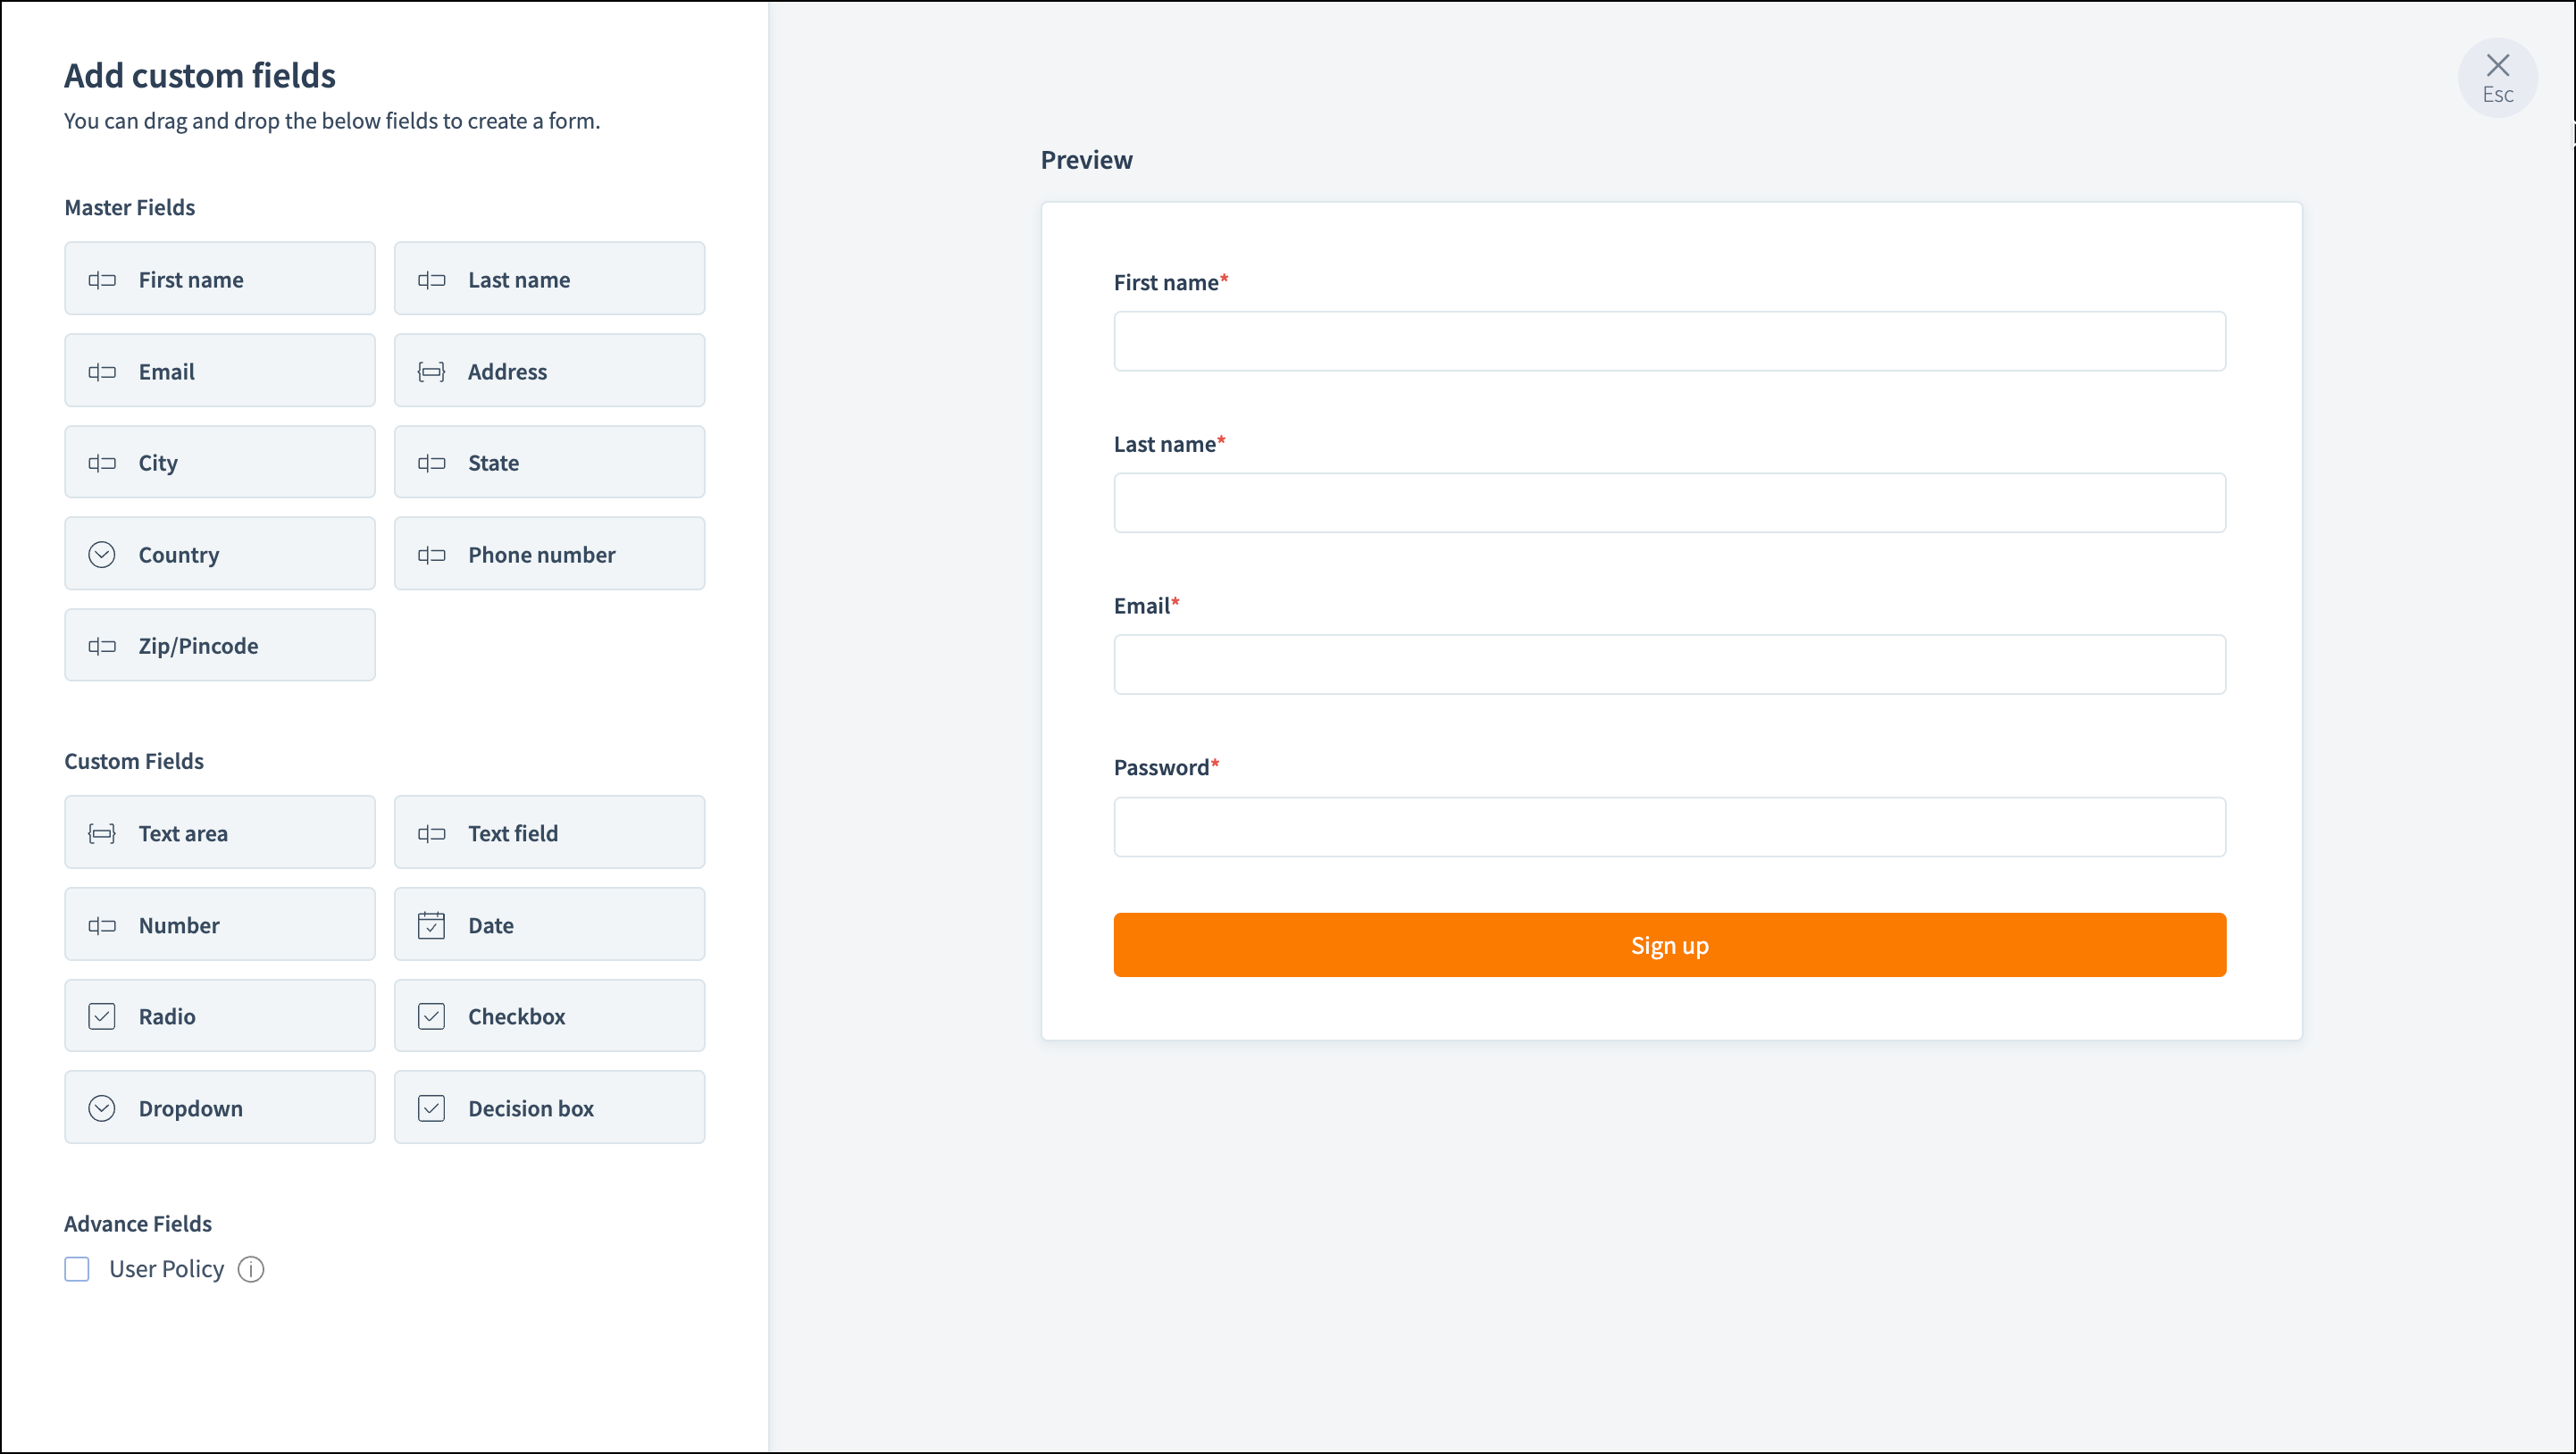
Edit Signup Fields
- Click edit icon at the right corner of the text box. The edit window will display.
- Edit the label name.
- Enable mandatory will be disabled for these fields, except for the Last Name field.
- Enable confirm password. The password field has the options to confirm the password.
- Select the layout as One column or Two column as required.
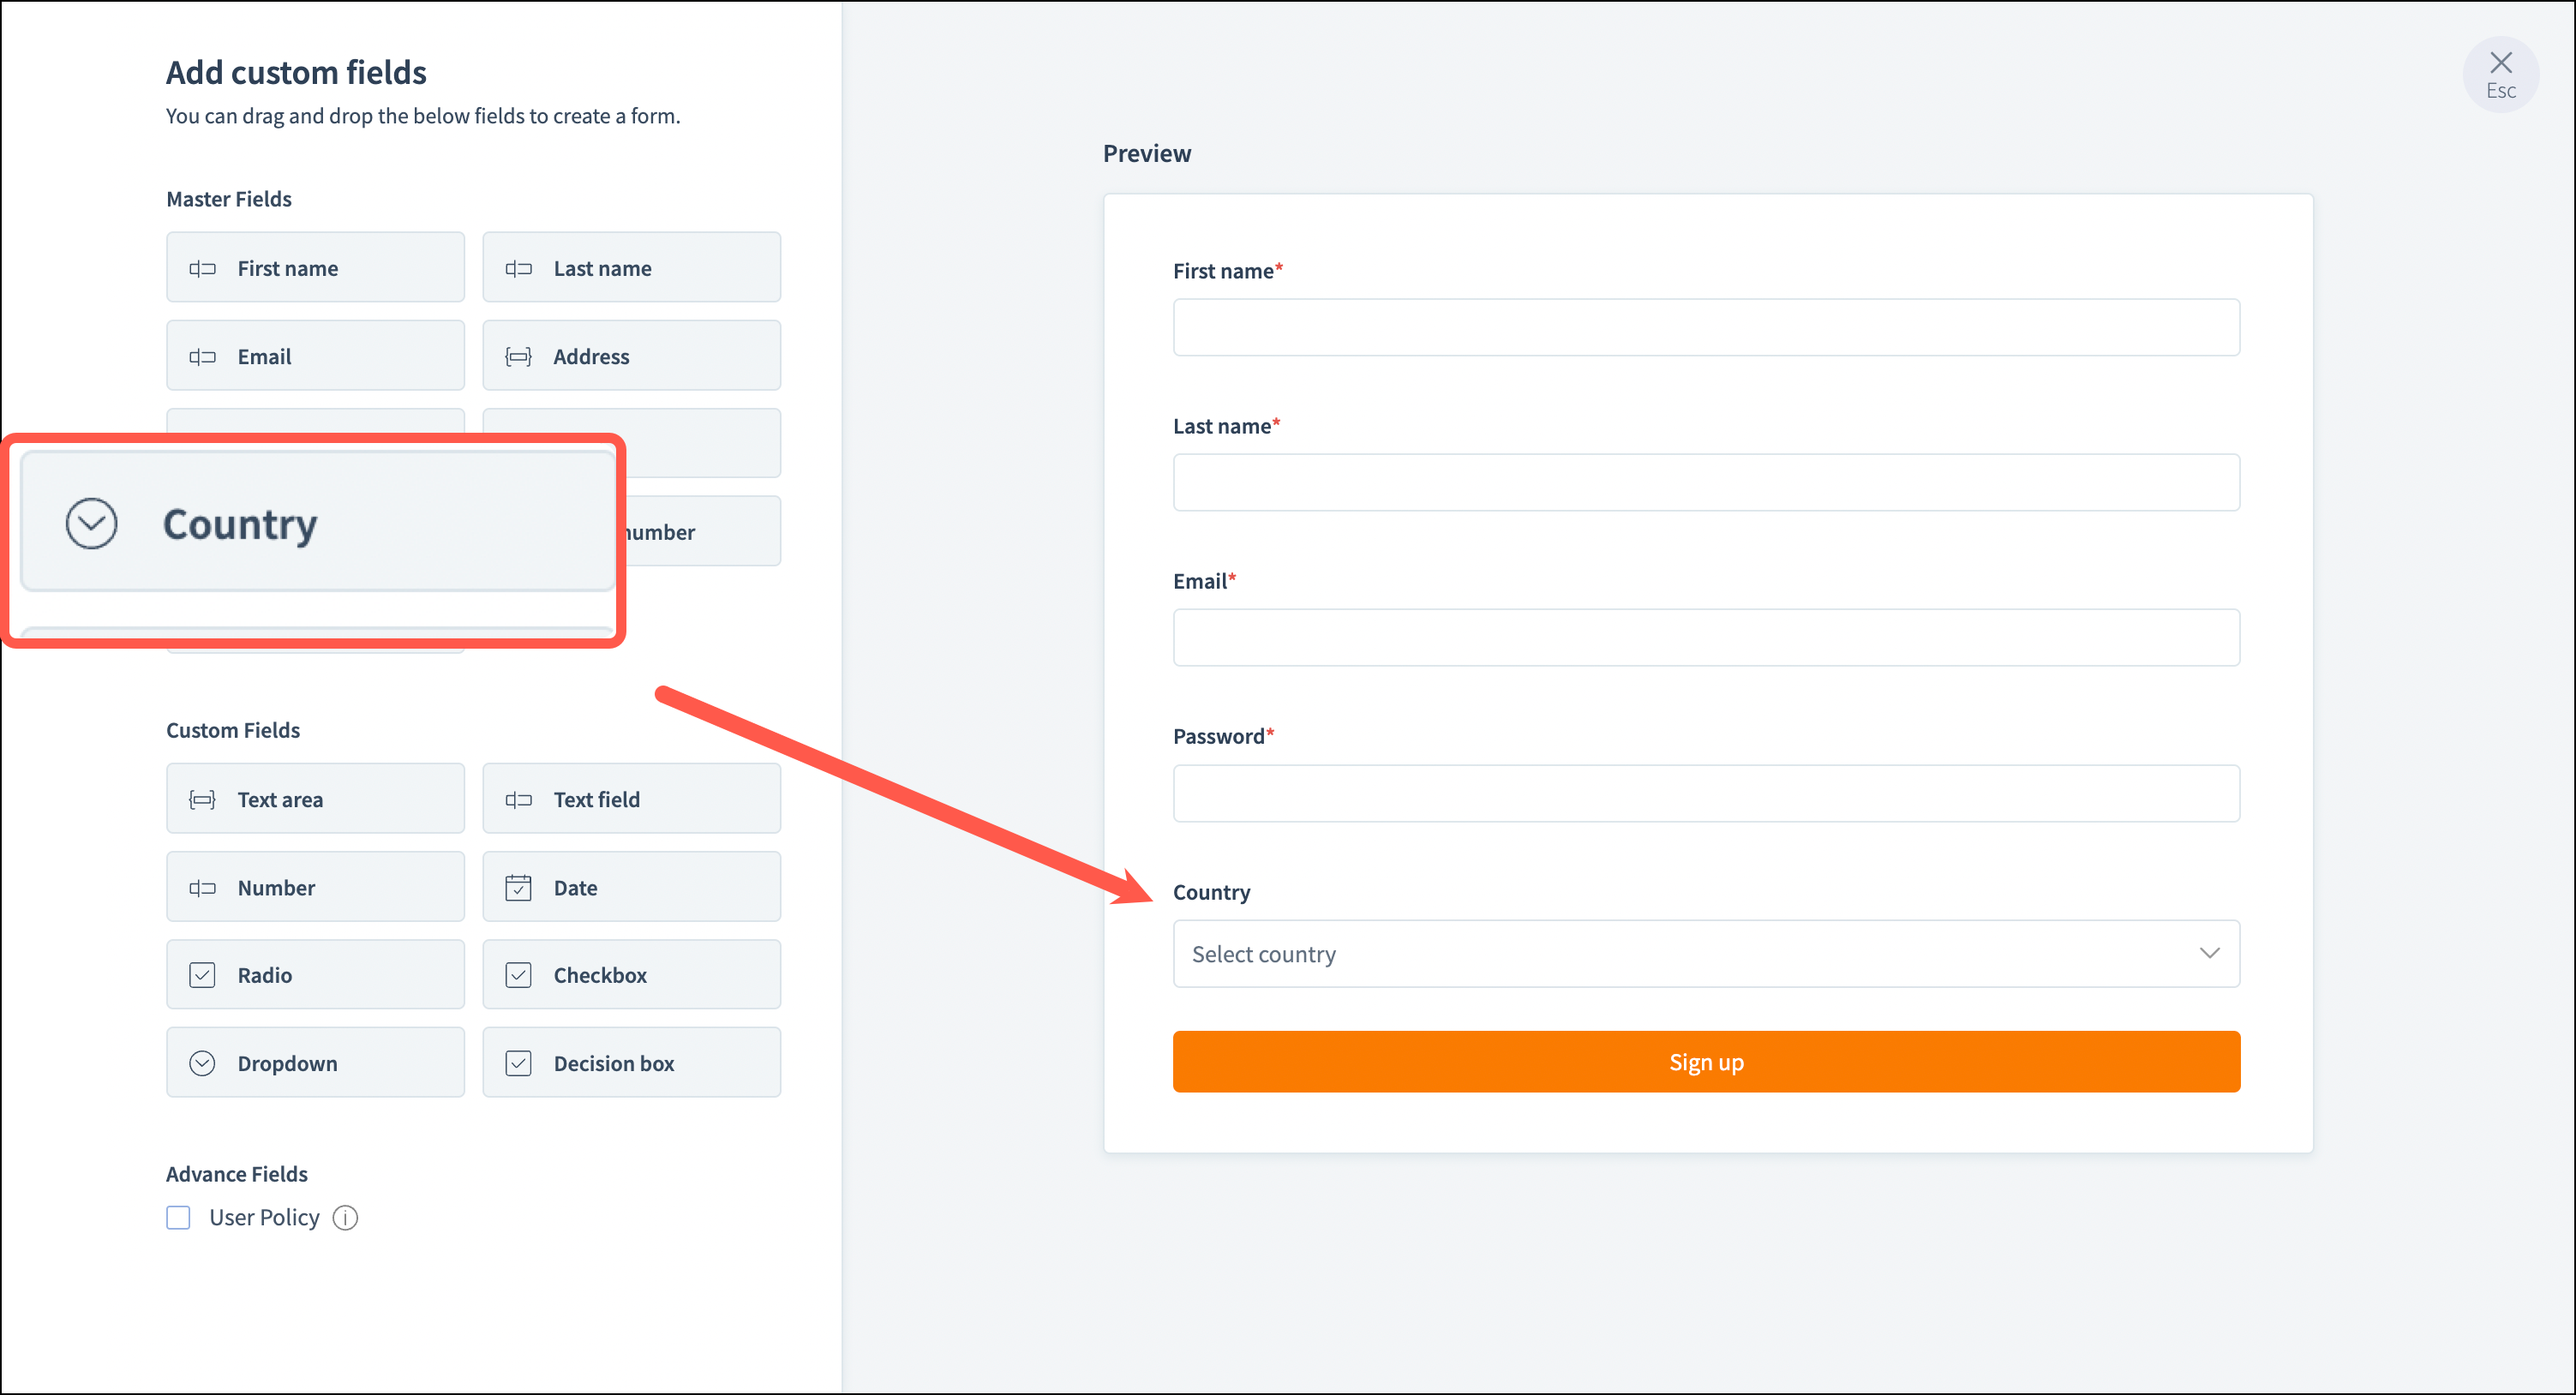
Master Fields
- Click Master field at the left side of the page.
- Drag and drop the predefined field to your form. The field will appear in your form.
Auto Number field
The Auto Number field is available in all TrainerCentral plans.
Only one Auto Number field can be added to your academy's Master Form.
Auto Numbers are generated automatically when new learners sign up.
Auto Number values cannot be edited by administrators or learners after they are generated.
Navigate to Forms and open the Master Fields tab.
Click Manage Master Fields.
Drag and drop the Auto Number field into your Master Form.
Configure the field settings:
Label Name – Enter a name for the field (for example, Unique ID or Roll Number).
Prefix – Add a text prefix if required.
Starting Number – Specify the number from which the sequence should begin.
Suffix – Add a text suffix if required.
Minimum Digits – Define the minimum number of digits to display. For example, entering 4 displays values as 0001, 0002, 0003, and so on.
Show on learner profile – Enable this option to display the Auto Number on learner profiles.
Save your changes.
Option | Description |
Prefix | Adds text before the generated number. |
Starting Number | Defines the first number in the sequence. |
Suffix | Adds text after the generated number. |
Minimum Digits | Pads the number with leading zeros to maintain a consistent format. |
For example:
Prefix: TC-
Starting Number: 1
Minimum Digits: 4
Generated values:
TC-0001
TC-0002
TC-0003
 Note: Auto Number values can't be edited manually. To update Auto Numbers, use the Regenerate option from the Master Form.
Generate Auto Numbers for existing learners
If you add an Auto Number field after learners have already joined your academy, you can generate IDs for existing records.
Open the Master Form.
Hover over the Auto Number field, and click the Regenerate icon.
Choose one of the following options:
Update for all existing records
Select this option to regenerate Auto Numbers for all learners in the academy.
Note: This action overwrites all existing Auto Number values and cannot be undone.
Update for missed records
Select this option to generate Auto Numbers only for learners whose profiles do not currently have an Auto Number.
Click Apply changes.
Generated Auto Numbers can be viewed in the learner's profile under Learner Information. While administrators can edit other master field values from the learner profile, Auto Number values remain read-only and can't be modified manually.

Only one Auto Number field can be added to the Master Form.
Auto Numbers are unique for each learner.
Auto Numbers are generated automatically during learner signup.
Existing learners can be assigned Auto Numbers using the regeneration option.
Auto Number values cannot be edited manually.
Regenerating Auto Numbers for all existing records permanently replaces previously generated values.
Custom Fields
- Click the custom field at the left side of the page.
Drag and drop the field to your form. The field will appear in your form.
Text area
Number
Radio
Drop down
Text field
Check box
Date
Decision box
The field type available in custom fields are,
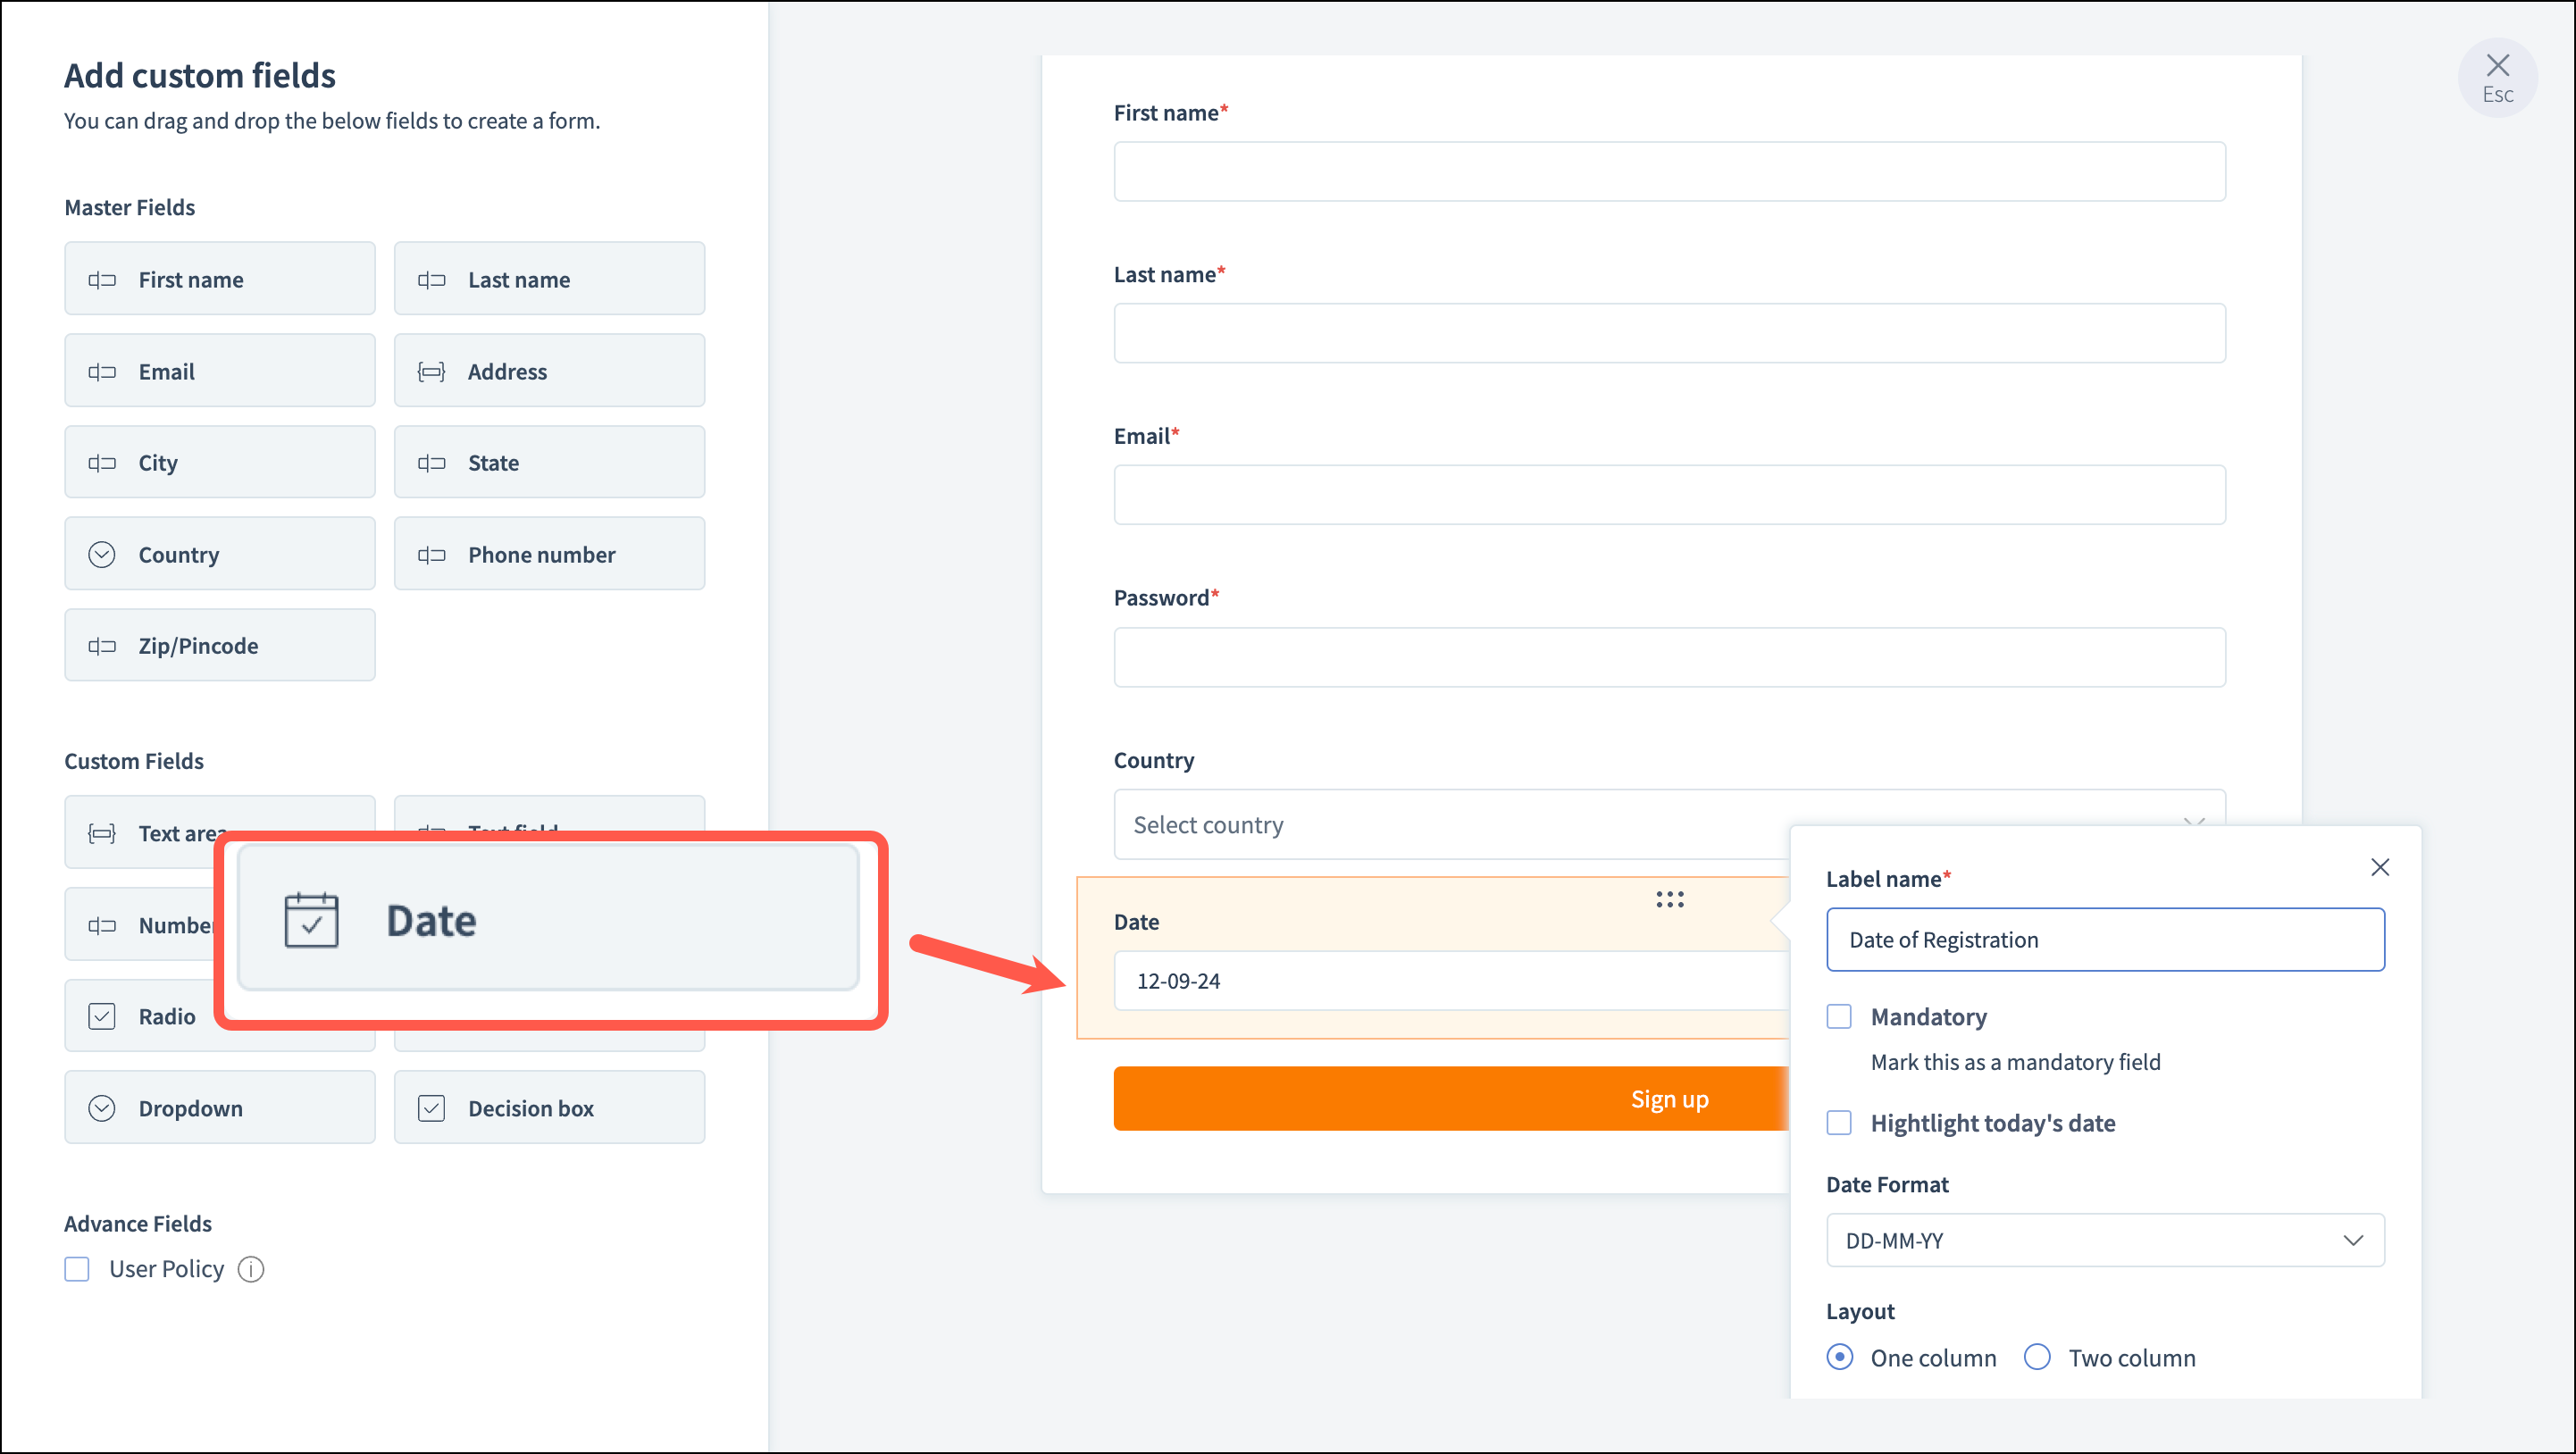
Edit Fields
- Click the text box, the edit icon will be displayed at the right side of the text box.
- Select the edit icon.
- Editable Label name
- Enable Mandatory Layout
Delete Fields
- Click the text box. The edit icon and delete icon will be displayed at the right side of the text box.
- Select the delete icon to delete the text box.