Custom Domain: How to link CNAME records in popular Domain Name Service (DNS) providers?
In TrainerCentral, when you add a custom domain, you will be required to create a CNAME entry for that custom domain in your domain service provider after which you can use the custom domain to host your courses and workshops in TrainerCentral. Given below are detailed steps on how you can configure CNAME for your custom domain with your provider. Once the CNAME is configured, you can add and verify the custom domain in TrainerCentral.
How to Set Up a CNAME Record in GoDaddy
GoDaddy is a popular domain registrar, web host, website builder, and website services provider.
Let's look at the steps for setting up a CNAME record in the GoDaddy domain registrar.
Let's look at the steps for setting up a CNAME record in the GoDaddy domain registrar.
- Log into your GoDaddy account.
- Navigate to the All Products and Services section and click on the DNS option. The DNS Management page will be displayed.
- Click the Add New Record button under DNS Records.
-
Enter the details for your new record.
Type: Select CNAME.
Name: Enter the name of your subdomain.
 A subdomain always precedes your domain name. For example, in https://training.zylker.com, training is your subdomain and zylker is your domain name.
Value: Copy and paste the value from TrainerCentral.
A subdomain always precedes your domain name. For example, in https://training.zylker.com, training is your subdomain and zylker is your domain name.
Value: Copy and paste the value from TrainerCentral.
The value will be in the format zst********.trainercentral.cs.zohohost.com.TTL: The amount of time for which the server should cache information before refreshing. The default setting is one hour.
- Click Save.
You have set up a CNAME record in the GoDaddy domain registrar. To learn more about configuring your domain in TrainerCentral, please refer this help article.
Domain forwarding
The domain forwarding feature triggers automatic redirection of learners to a destination URL.
Learners might access your site with or without the "www" portion (for example: zylker.com instead of www.zylker.com). Domain forwarding ensures that they still arrive at the intended destination.
- Select the Forwarding tab next to DNS Records. The Forwarding window will be displayed.
-
Set the URL protocols to https.
Please ensure that your custom domain is SSL certified. - Enter the forwarding URL.
- Choose the Forward Type from the following options:
Permanent (301): Learners can access the destination URL and search engines will display the new site content as the domain's permanent location.
Temporary (302): Learners can access the destination URL only for a limited time.
Forward with masking: Learners can access the destination URL, but the address bar will display the original domain name rather than the destination URL. -
Click Save.
How to Set Up a CNAME Record in Bluehost
1. Log into your Bluehost account.
2. Select domains, then zone editor, and choose the domain you'd like to have your TrainerCentral site available at.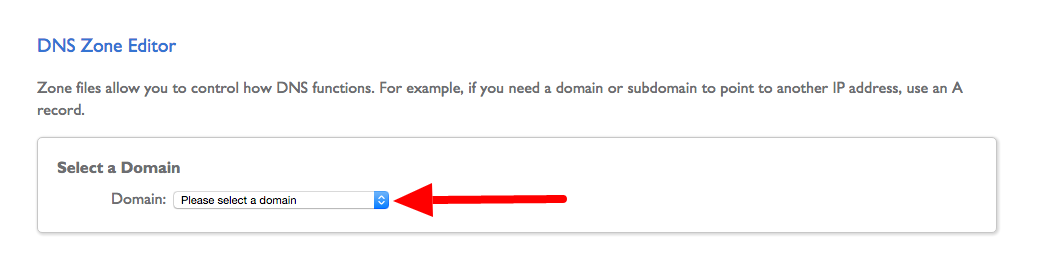
2. Select domains, then zone editor, and choose the domain you'd like to have your TrainerCentral site available at.
3. Select Add DNS Record and fill out the following fields:
Host Record: This will be your desired subdomain.
TTL: Leave the default value. It is often 3600, but may be different depending on your account type.
Type: CNAME
Points To: Enter the URL specified in the Custom Domain section of TrainerCentral (screenshot attached below)
4. Next, select add record to save your CNAME record.
Once the CNAME is configured here, you can add and verify the domain mapping in TrainerCentral and proceed to apply for the SSL certificate.
Using a CNAME Record in Hover
1. Log into Hover, and choose Domains from the Your Account dropdown:
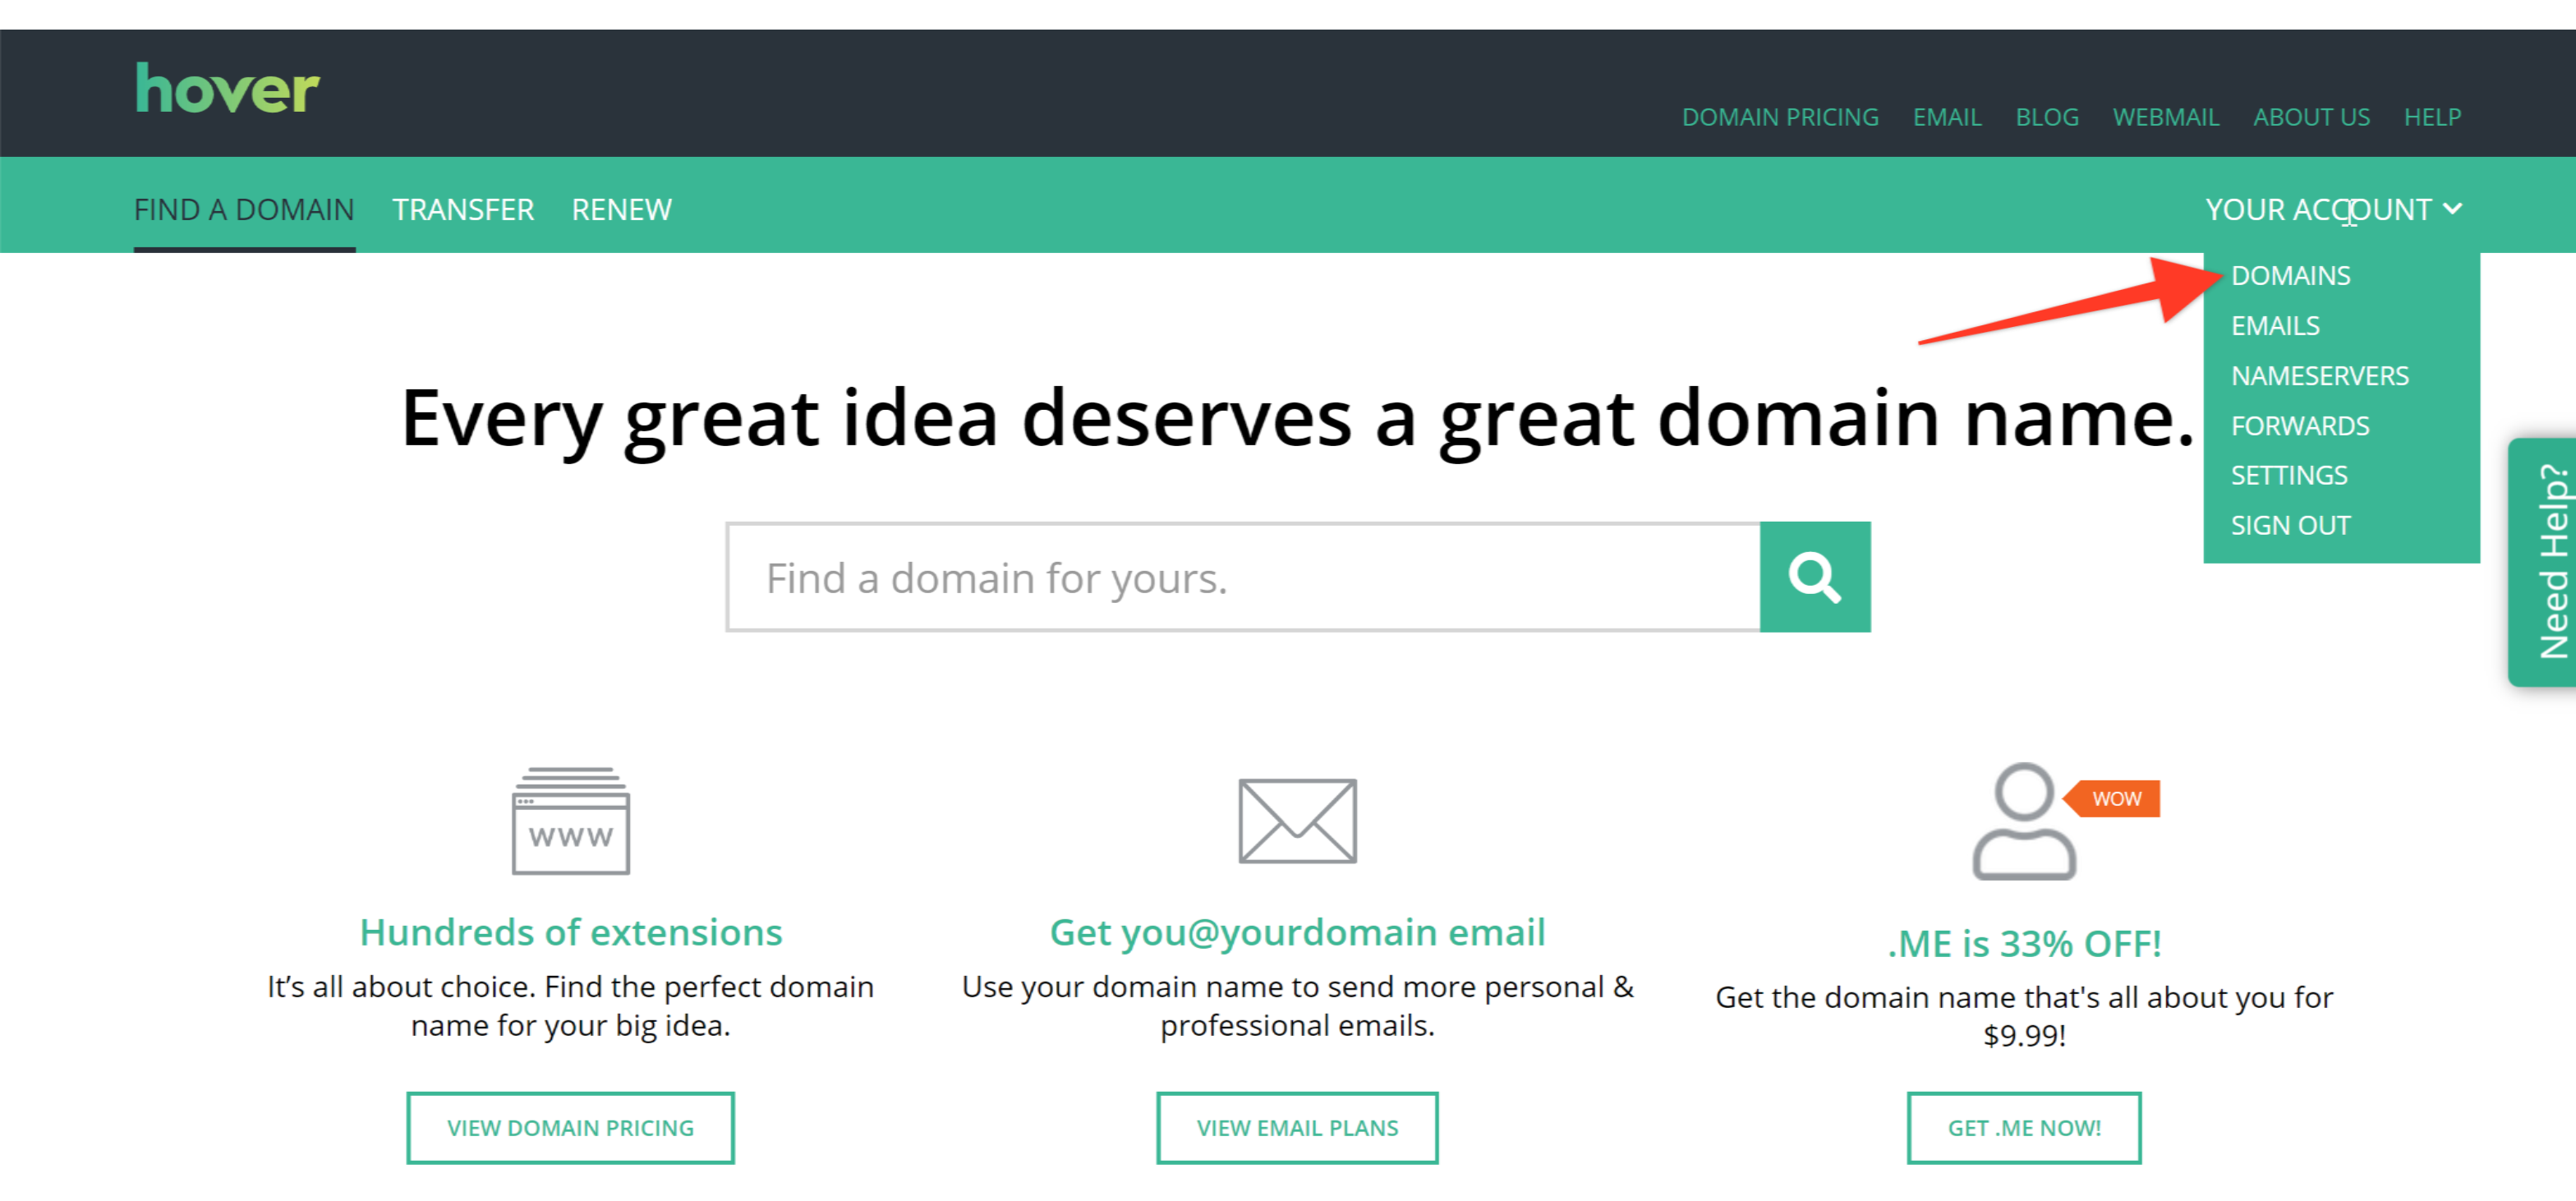
2. Select the domain you would like to use to set up your custom URL for your TrainerCentral site. Click on the DNS tab.
4. From there, click on the Add A Record button.
5. In the pop up, select a CNAME record from the dropdown and complete the fields.
Hostname: Your desired subdomain.
TTL: leave as the default.
Once the CNAME is configured here, you can add and verify the domain mapping in TrainerCentral and proceed to apply for the SSL certificate.
How to Set Up a CNAME Record in CloudFlare
1. Log in to your CloudFlare account and in the top menu, select DNS.
2. Under DNS Records, you will see an option to add a record. Fill out the following
First dropdown menu: Select CNAME
Name: This will be your desired subdomain.
Automatic TTL: You can leave this as the default. TTL stands for Time to Live and simply indicates how long it will take this change to propagate.
Cloud icon: Click this until you see a grey cloud icon. This will ensure it is set to DNS only, which means traffic will not go through CloudFlare.
5. Select Add Record
Once the CNAME is configured here, you can add and verify the domain mapping in TrainerCentral and proceed to apply for the SSL certificate.
Related Articles
Custom Domain
As a course trainer, after creating and publishing your courses, the next step is to make them available to your intended learners through a website. However, to achieve this, you need to have a domain where the course content will be hosted and ...How to set up SPF and DKIM TXT records for your domain
After copying the SPF and DKIM record values, you can go to your domain hosting website and paste in the copied record values. We've provided the steps of the most popular domain-hosting websites below. However, if you don't find your website in the ...Authenticate email domain in TrainerCentral
Domain Authentication is a mechanism that verifies the email from the point of its origin by validating the email sender. It checks emails to rule out any possibility of spamming or spoofing thereby protecting the sender's good reputation. ...Custom Payment Gateway
A payment gateway is a network system that facilitates the transfer of funds from one person to another. It streamlines the online payment process and facilitates faster and more secure payment transactions.In TrainerCentral, we provide integration ...Custom Forms
TrainerCentral allows you to create a custom form to suit your specific data collection requirements which you can add to your website, course pages etc. Create and edit a custom form 1. To create a custom form, navigate to the Forms section under ...