Steps to migrate to the new website builder
In TrainerCentral, we have launched a new website builder to enhance your website-building experience and strengthen your academy’s online presence. By migrating your website to the new builder, you can create an intuitive, professional, and well-structured site that helps you market your offerings more effectively. In this help article, we’ll walk you through the steps involved in creating and migrating your academy website.
Create your academy website
Create your academy website using the new website builder to elevate your business, captivate your audience, and build trust and credibility with your learners—all in just a few clicks.
- Select the Site tab in the left pane.
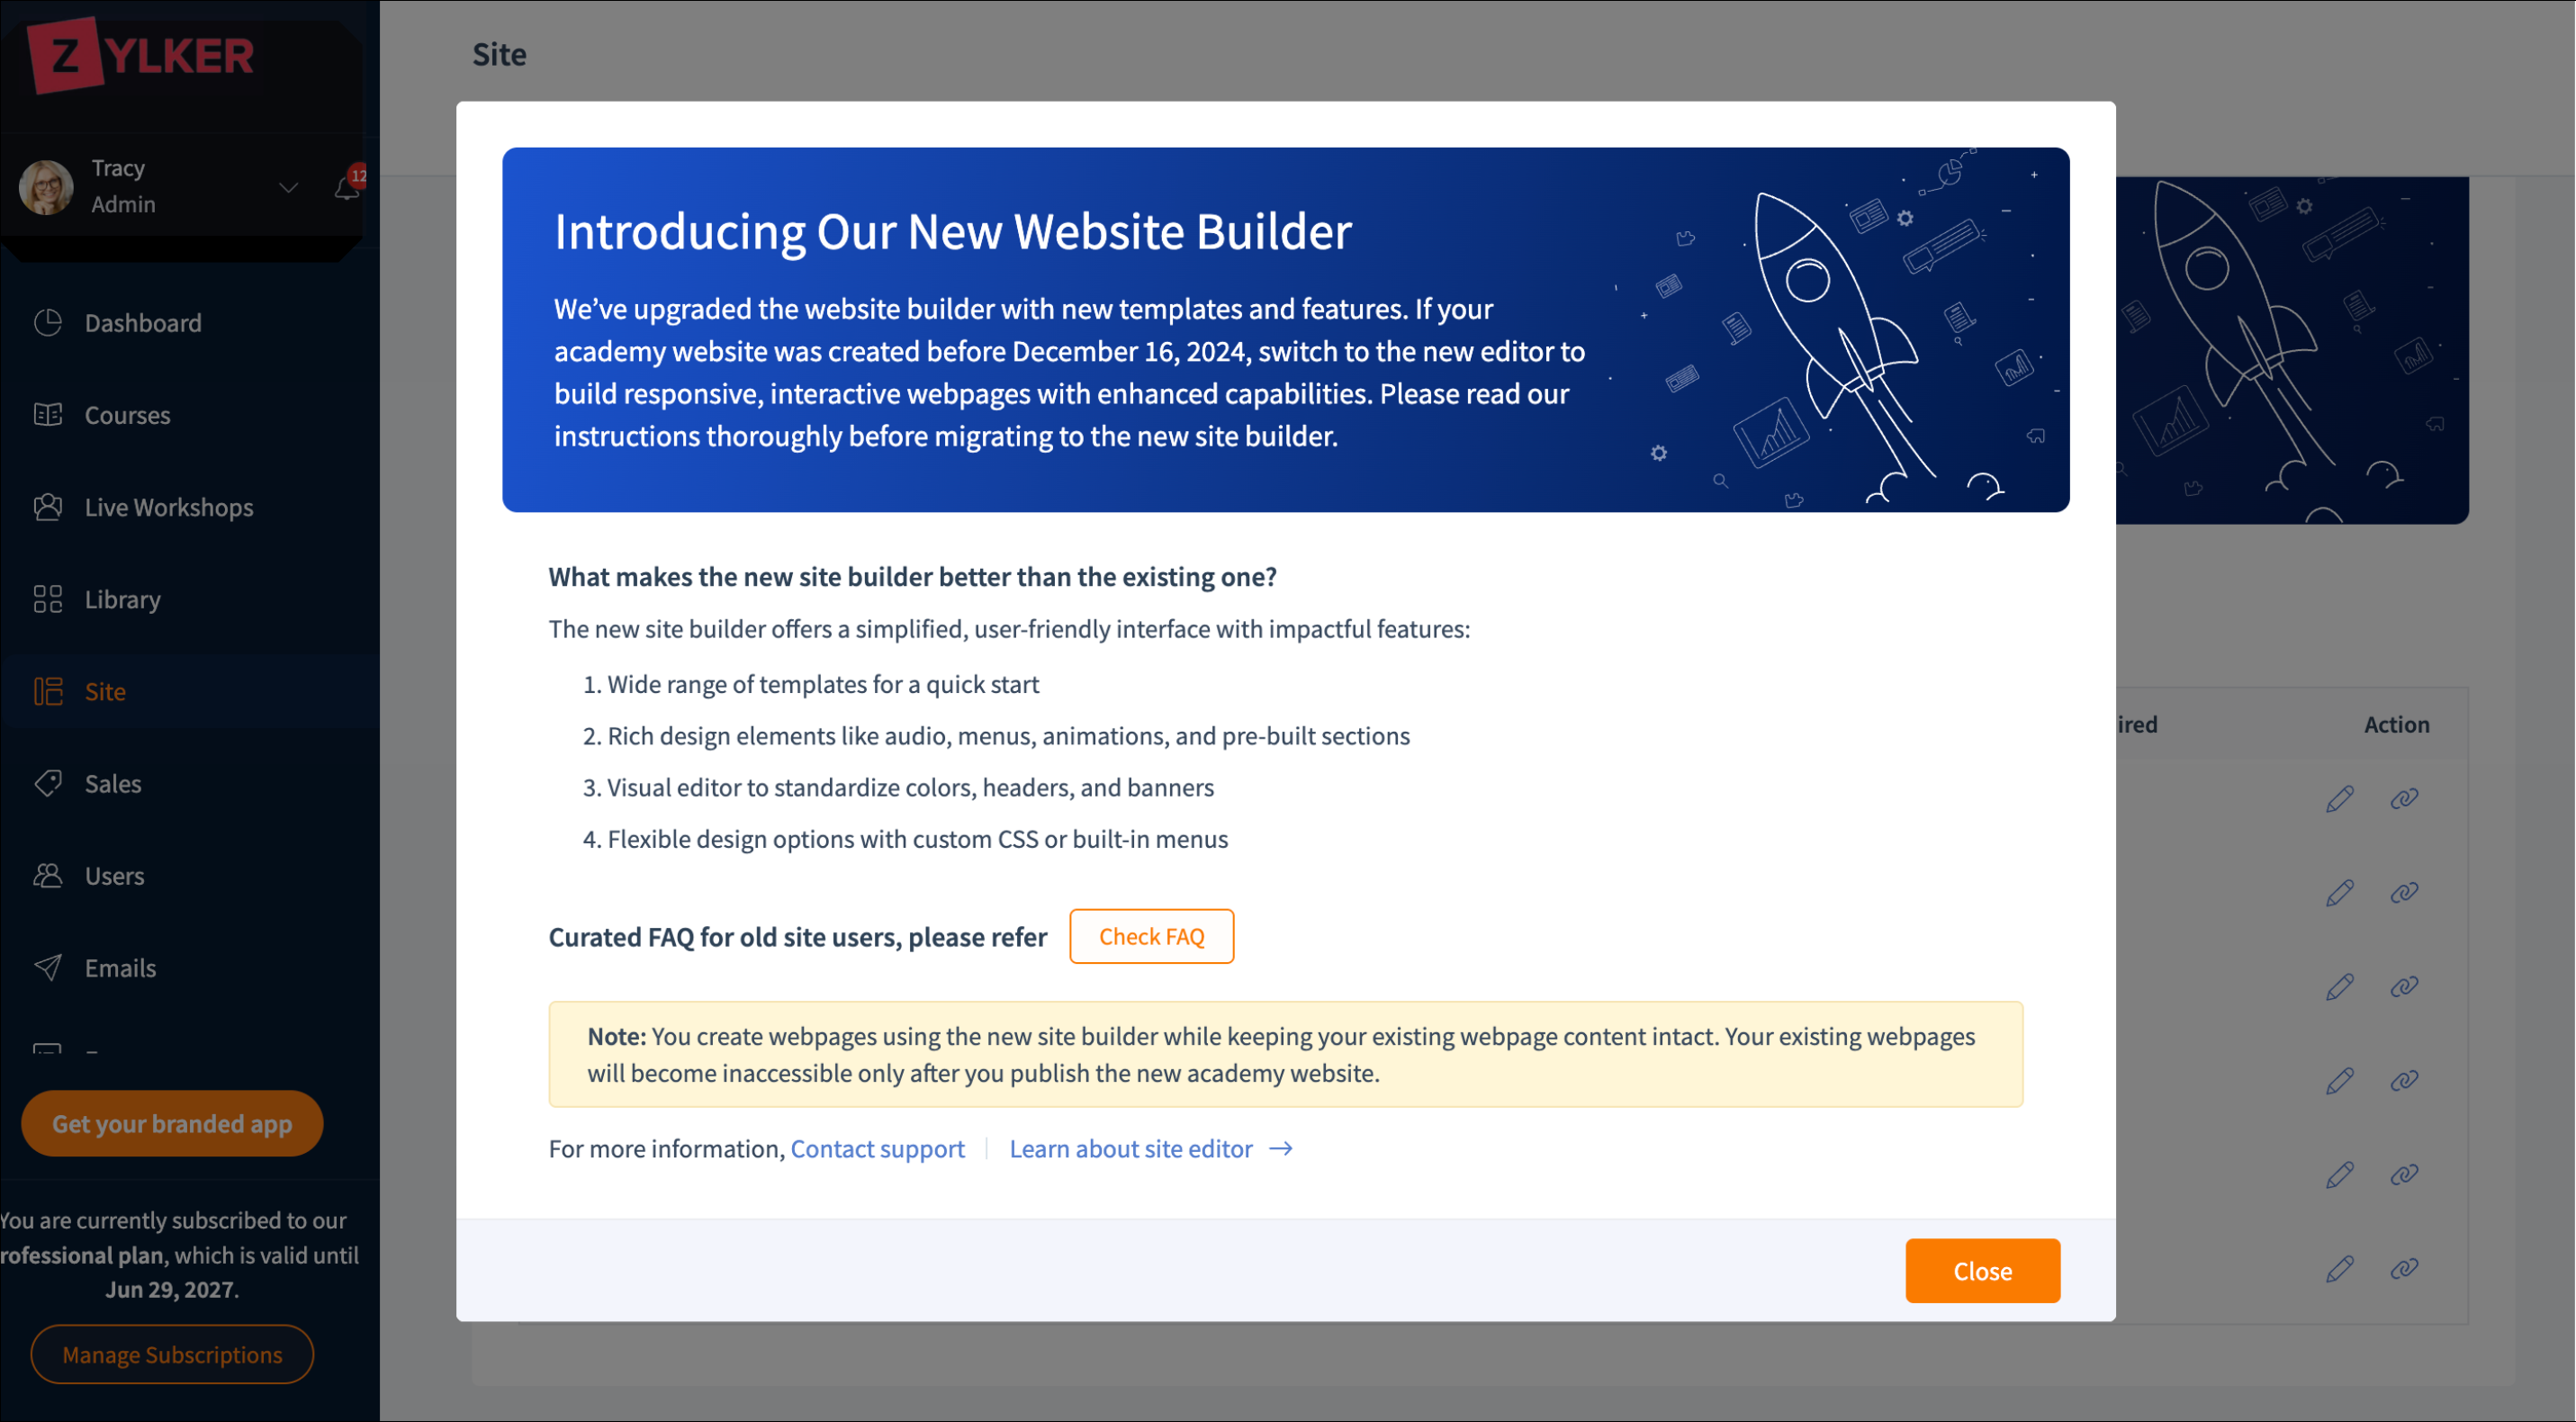
The page has three sections:
A website preview thumbnail
An introduction to the new website builder
A list of academy website pages. - In the Introduction to the new website builder section:
Click Try New Builder to proceed with the site migration. The Confirm to Create Website window will be displayed.
Click the View Info button to view the Curated FAQ that provides detailed information about migration. - In the Confirm to Create Website window:Read the instructions thoroughly before proceeding.Check the Yes, I understand box to confirm after you have read the above-mentioned points, then click Create Website. A wide range of templates will be displayed.
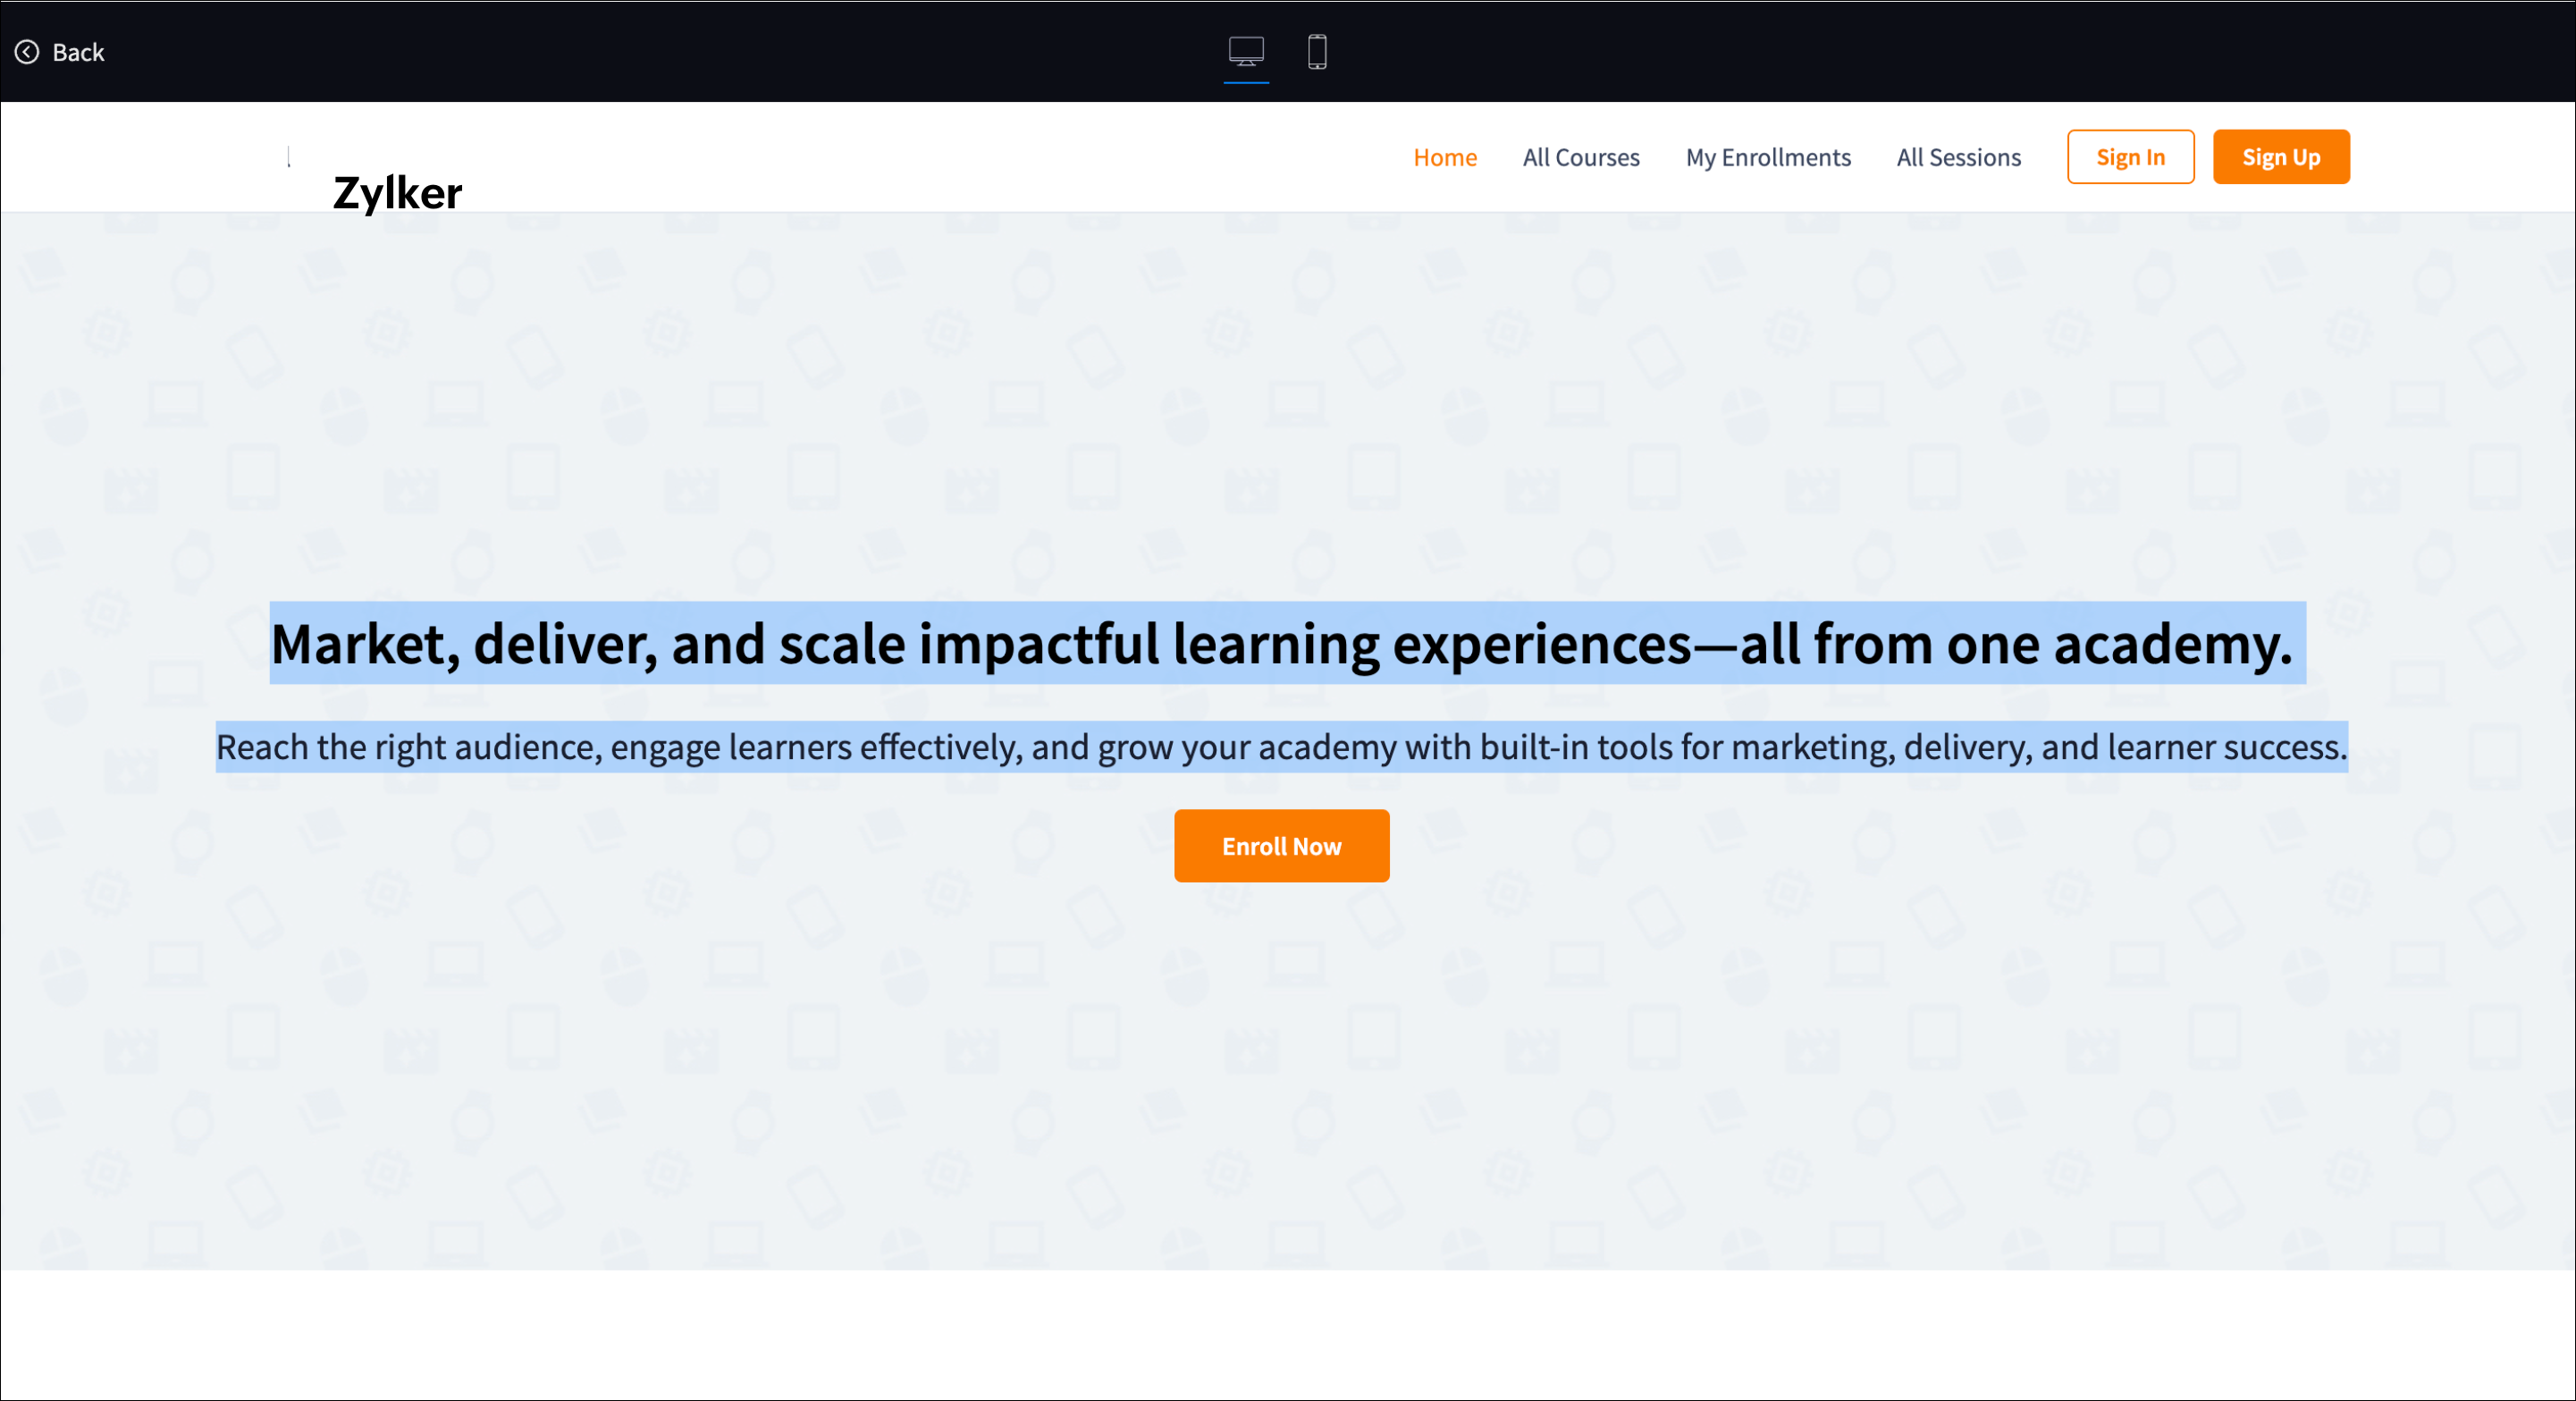
- Hover over the selected template and click Preview Site.
- Click Choose to create your academy website with the selected template.
You have now successfully created an academy website that aligns with your brand.
The new website builder offers a drag-and-drop interface, powerful tools, and customizable templates to help you build a stunning, scalable academy website. Now, you can either create the website from scratch or migrate content from the existing website to the new one.
We'll look at the steps on how to migrate content from the existing website to the new one.
Migrate the academy website content
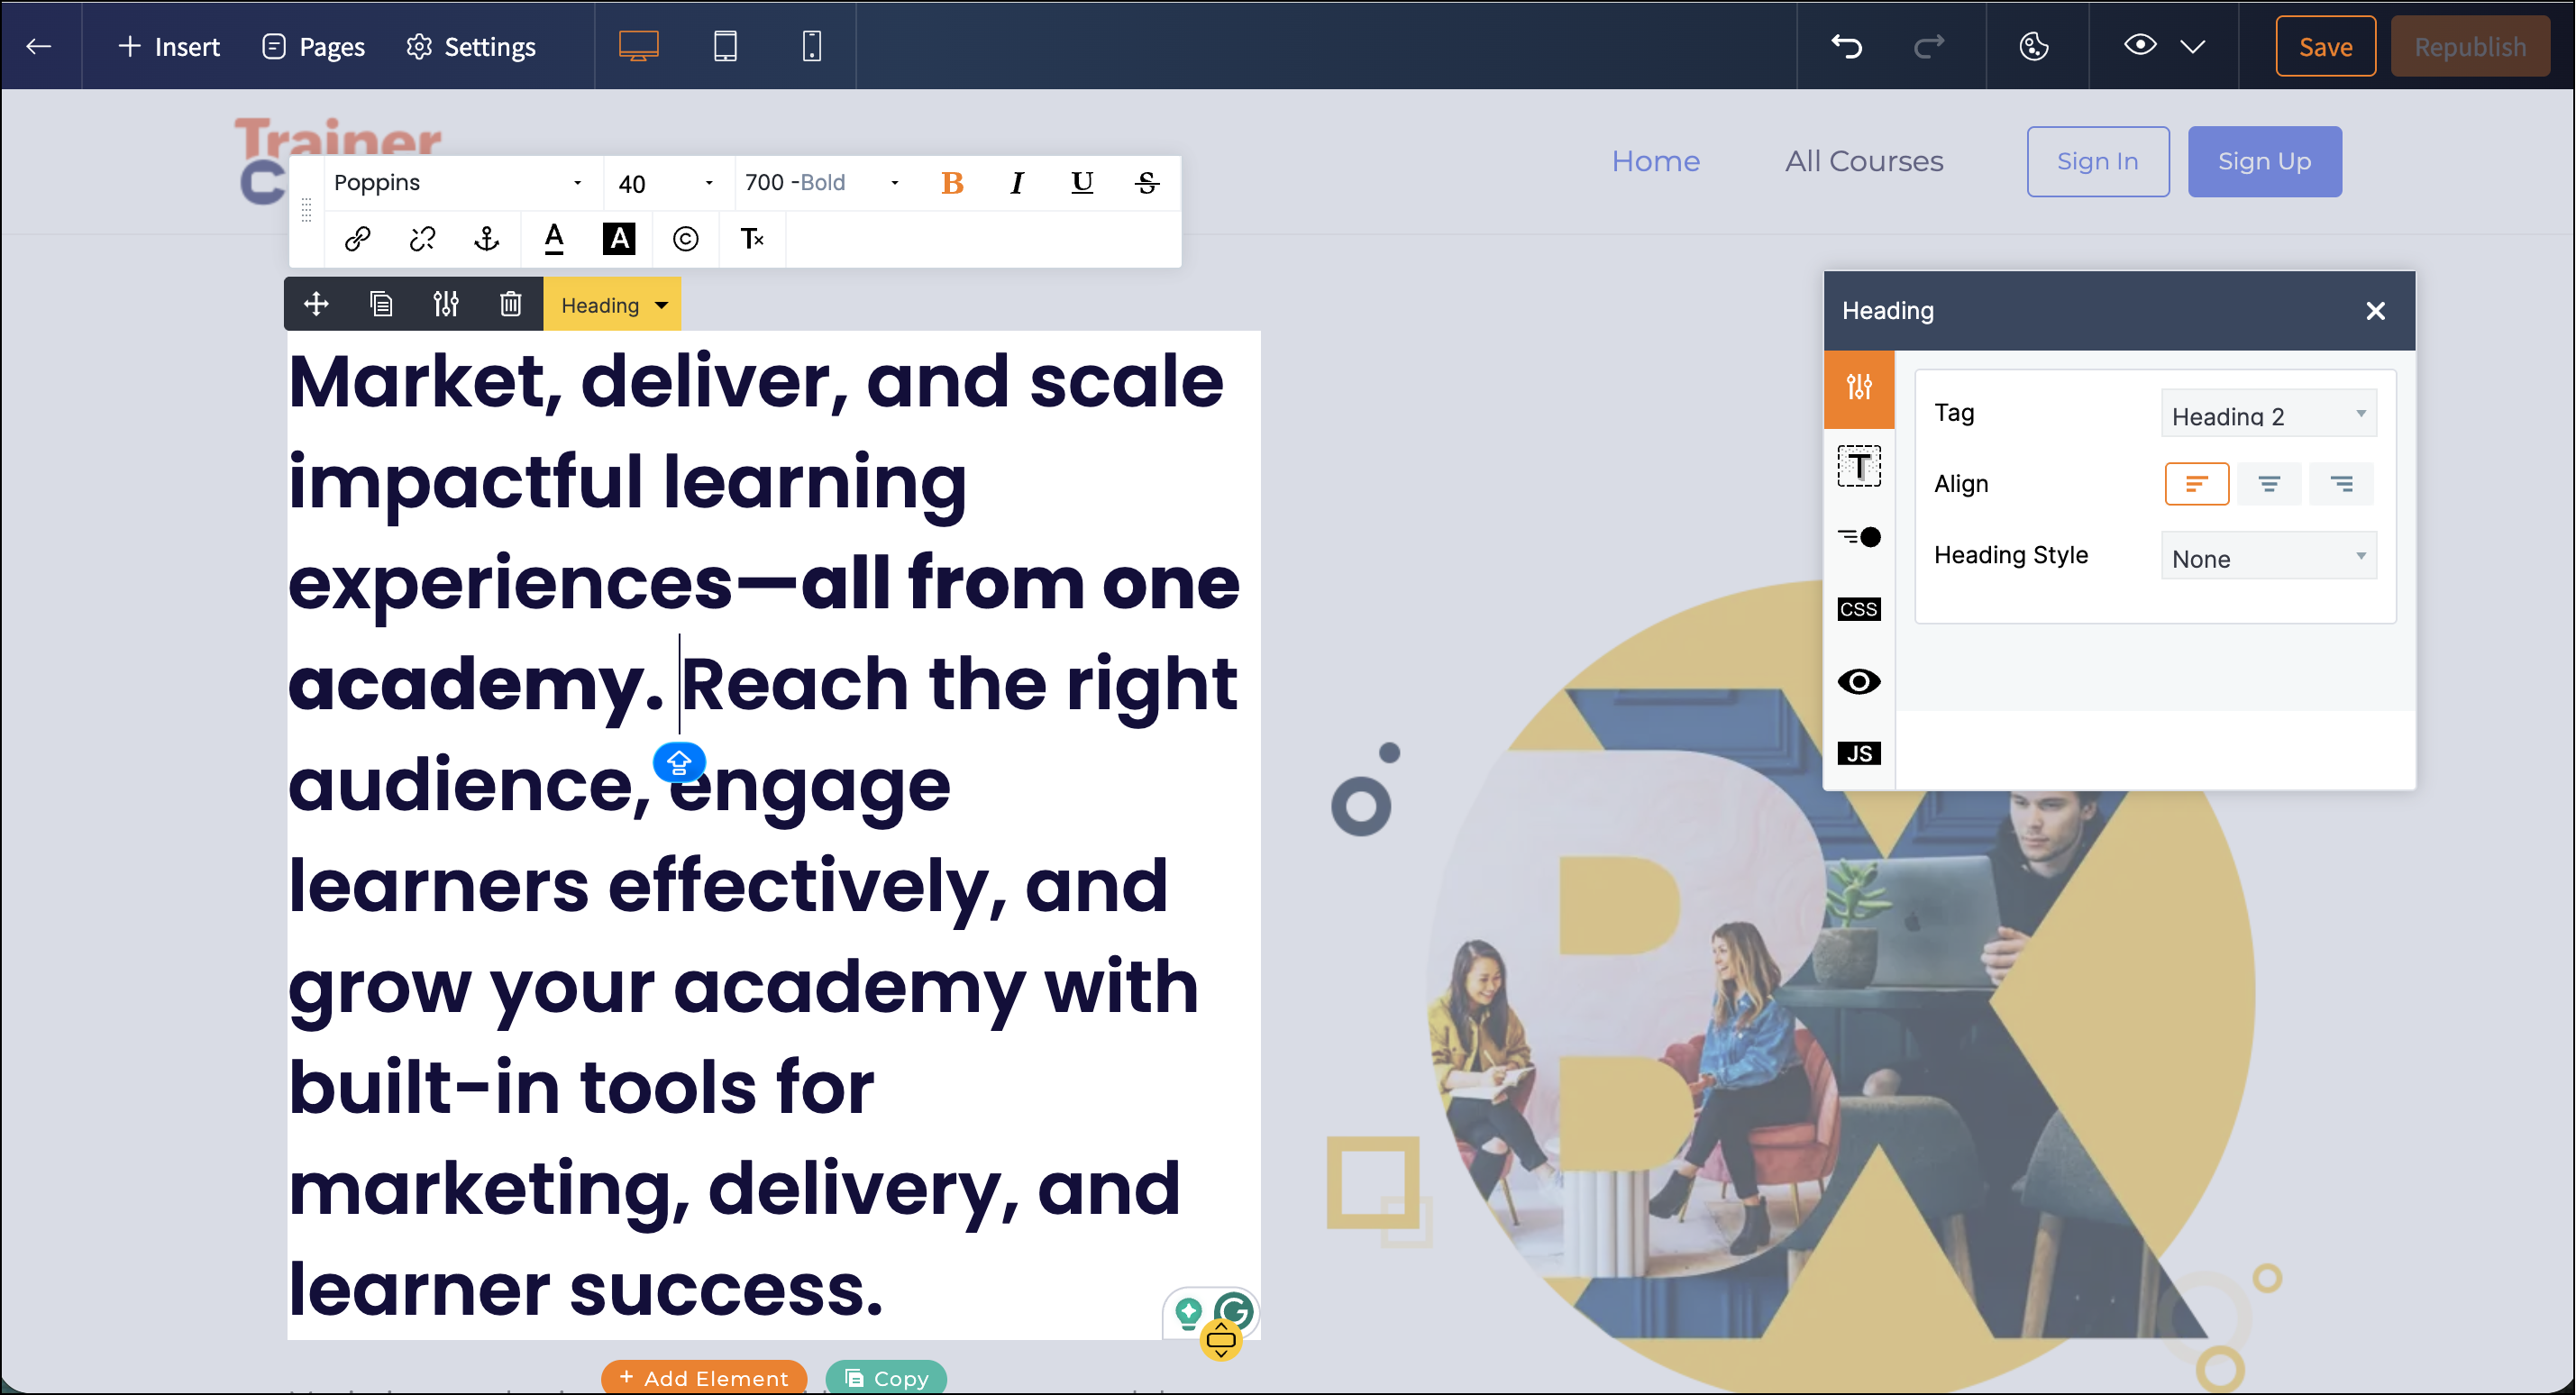
Copying content from the existing website to the new one can be done easily by keeping both the website and the new website builder open in adjacent tabs.
You can achieve this by following these steps.
- In the Introduction to the new website builder section, click the Open New Site button. The new website will be displayed in a new tab.
- In the Website preview thumbnail section, click the Preview button. The existing website will be displayed in the same tab.
Alternatively, you can also click the preview icon of the Page URL under Pages. The existing website will be displayed in the same tab. - Copy the required content from the existing website to the new one.
- Repeat these steps until you copy the required content. You have now successfully migrated the content from the existing website to the new one.
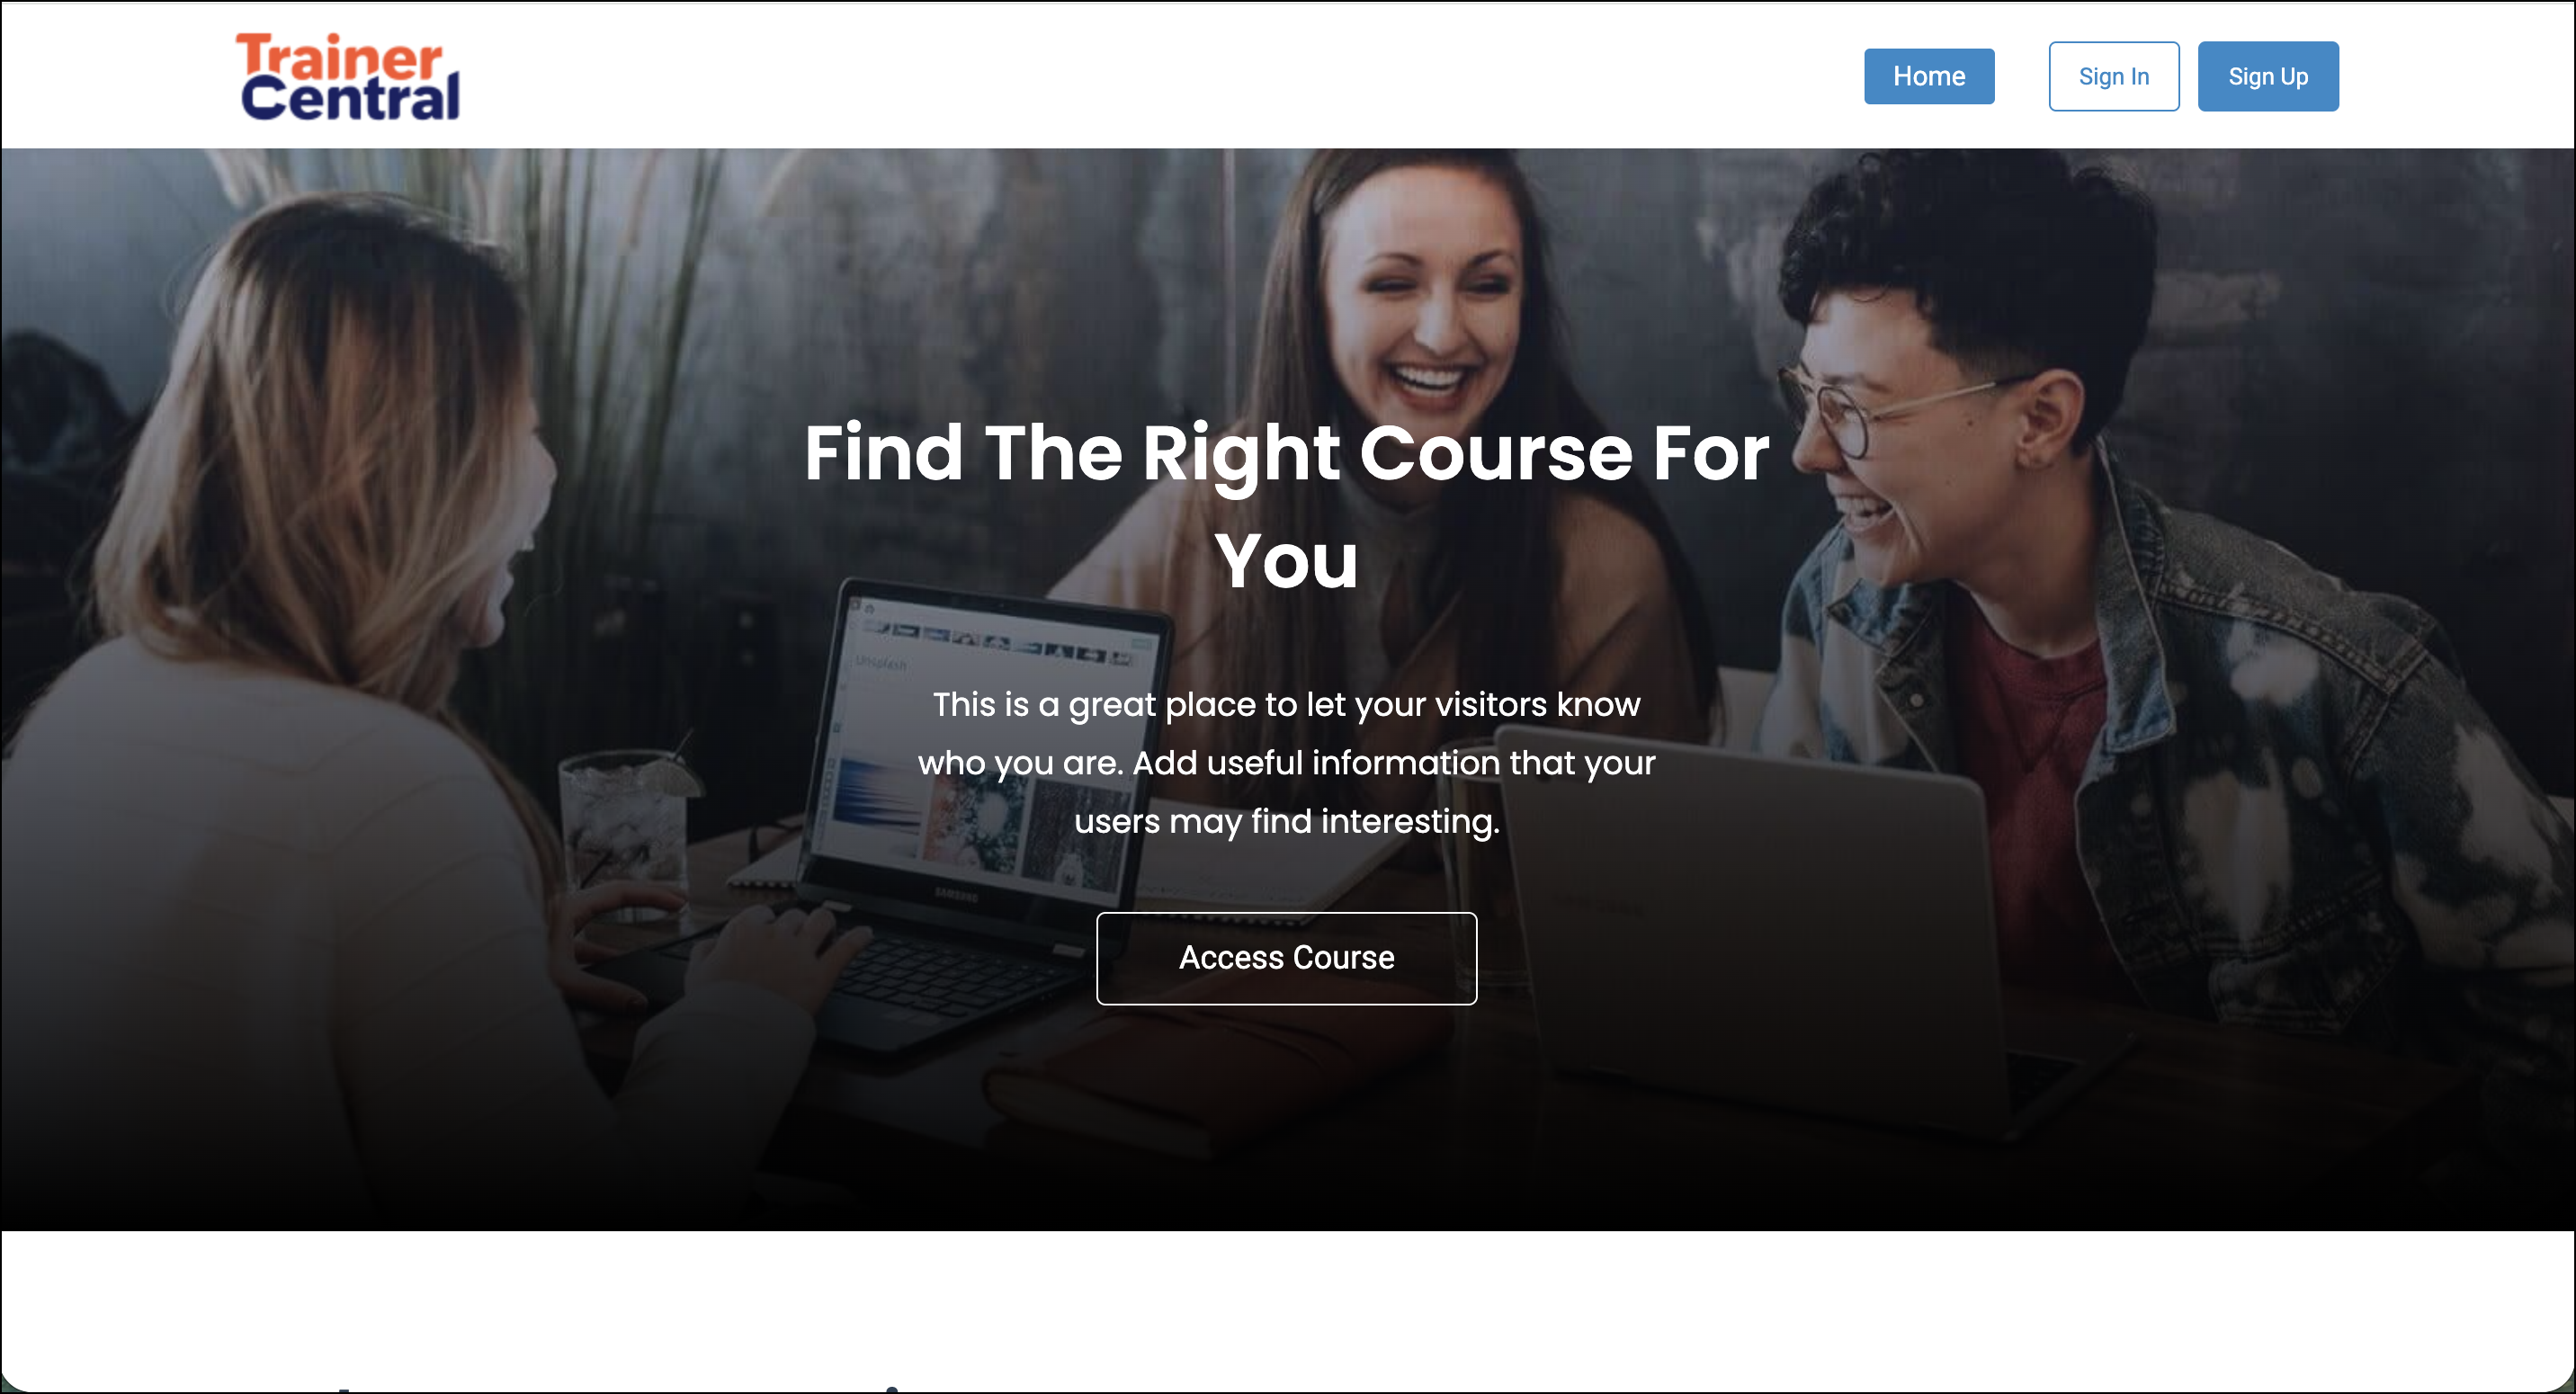
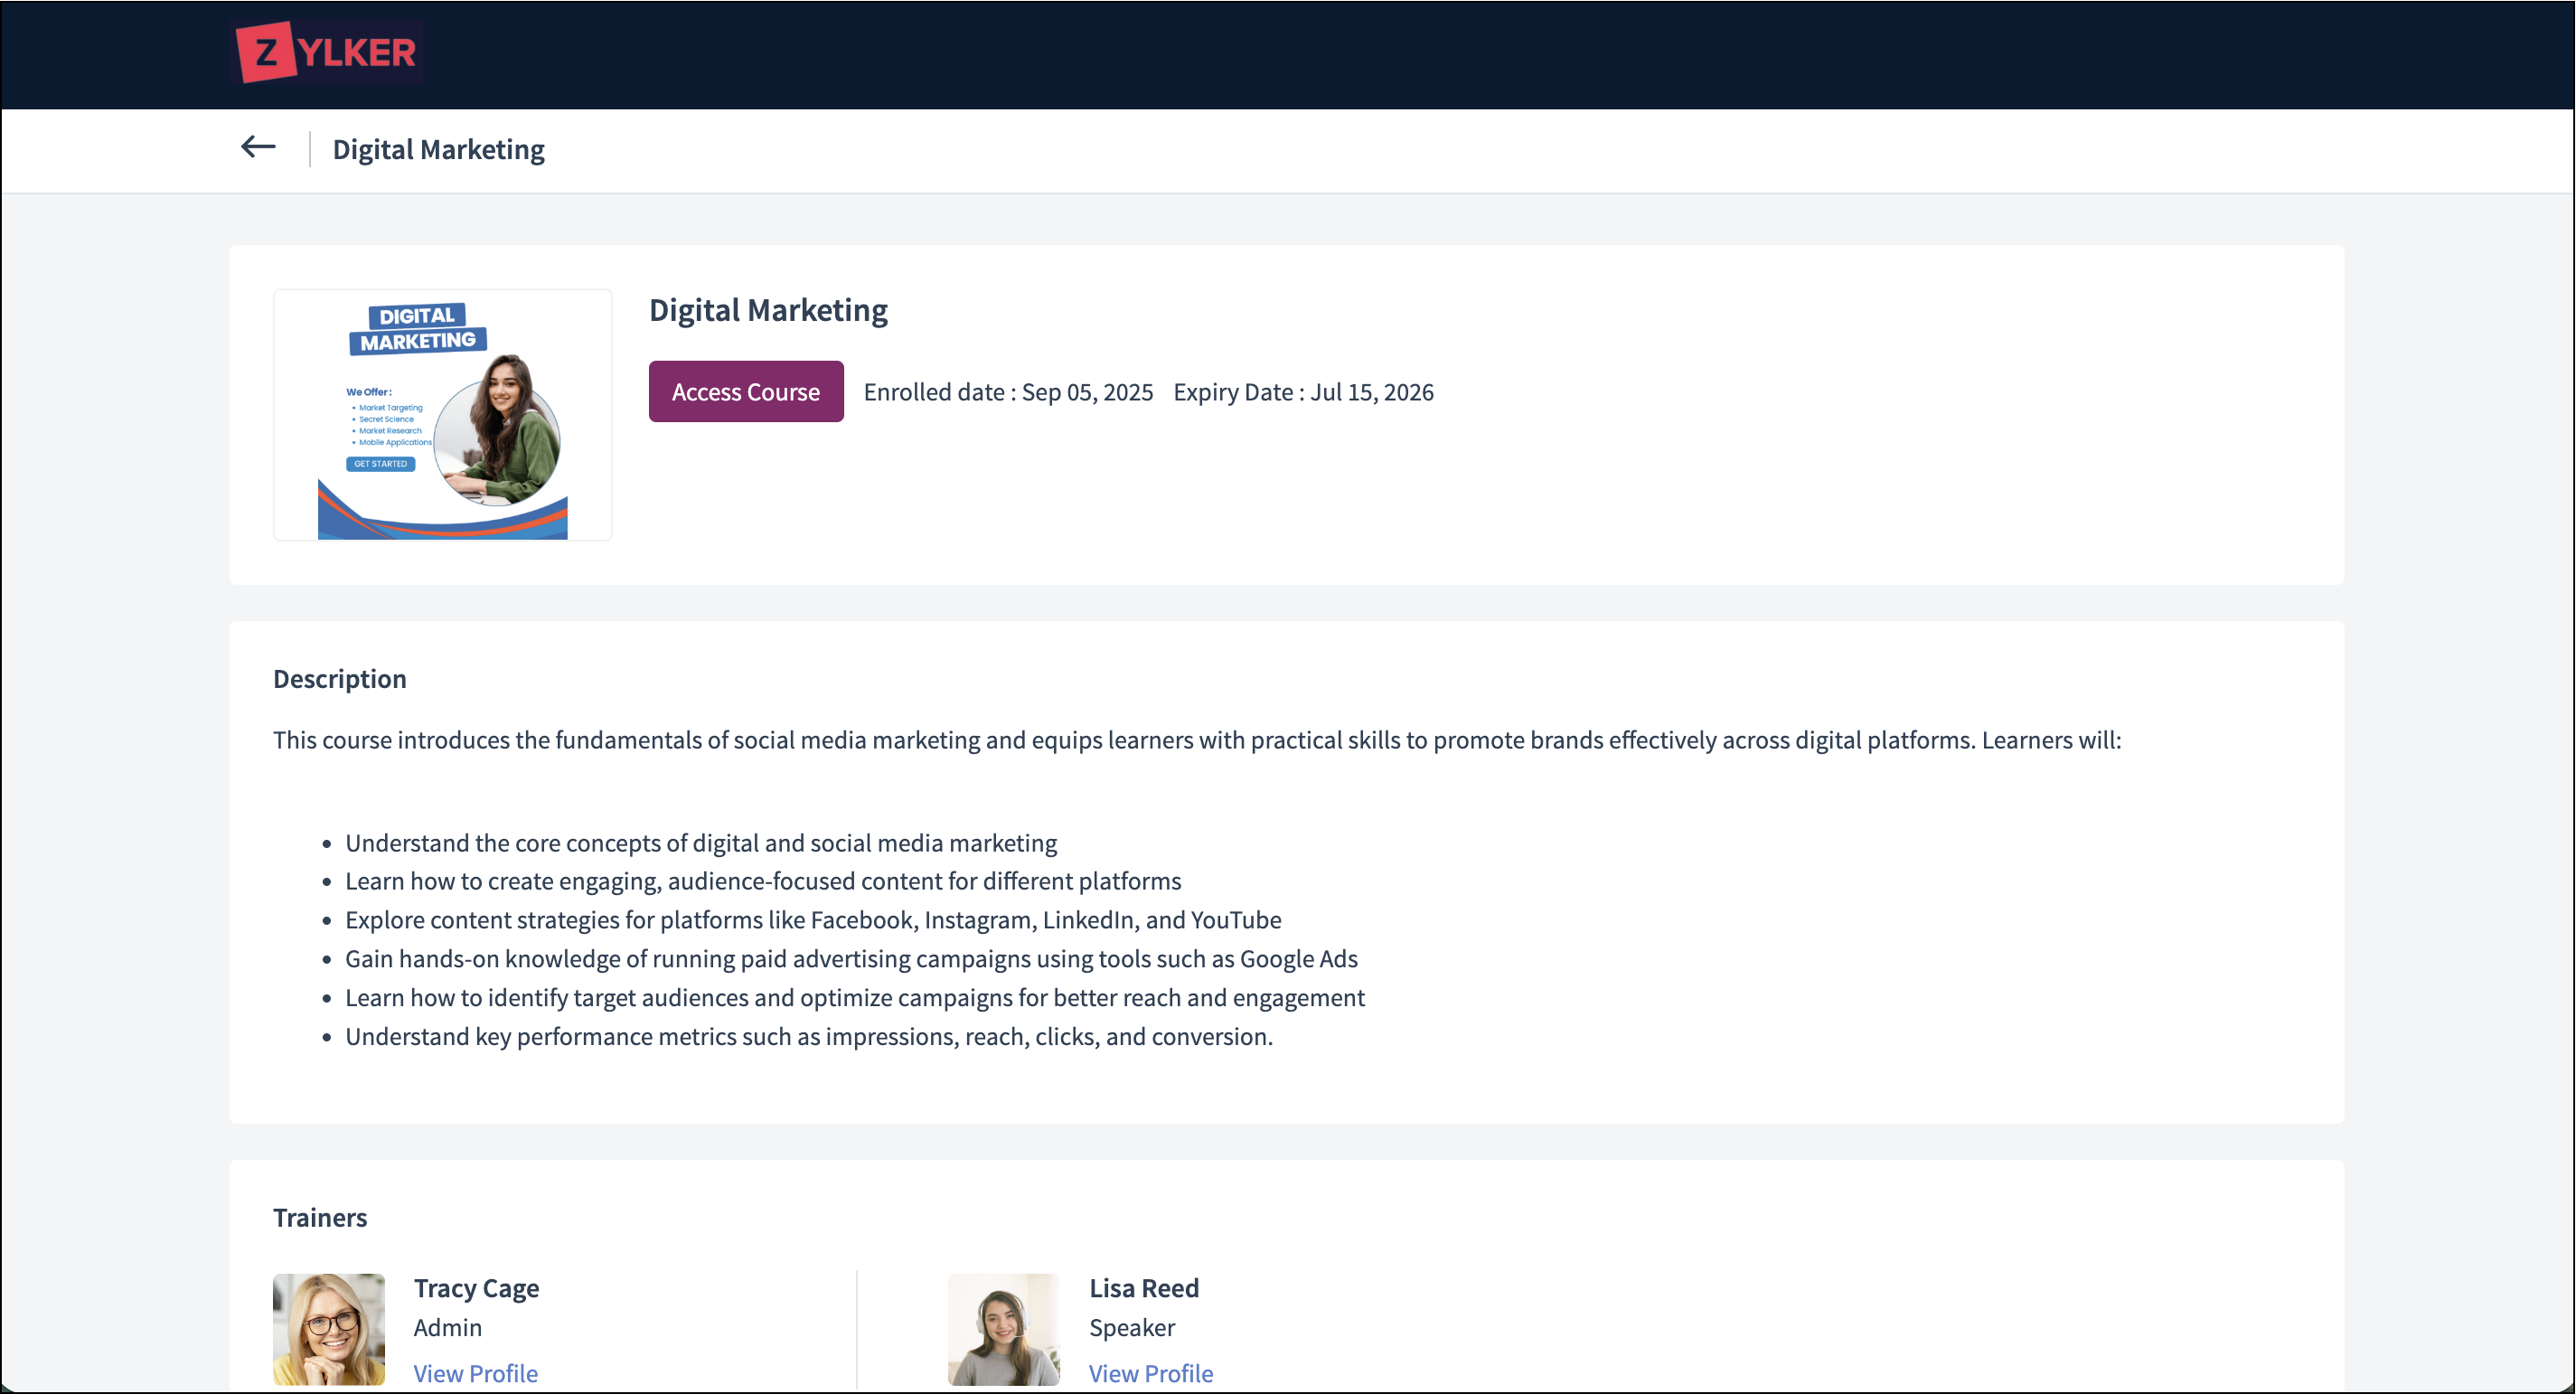
Existing website
New website
New website

Note: In addition to content migration, you can also customize the website with images, videos, widgets, visual editor, and more. Refer to this help article to learn more.
Course and session webpage
A dedicated course or session web page helps you reach more learners by enhancing the visibility of your course offerings, highlighting their value, and guiding learners to start their learning journey.
If your existing courses use the default webpage with no customization, no content migration is required for your course webpage. You can add more content afresh, if needed.
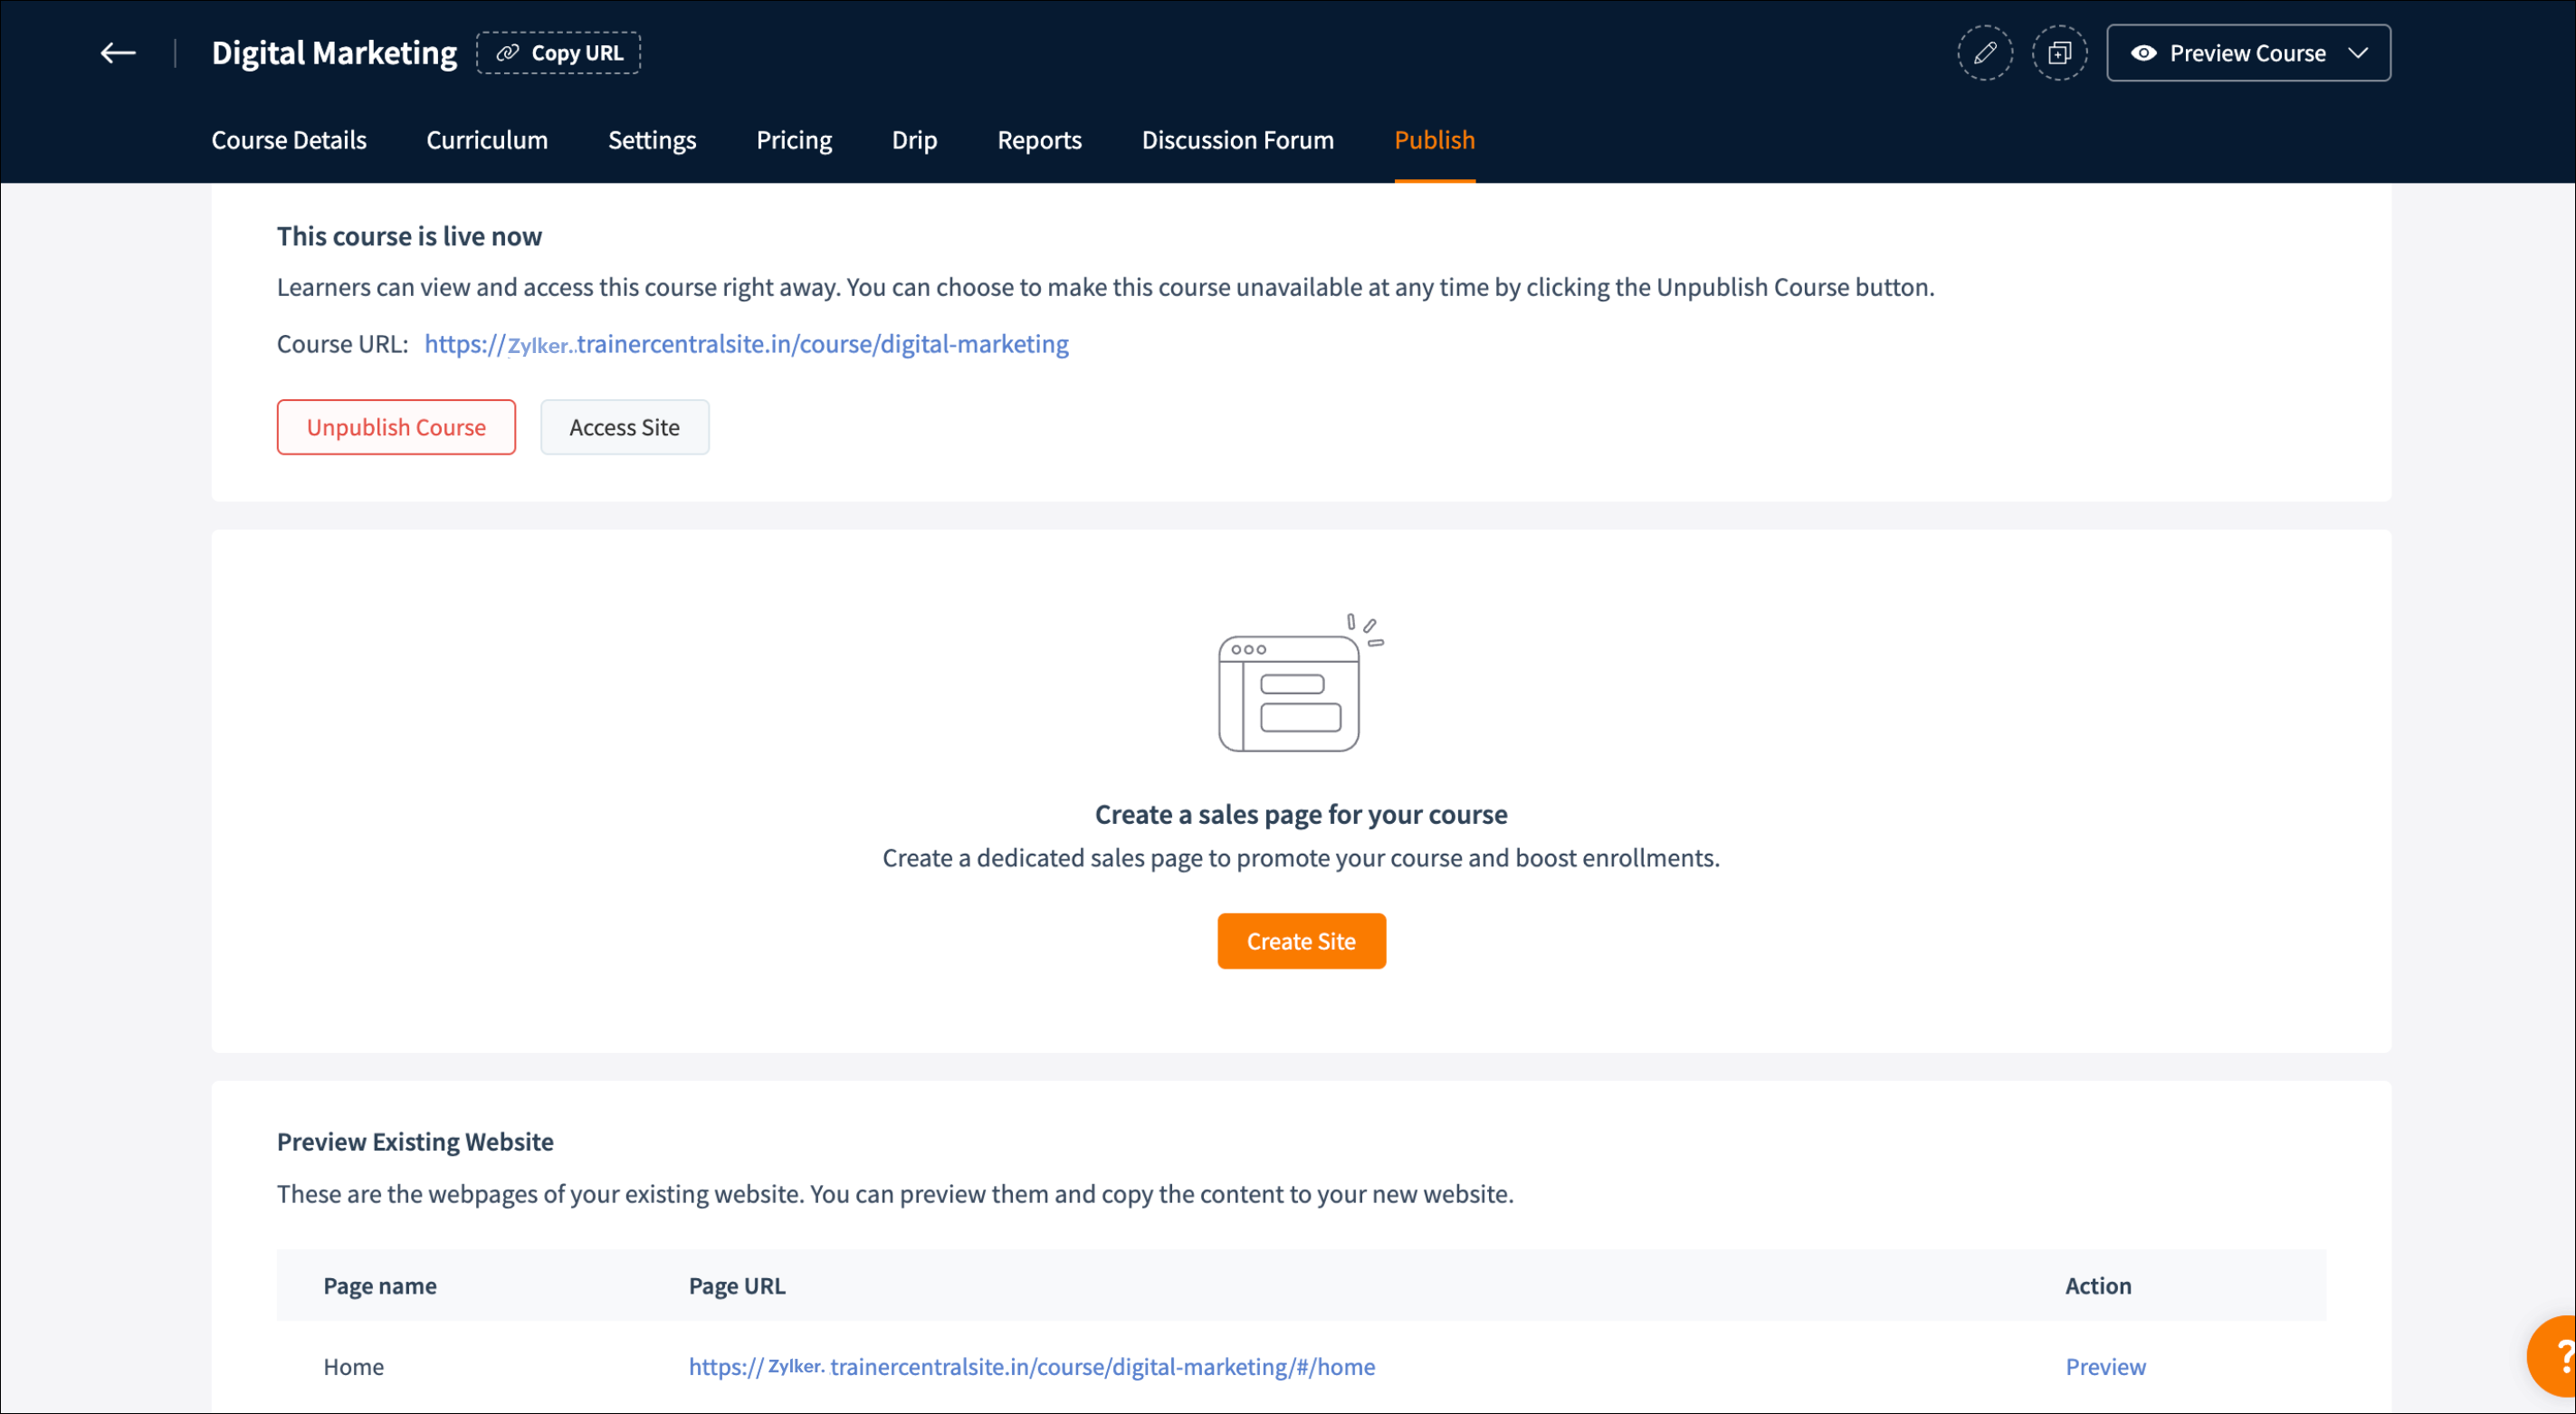
Navigate to the course for which you want to create a course webpage and select the Publish tab.
Create course webpage
Click Create Site. The course webpage will be created for the corresponding course.
Migrate course webpage content
Copying content from the existing webpage to the new one can be done easily by keeping both the webpage and the new website builder open in adjacent tabs.
You can achieve this by following these steps:
- In the Edit course site section, click Open site editor. The new course webpage will be displayed in a new tab.
- In the Preview Existing Website section, click Preview. The existing course webpage will be displayed in the same tab.
- Copy the content from the existing webpage to the new one.
- Repeat these steps until you copy the required content.
You have now successfully migrated the required course webpage content from the existing website to the new one.
Session Page
Navigate to the session for which you want to create a session webpage and select the Promote tab.
Navigate to the session for which you want to create a session webpage and select the Promote tab.
Create session webpage
Click Create Site. The session webpage will be created for the corresponding session.
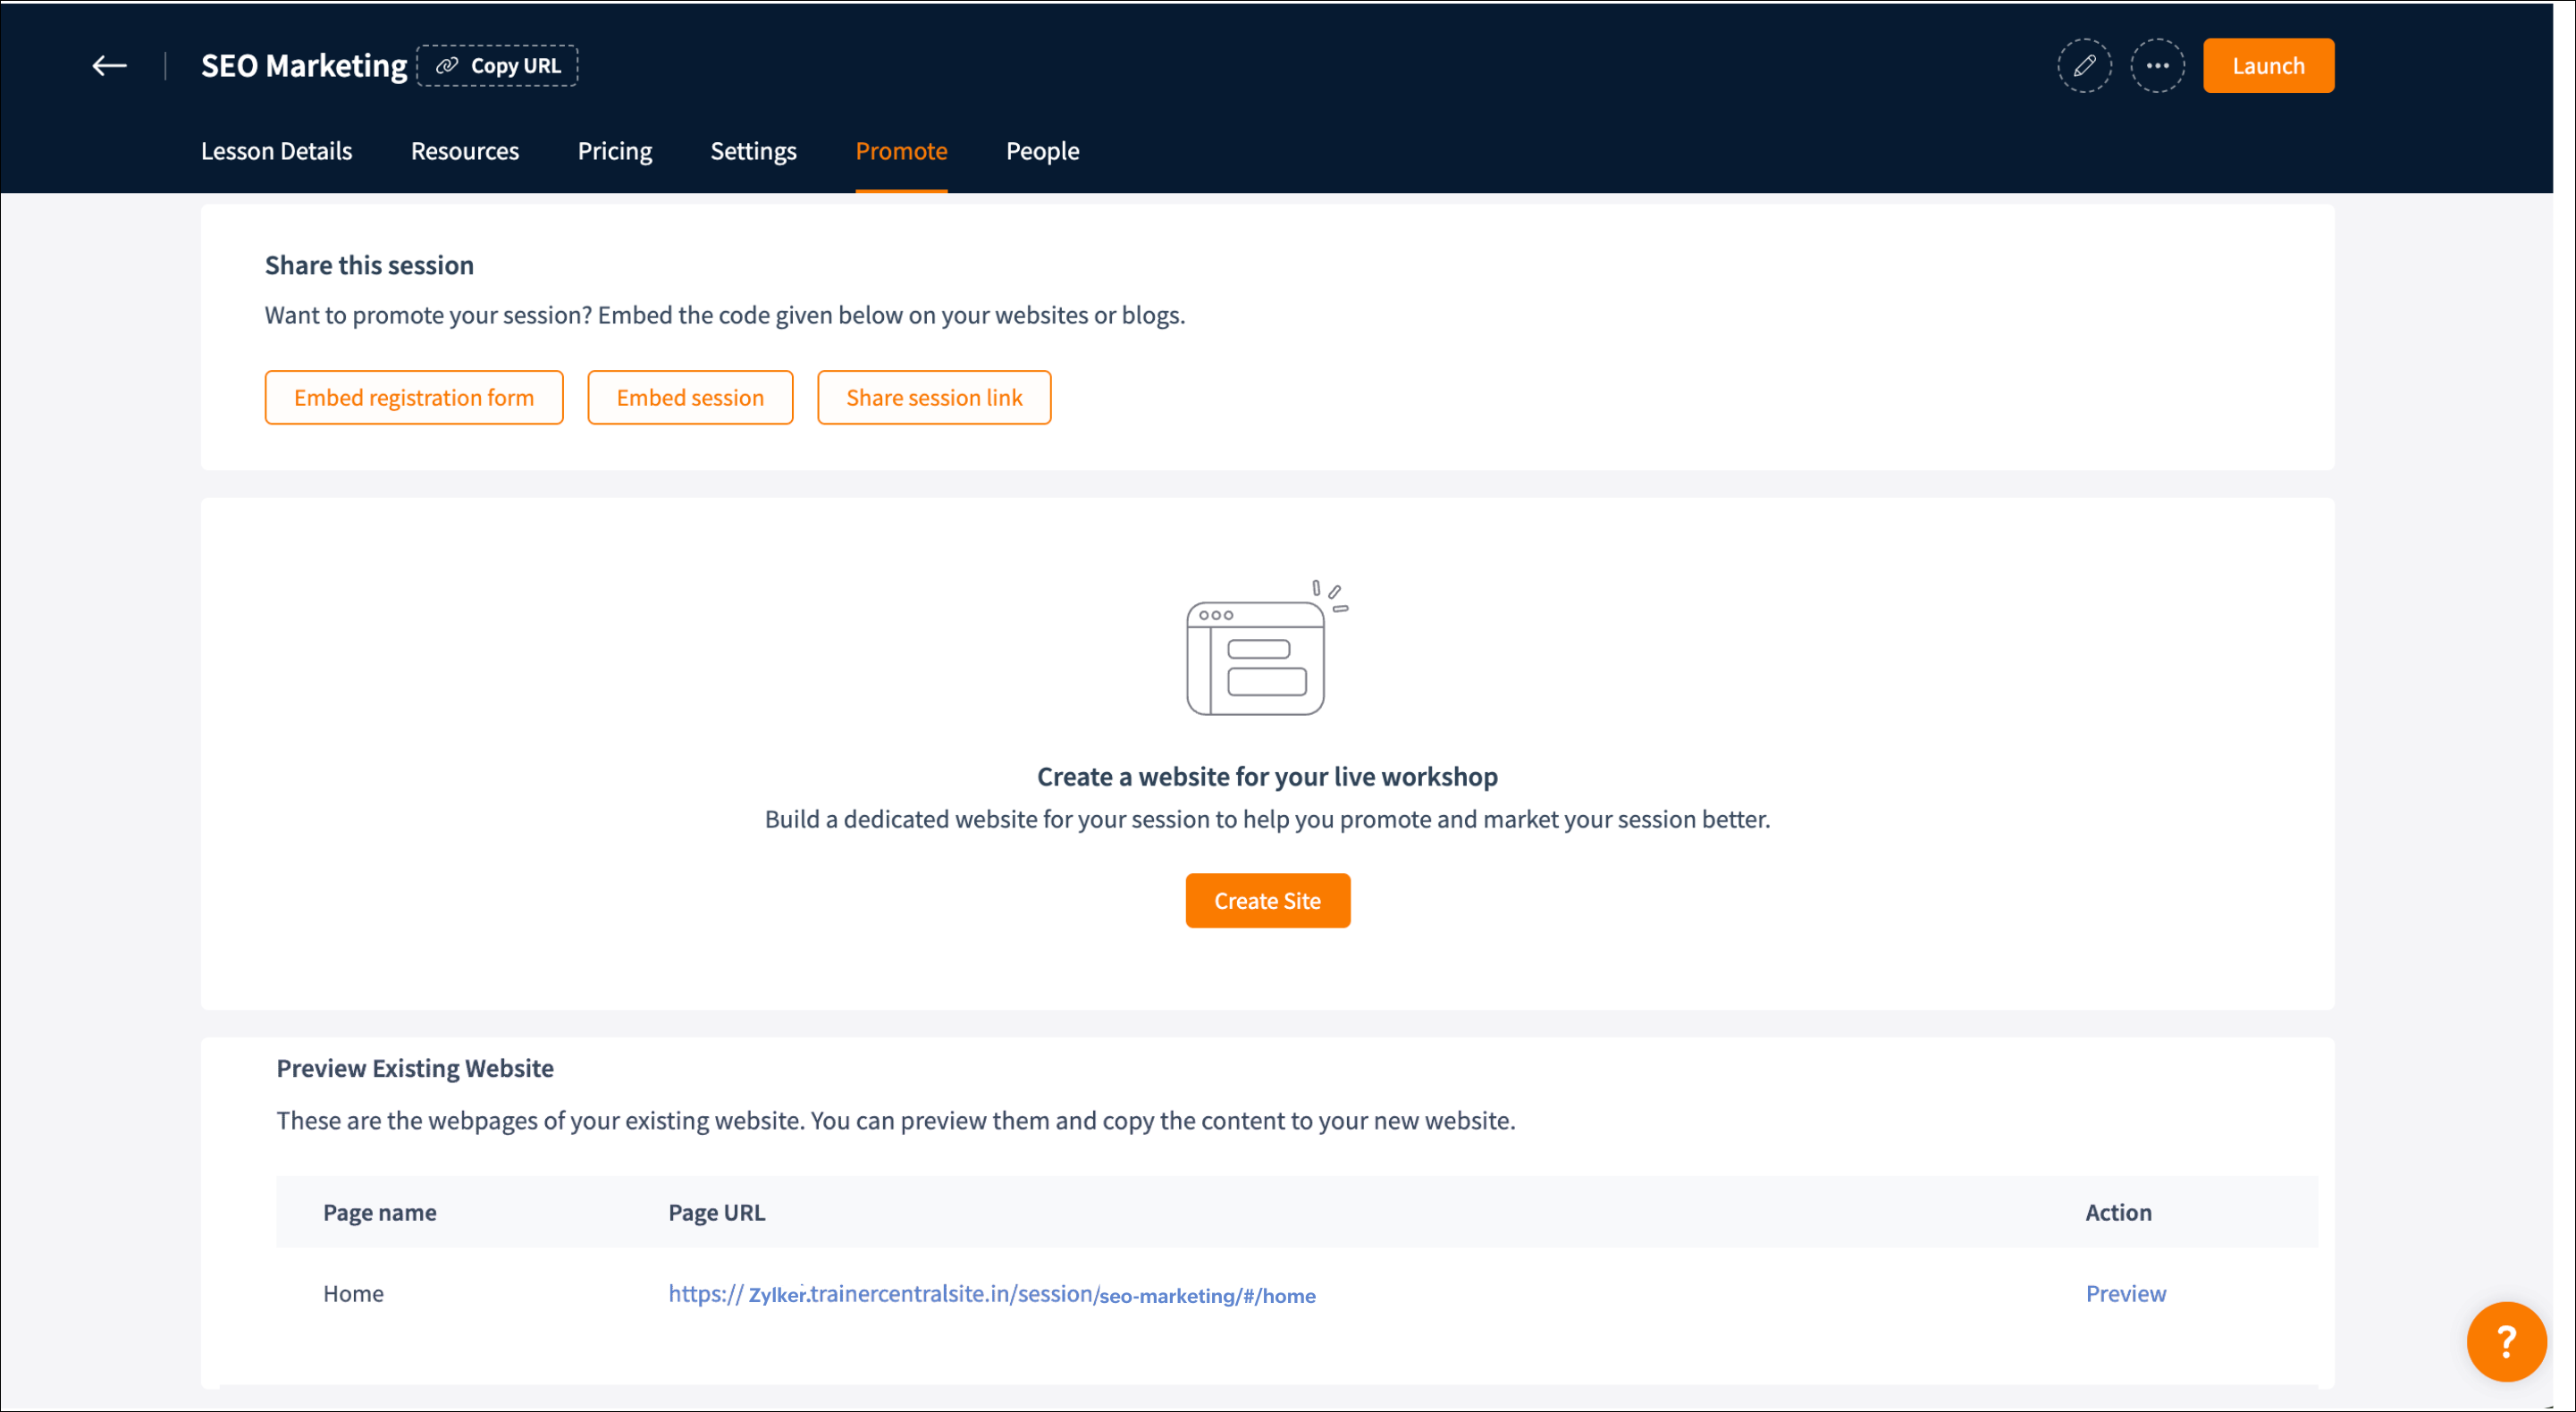
Migrate session webpage content
Copying content from the existing website to the new one can be done easily by keeping both the website and
the new website builder open in adjacent tabs. You can achieve this by following these steps.
the new website builder open in adjacent tabs. You can achieve this by following these steps.
- In the Edit liveworkshop site section, click Open site editor. The new session webpage will be displayed in a new tab.
- In the Preview Existing Website section, click Preview. The existing session webpage will be displayed in the same tab.
- Copy the content from the existing webpage to the new one.
- Repeat these steps until you copy the required content.
- In addition to content migration, you can also customize the webpages with images, videos, widgets, the visual editor, and more. Refer to this help article to learn more.
- There’s no need to create session webpages for past sessions. However, if a live session is scheduled, make sure to create a session webpage and copy over the required content.
- The scheduled live session links shared from the existing website will become inaccessible. To make them accessible, you must create corresponding session webpages in the new website builder.
- The recorded video links shared from the existing website will become inaccessible. After the migration, you will need to share the new links from the Library.
Publish your academy website
After creating the academy website, the next step is to publish it so that learners can access it.
- Ensure you've reviewed the website before publishing.
- Once published, your existing website will become inaccessible and cannot be retrieved.
- If you had configured a custom domain with the existing website, it will be configured to your new website automatically.
- Navigate to the Template within the Site.
- In the Introduction to the new website builder section, click Publish New Site. A confirmation window will be displayed along with the instructions.
- Click Publish Website.
Always ensure that you publish the website before publishing the course and session web pages.
With your academy website, learners can explore what your academy offers. Dedicated course and session pages further help them understand the value of each offering. Publish these pages to inspire learners and kickstart their learning journey.
Publish course webpage
- Navigate to the course for which you want to publish the course webpage and select the Publish tab.
- In the Edit course site section, click Publish Website. The course webpage will be published.
Sometimes, the Publish Webpage button may be disabled if the course has been unpublished. Therefore, always ensure that the course is published so that its corresponding web page can be made live.
Publish the session webpage
- Navigate to the course for which you want to publish the course webpage and select the Promote tab.
- In the Edit liveworkshop site, click Publish Website. The session webpage will be published.
The course or session webpage helps learners discover, understand, and engage with your course or session. However, we understand that having a dedicated course or session page is not mandatory. In such cases, we provide a default page where learners can learn about your offering.
Course webpage:
Default page:
Course webpage:
Default page:
Related Articles
Customize website setting
A captivating and user-friendly website is paramount in improving visitors' browsing experience and enhancing your brand credibility. Let's look at the steps to customize your website according to your preferences. This new site editor is only for ...Publish your website
Once you have built your website and configured the settings, you can bring it live for visitors to access. Let's look at the steps to publish your website. This site editor is only for academies created on or after December 16, 2024. For academies ...FAQ - Migration from the existing website builder to a new website builder
1. What makes the new site builder better than the existing one? The new site builder offers a simplified, user-friendly interface with impactful features: Wide range of templates for a quick start Rich design elements like audio, menus, animations, ...Build your academy website
A well-designed academy website increases visibility, credibility, and engagement. It also serves as your brand identity and shares your mission and vision with the visitor. In this article, we’ll cover how to build your academy website step by step. ...Add webpages to your website
A website is made of several pages that can showcase your offerings in detail and drive leads and sales. TrainerCentral's website templates include three default pages: Home Page, All Courses, and All Sessions. You can also add additional webpages to ...