VeriFactu compliance for Spain trainers and academies
Spain is introducing mandatory VeriFactu compliance for all transactions. All VAT-registered businesses in Spain that are not subject to the SII reporting mandate will be required to adopt the VeriFactu system for all domestic transactions, effective January 1, 2026. Self-employed individuals, freelancers, and smaller enterprises will need to comply with VeriFactu starting July 1, 2026.

This feature is available in early access. To avail this feature, please contact our support team.
How does VeriFactu work for TrainerCentral?
B2Brouter is a certified e-invoicing provider that helps businesses send and receive invoices safely and in the correct format. TrainerCentral uses B2Brouter as the authorized service provider to send invoices to the AEAT.
Let's view a brief description of how it works:
Let's view a brief description of how it works:
- You have to create a B2Brouter account to push invoices to AEAT.
- After you enable VeriFactu in TrainerCentral, you need to connect to B2Brouter by providing credentials from B2Brouter.
- Once connected, select the transaction and push the invoice to the B2Brouter.
- B2Brouter checks the invoices and transmits them to AEAT securely.
- Once validated by AEAT, a QR code will be added to the invoice, and a notification will be sent to your system with the invoice status.
- You can then share this invoice with your learner through your preferred communication channel.
Set up VeriFactu in TrainerCentral
To set up VeriFactu in TrainerCentral, you must have a B2Brouter account. If you don’t have one, you can create it and continue with the setup.
You’ll need the Project Identifier, API Key, and Signature Key to configure your B2Brouter account in TrainerCentral.
You’ll need the Project Identifier, API Key, and Signature Key to configure your B2Brouter account in TrainerCentral.
Here’s how to find them:
- Log in to your B2Brouter account.
- Go to Settings.
- Select VeriFactu under Taxes.
- Enter the required details and click Save to enable VeriFactu in B2Brouter.
To copy the Project Identifier:
Go to Developers and click the Edit icon next to the Groups dropdown.
Copy the Account Identifier next to the account name.
To copy the API Key:
Under Developers, navigate to the API Key tab.
Click Show API Key and cop
To copy the Signature Key:
Under Developers, navigate to the Webhooks tab.
Click Add webhook and paste the webhook URL that you copied from your academy.
Mark Changes in tax return status under Events.
Mark the Show Key under Signature Key and copy
Let’s see how you can set up VeriFactu in TrainerCentral.
- Select the Settings tab from the left pane and click the Payments tab.
- Click the settings link at the top-right of the screen. The Payments window will be displayed.
- Select the VeriFactu tab.
- Click the Connect to B2Brouter button.
- Enter the required details that are copied from your B2Brouter account.
- Click Copy Webhook URL, which you can use when configuring your B2Brouter account.
 Paste it in the URL field in B2Brouter.
 - Click Finish to complete the setup. You have now successfully set up the VeriFactu in your academy, and it's time to push the invoice to the AEAT.
Push Invoices via B2Brouter
- Navigate to the Sales tab in the left pane, and select the Transactions tab.
- Select the required transaction for which you need to push the invoice to AEAT.
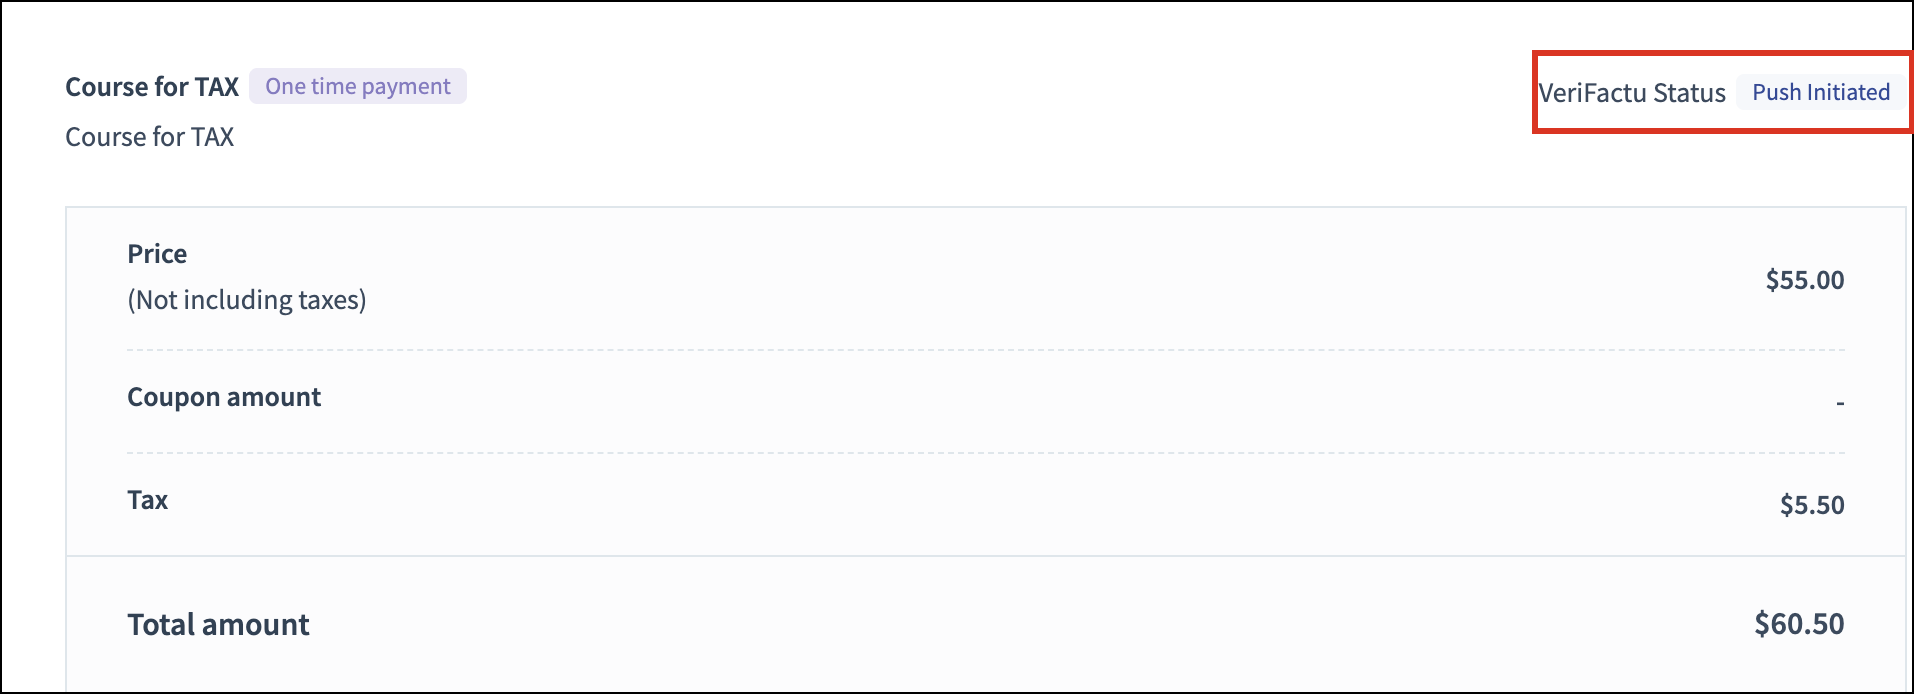
- Click the Push to Invoice button at the top-right of the page next to VeriFactu Status. The invoice will be pushed to AEAT.
- Once the invoice is successfully pushed to AEAT, a QR code will be displayed on the invoice, and a notification will be sent to your system about the status of the invoice.
Statuses of Invoices in VeriFactu
The status of each invoice will be displayed in the invoice overview page. Invoices in VeriFactu can have the following statuses:
Status | Description |
Yet to be pushed | The invoice has been created but has not yet been pushed to AEAT. |
Initiated | The invoice has been pushed to AEAT. |
Pushed | The invoice has been successfully pushed to AEAT and sent to the customer. |
Failed | The invoice contains errors (such as missing fields) that need to be corrected before resending. |
Canceled | The invoice has been successfully cancelled in AEAT, and its status will be updated to Canceled. |
Cancel Pushed Invoices
You can cancel pushed invoices for reasons like purchase cancellation or incorrect entries.
Here’s how to cancel an invoice:
Here’s how to cancel an invoice:
- Navigate to the Sales tab in the left pane, and select the Transactions tab.
- Select the transaction for which you need to cancel the invoice that has been pushed to AEAT.
- Click Cancel next to VeriFactu Status.
- Select a reason and a description of why you’re cancelling the invoice in the pop-up that appears.
- Click Cancel. Once canceled, you can cancel the transaction at your end.
Please refer to this help article to learn how to cancel the transaction in your TrainerCentral.
Disable VeriFactu
You can enable or disable it anytime. Once disabled, you'll not be able to send the invoice to AEAT.
- Select the Settings tab from the left pane and click the Payments tab.
- Click the settings link at the top-right of the screen. The Payment window will be displayed.
- Select the VeriFactu tab.
- Slide the toggle to Disabled if you don’t want to send invoices to AEAT.
You can enable them anytime by sliding the toggle to Enabled.
Related Articles
Guest Trainers
TrainerCentral's Guest trainer feature allows you to invite domain experts or external trainers as speakers directly to a training session. This helps you add a fresh perspective to your trainings, reach a wider audience, and enhance the learning ...Co-trainers
Enrich your training sessions by adding a co-trainer. Co-trainers are people from your organization who can be added to your live remote sessions to act as moderators. They can assist you in answering questions, engaging your participants via chat, ...FAQ - Manage trainers
How can I invite a trainer to my academy? Navigate to the Users pane and click on Invite Trainers under the Trainers tab. Enter their name and email address and click on Invite. How can I bulk invite trainers to my academy? Navigate to the Users pane ...Add admins and trainers to your academy
To add new admins and trainers to the academy, a user with Super Admin or Admin privileges can follow the steps below. You can add an admin or trainer based on your subscription plan. To access the Users tab Click the Users tab on the left pane. ...Deliver a live session
TrainerCentral allows you to broadcast your voice and video, screen share, showcase videos and present slideshows to attendees in different locations. By default, when you begin, TrainerCentral audio and video will be enabled. You can start a session ...